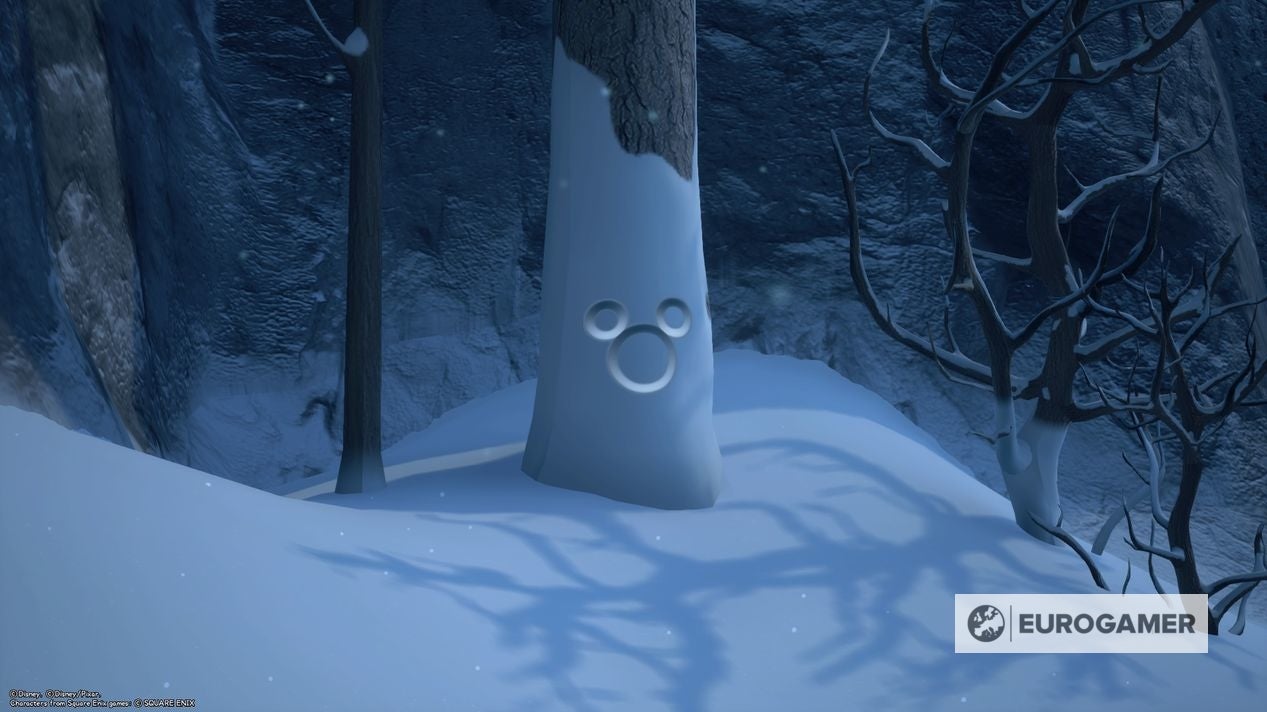
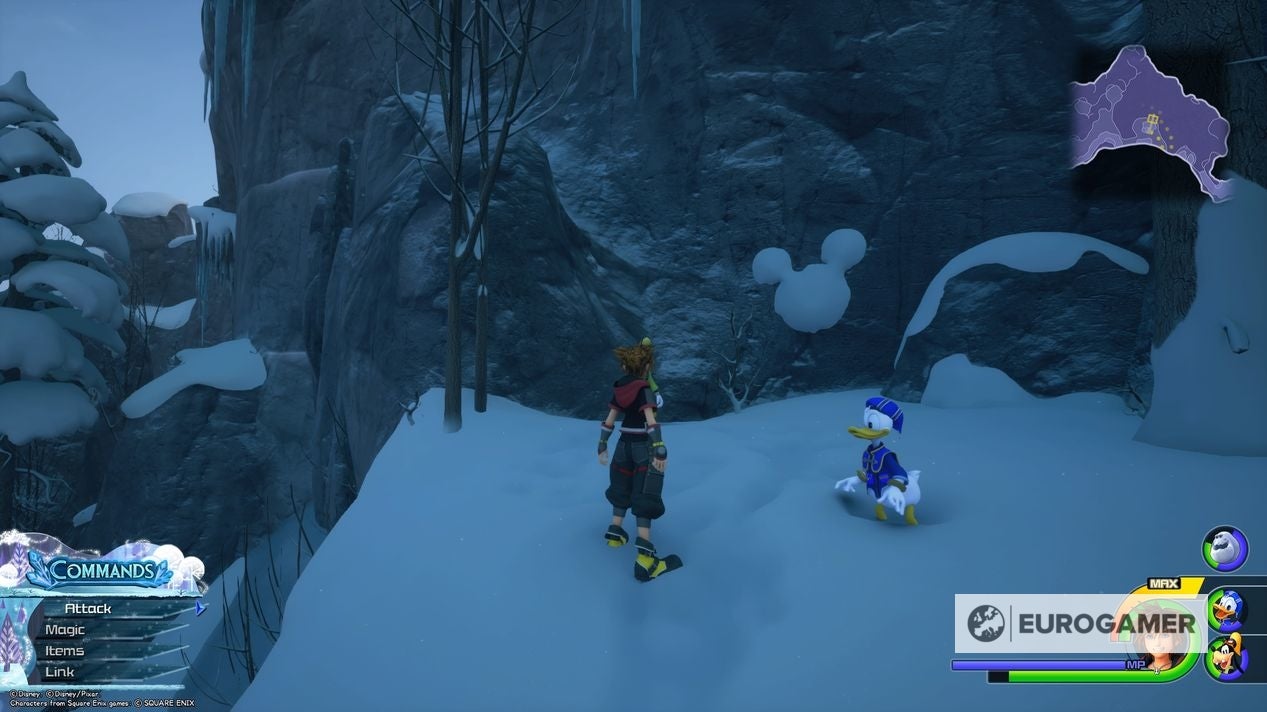
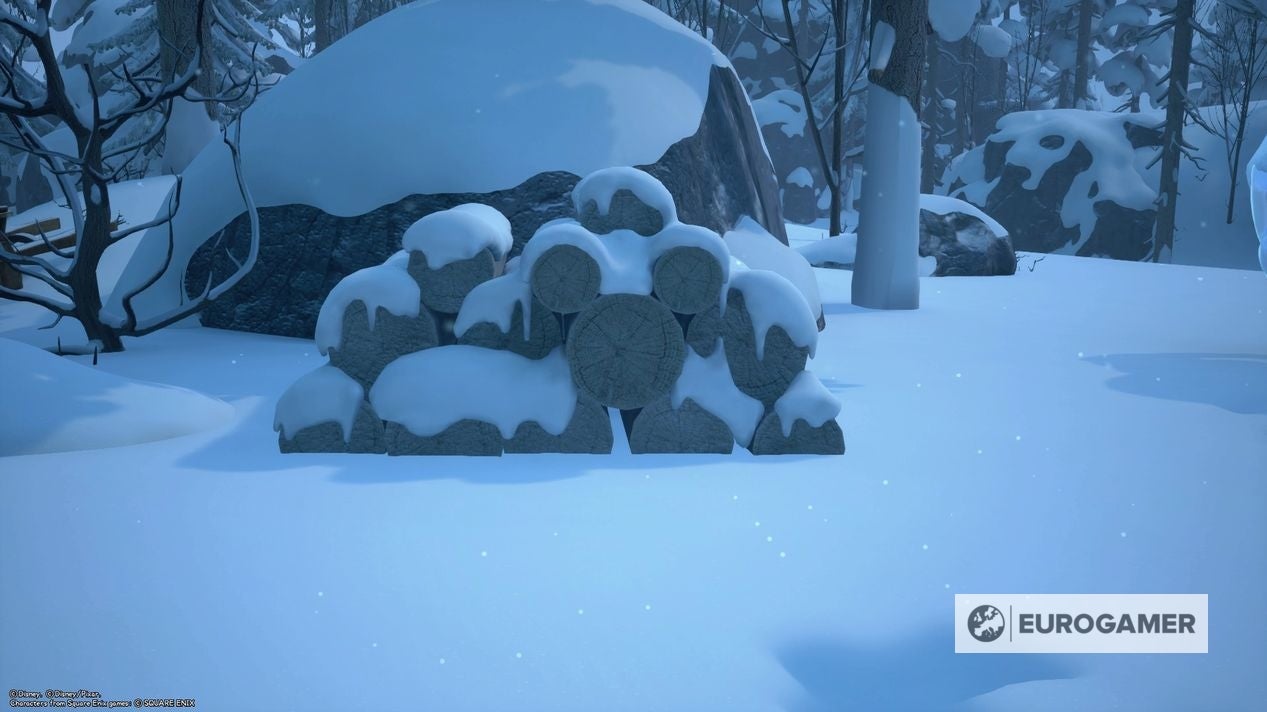
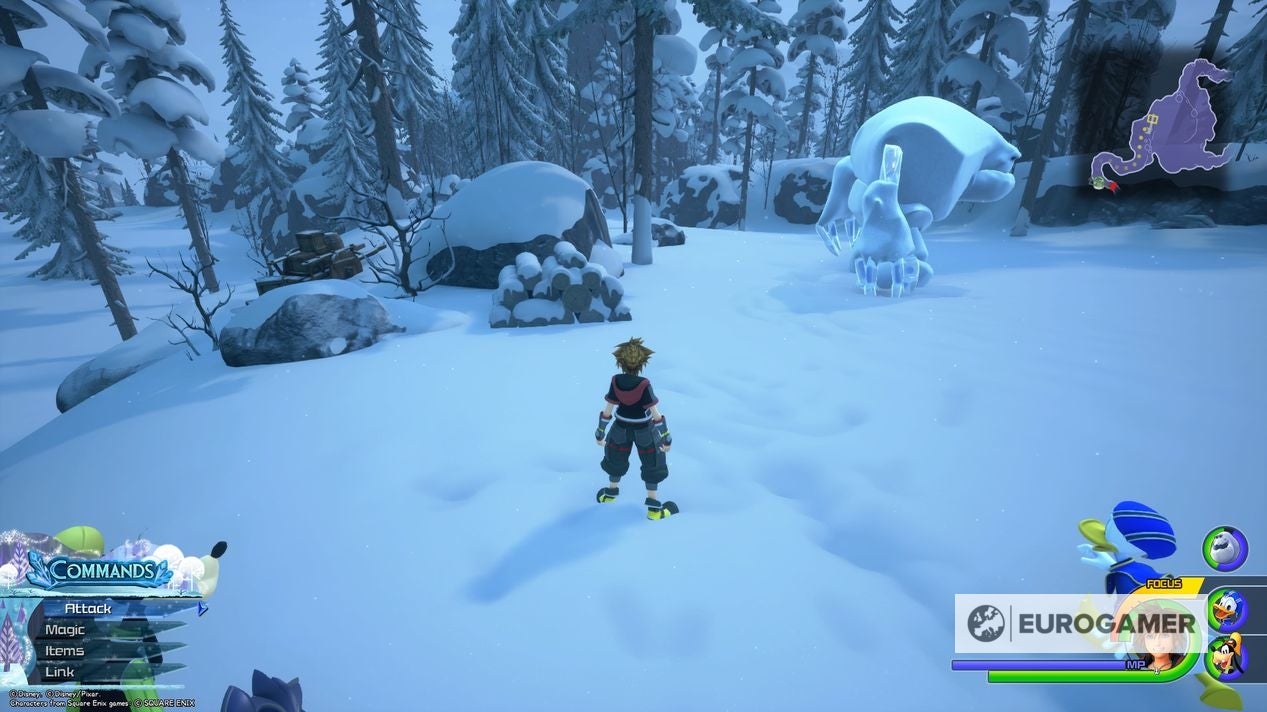
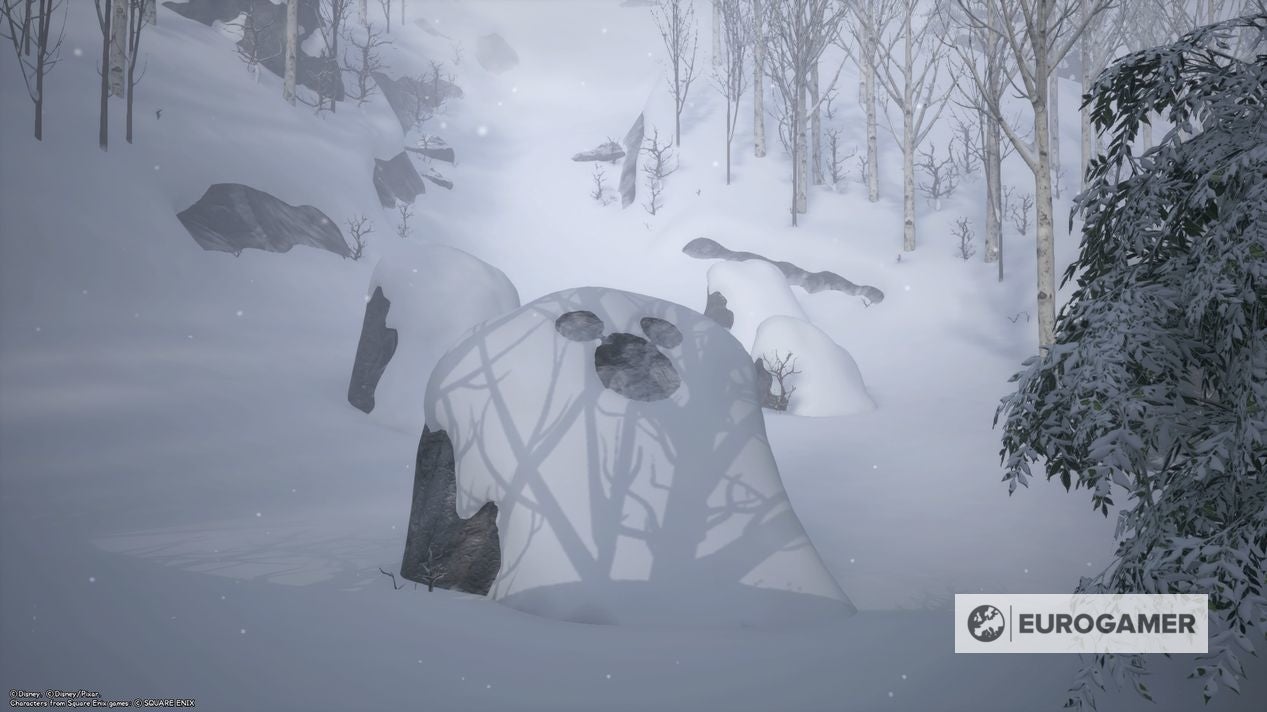
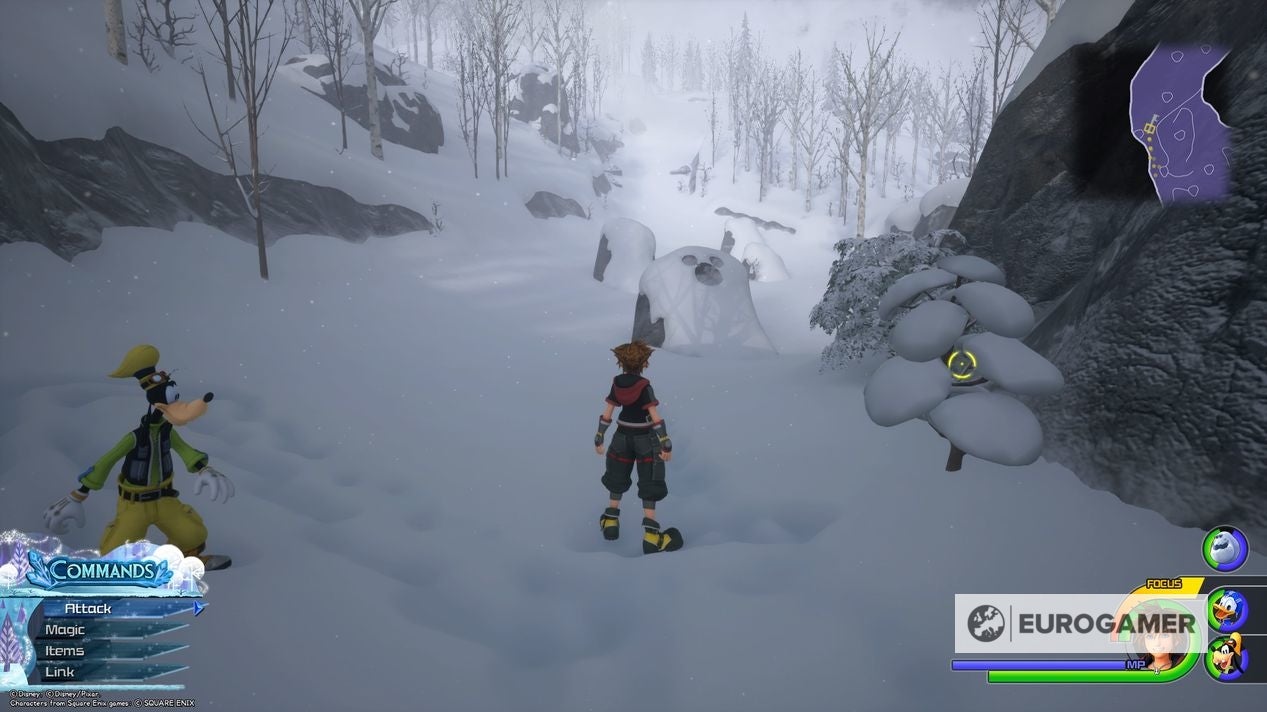
Finding various quantities of them results in various Lucky Emblem rewards, and finding them all helps you unlock end-game content - including a secret ending and valuable Orichalcum +. On this page: Not only that, but you’ll need to track down a certain number of them if you wish to view the secret ending to Kingdom Hearts 3 - all 90 if you’re playing on Beginner, 60 on Standard and on 30 on Proud mode. Donald and Goofy do their best to try and point them out to you in they spot one nearby, but for when their eyes fail (and they so often do) we’ve got a list of all the Kingdom Hearts 3 Lucky Emblem locations for you here. We’ve also broken down all the rewards you receive at various milestones in your hunt. Below, we’ve listed the rewards you’ll receive at each milestone:
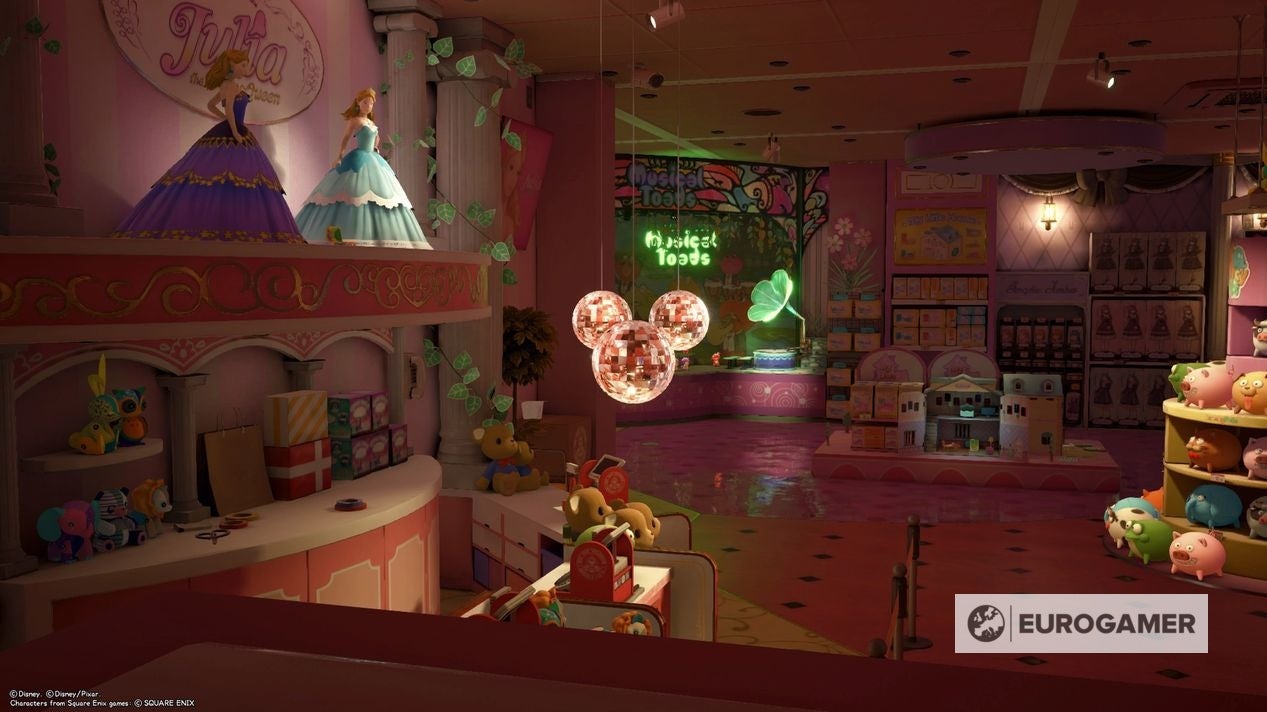
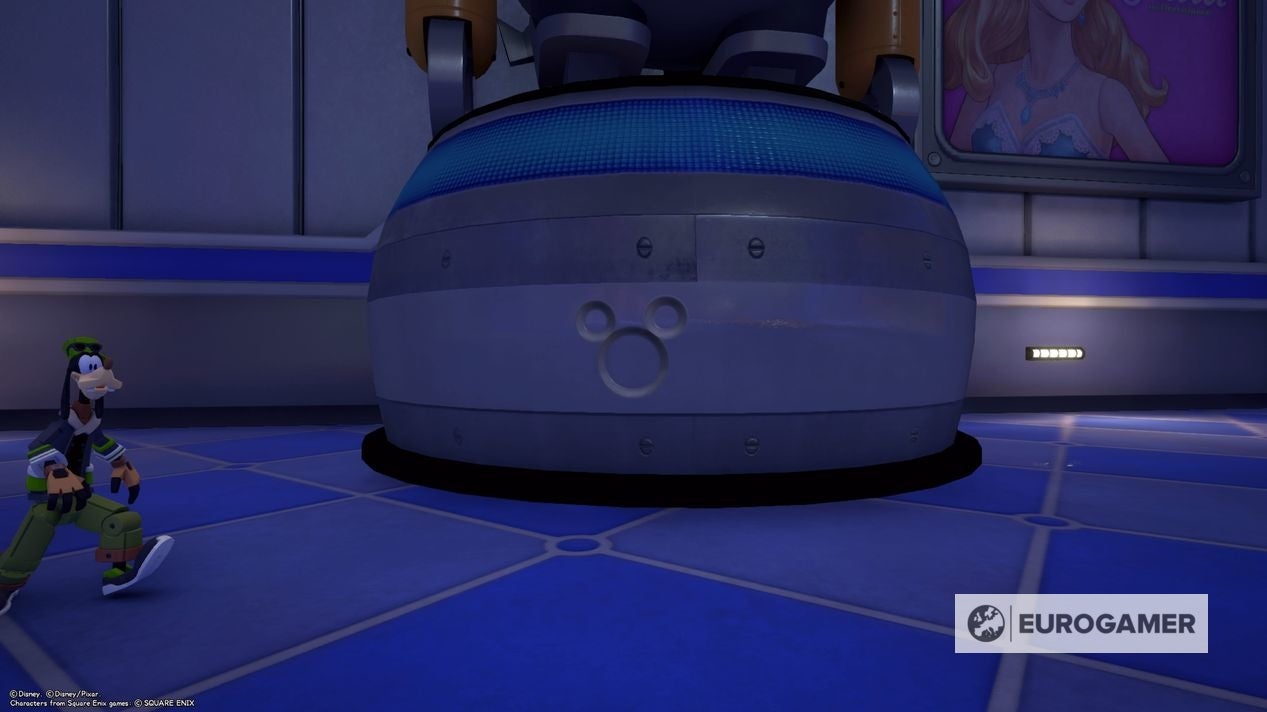
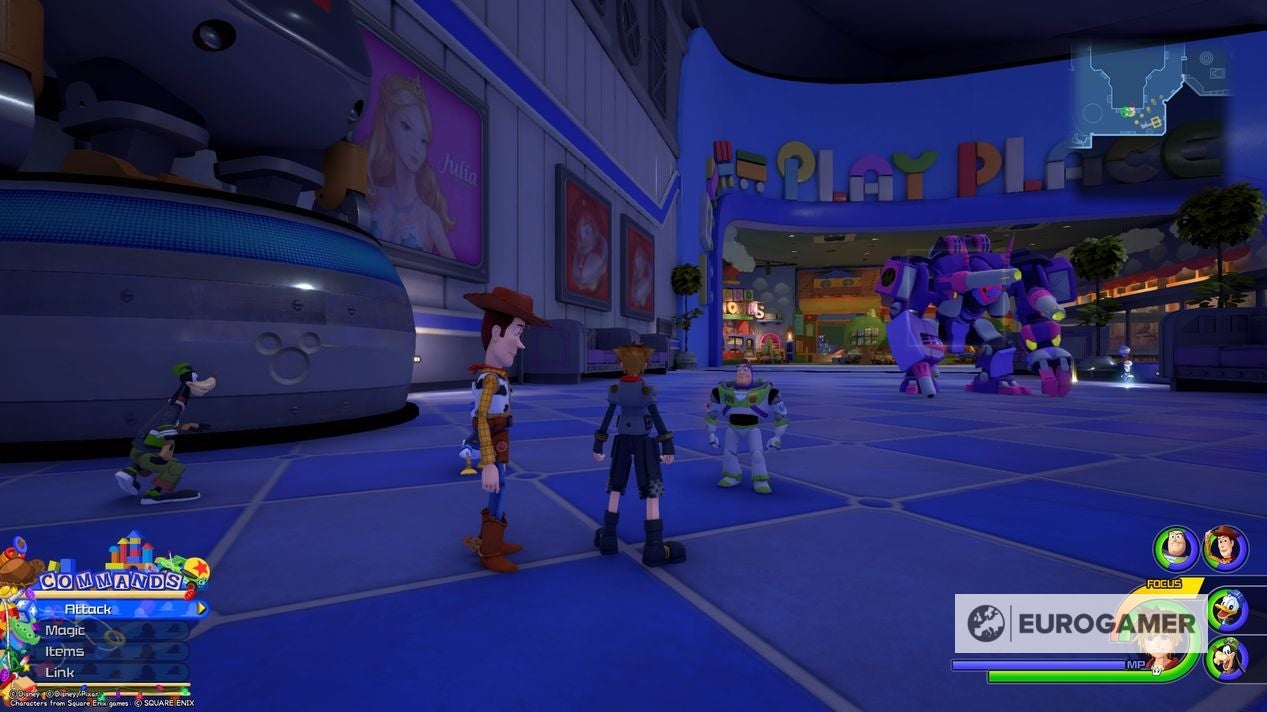
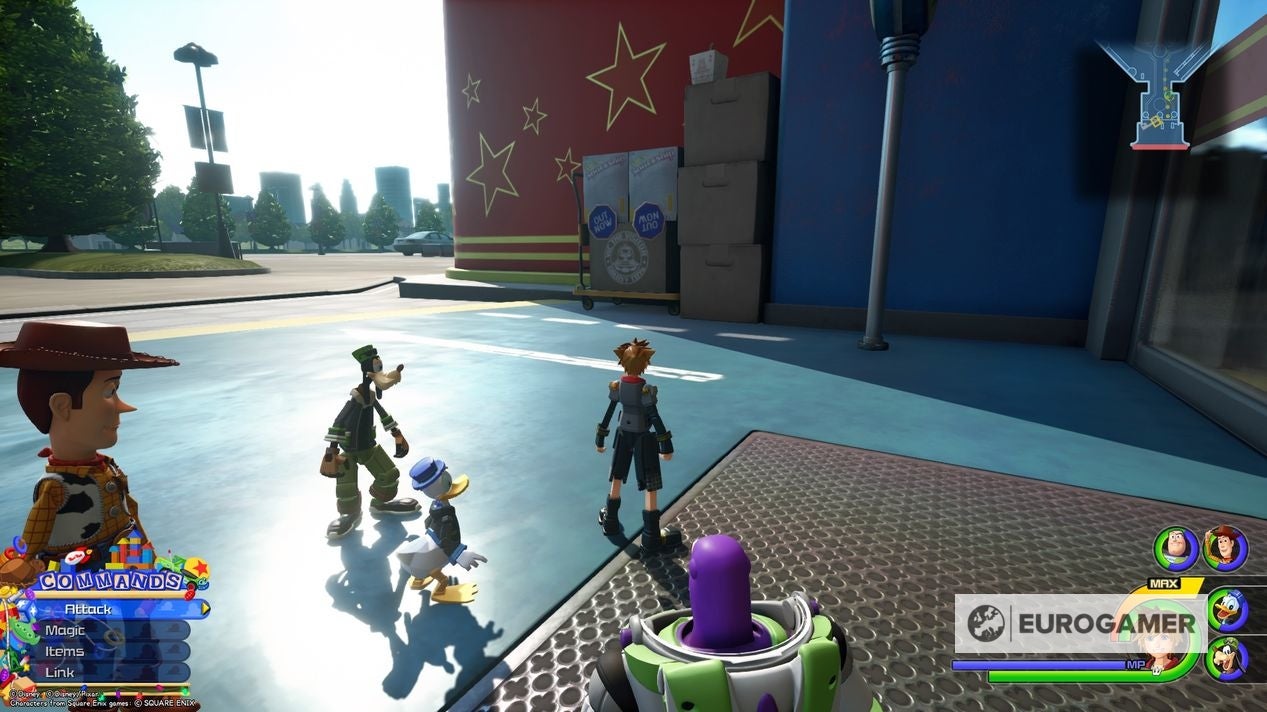
15 - Moon Amulet 20 - Magic Boost 25 - Star Charm 30 - Ribbon 35 - Buster Band+ 40 - Strength Boost 45 - Master’s Necklace 50 - Wisdom Ring 55 - Defense Boost 60 - Orichalcum Ring 65 - Cosmic Belt 70 - Royal Ribbon 80 - Orichalcum+ 90 - Mickey Clasp
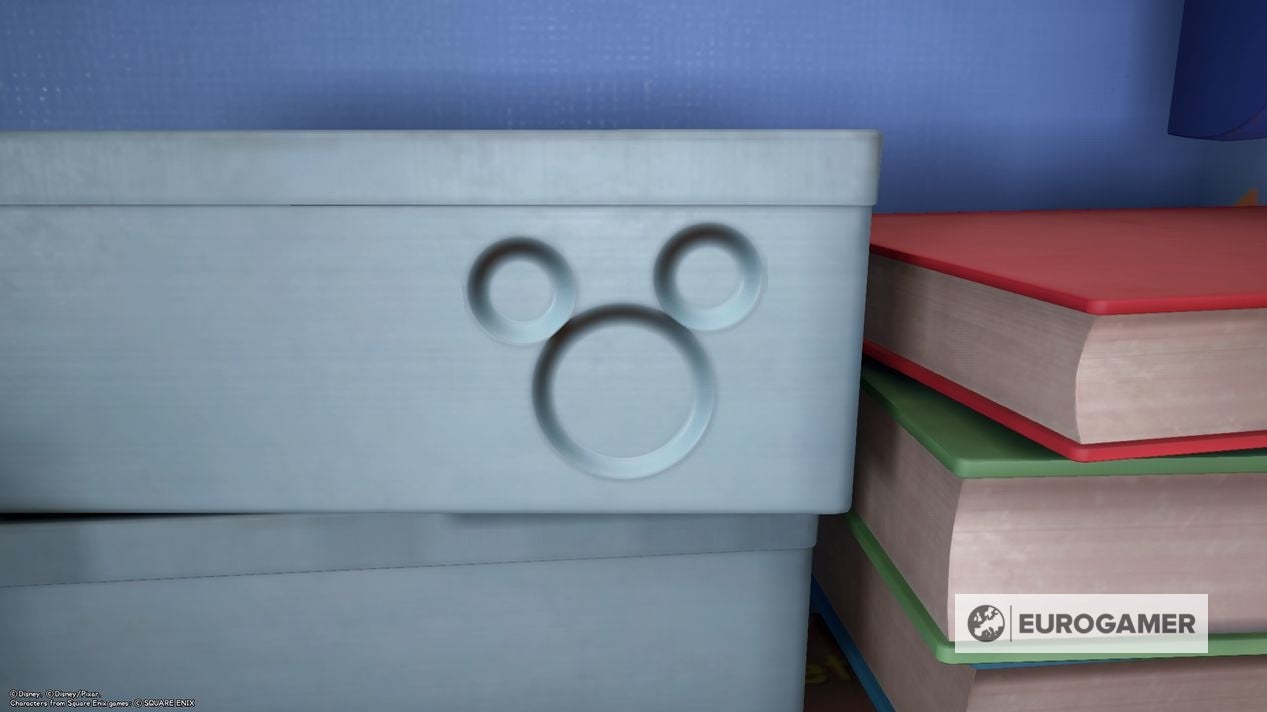
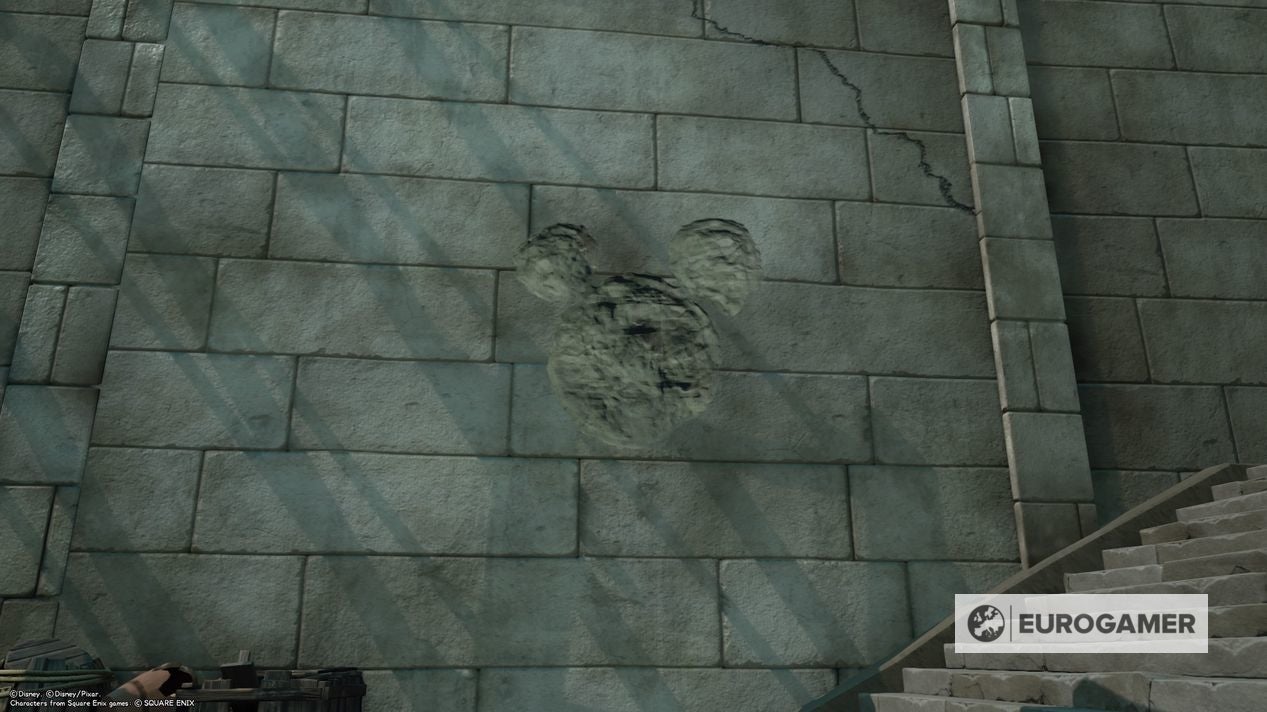
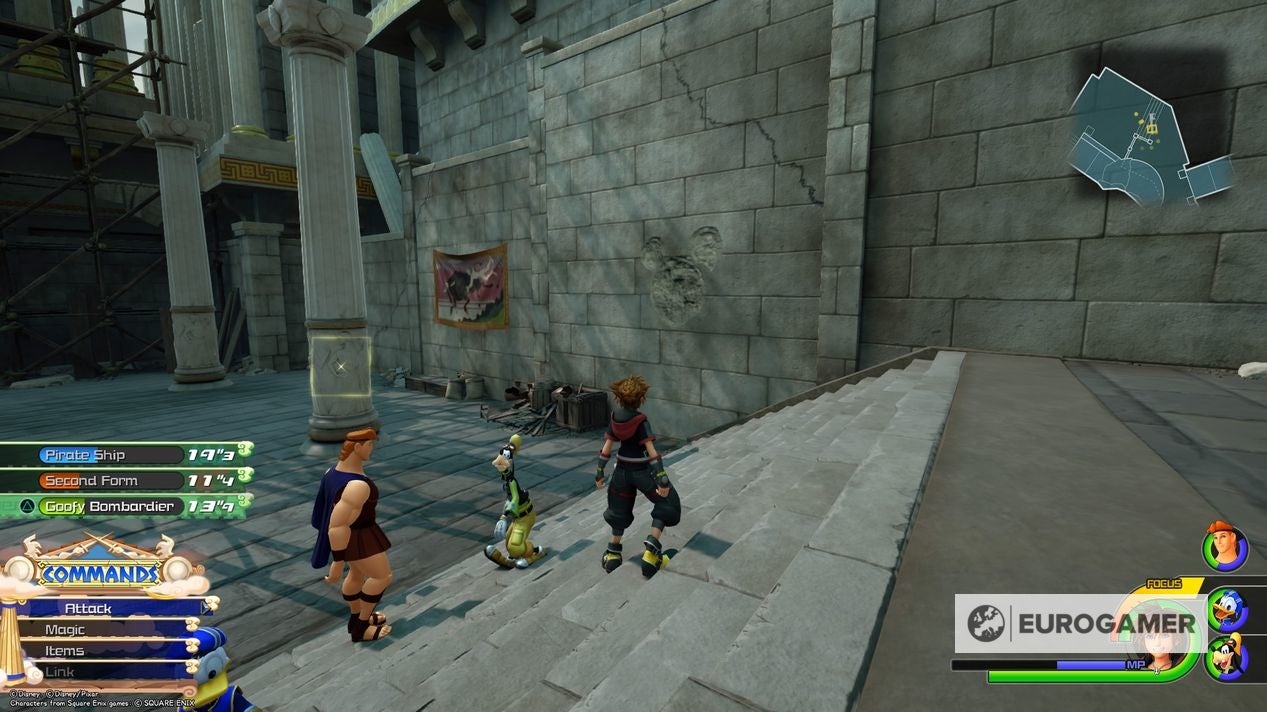
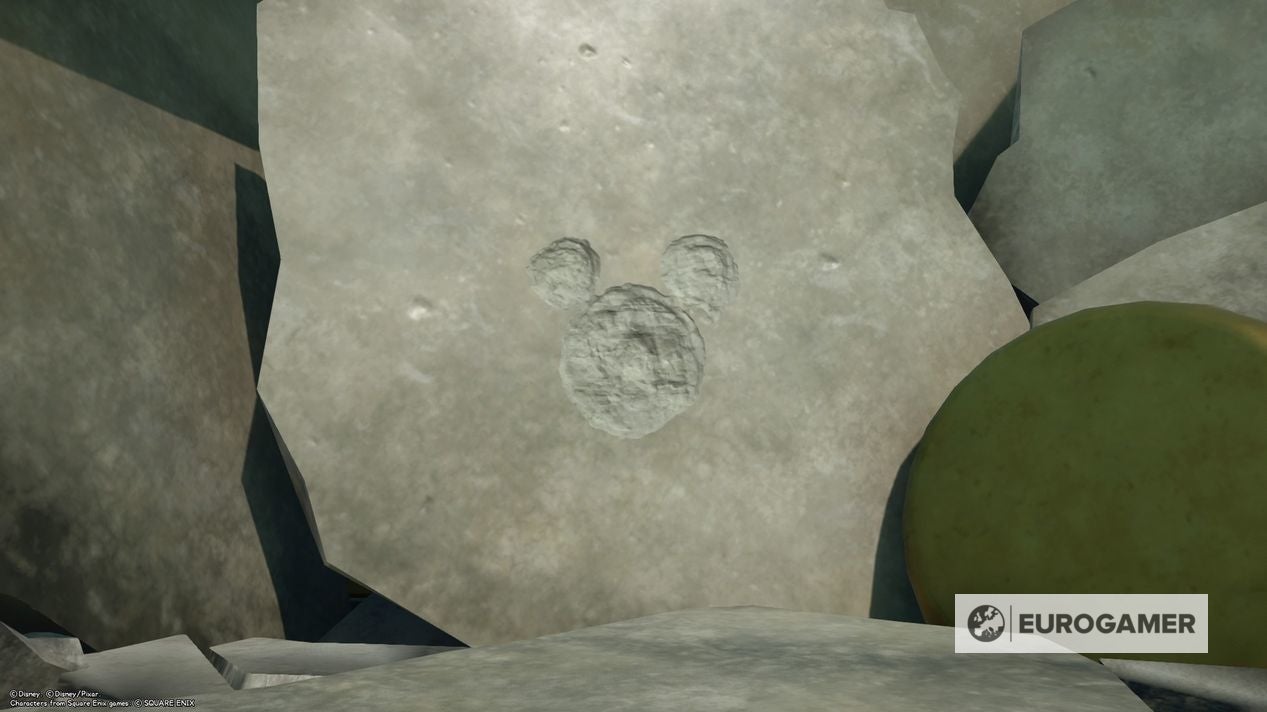
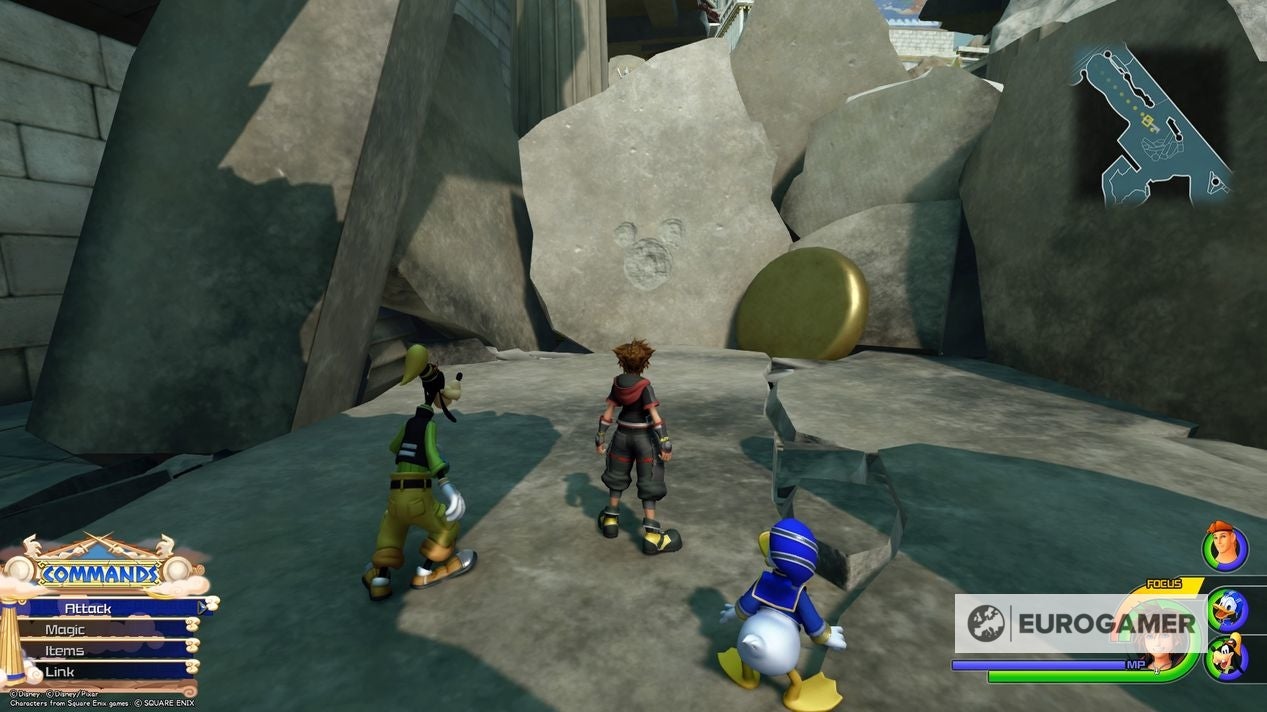
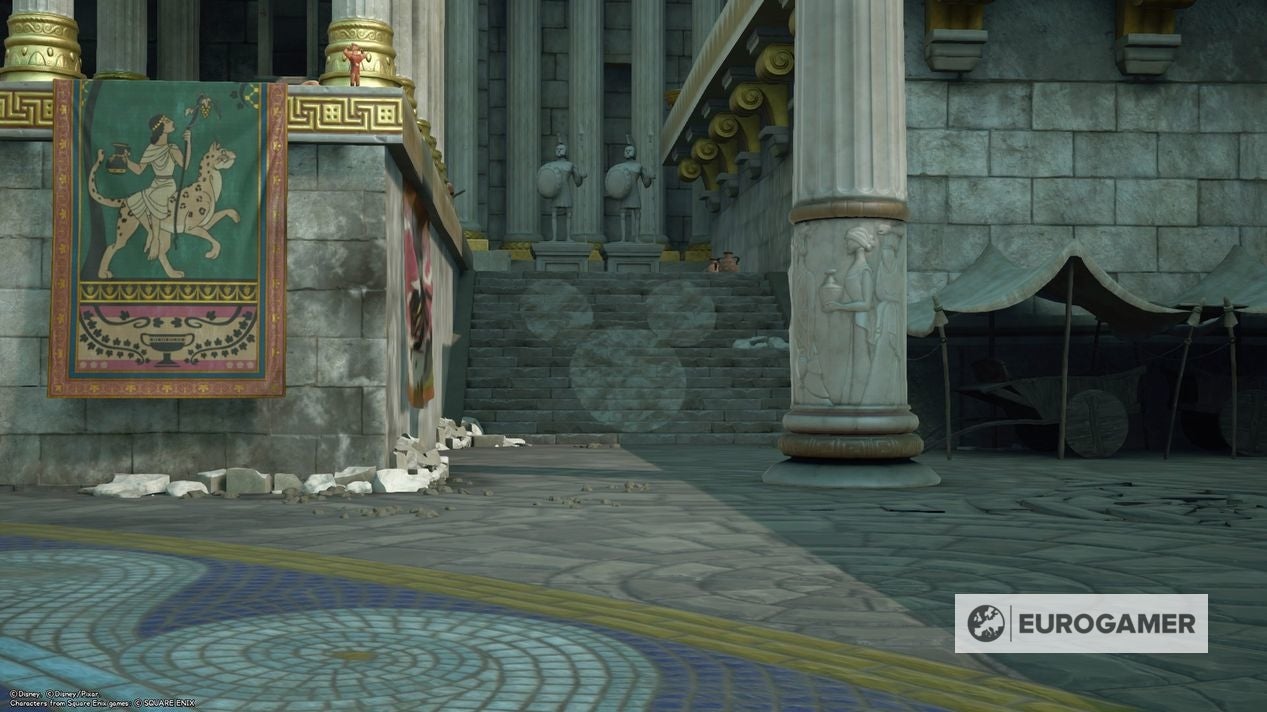
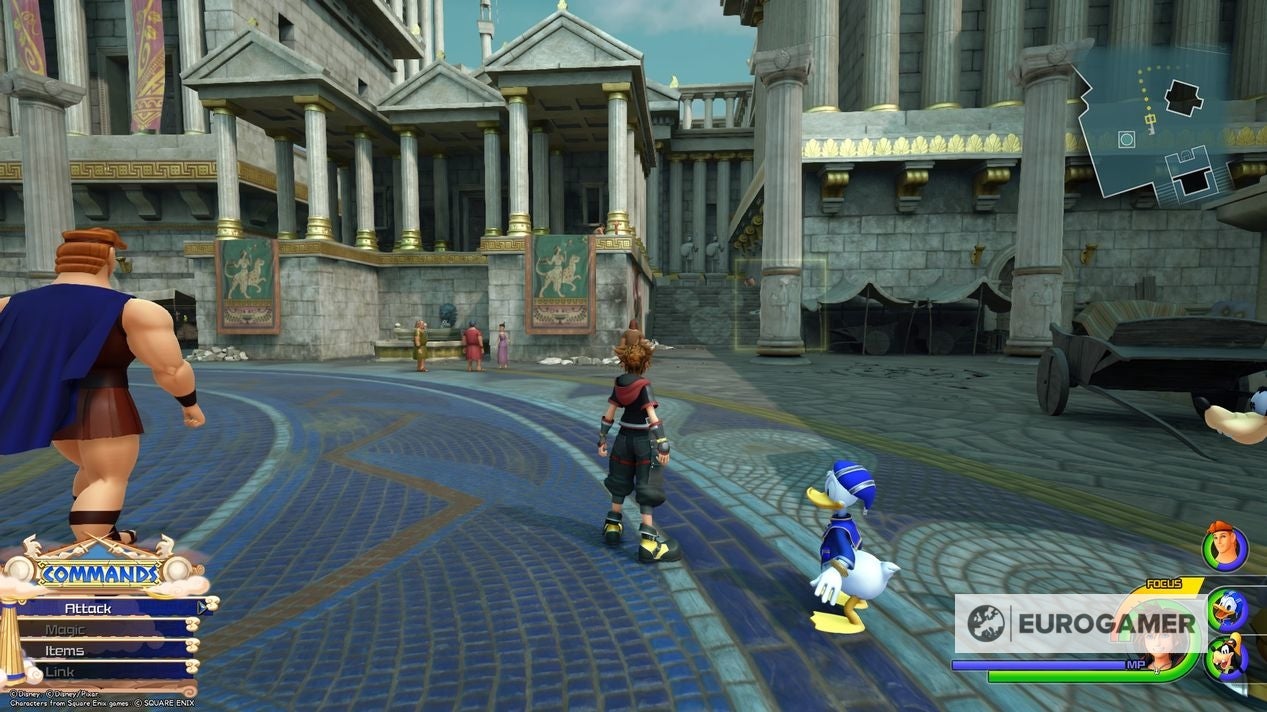
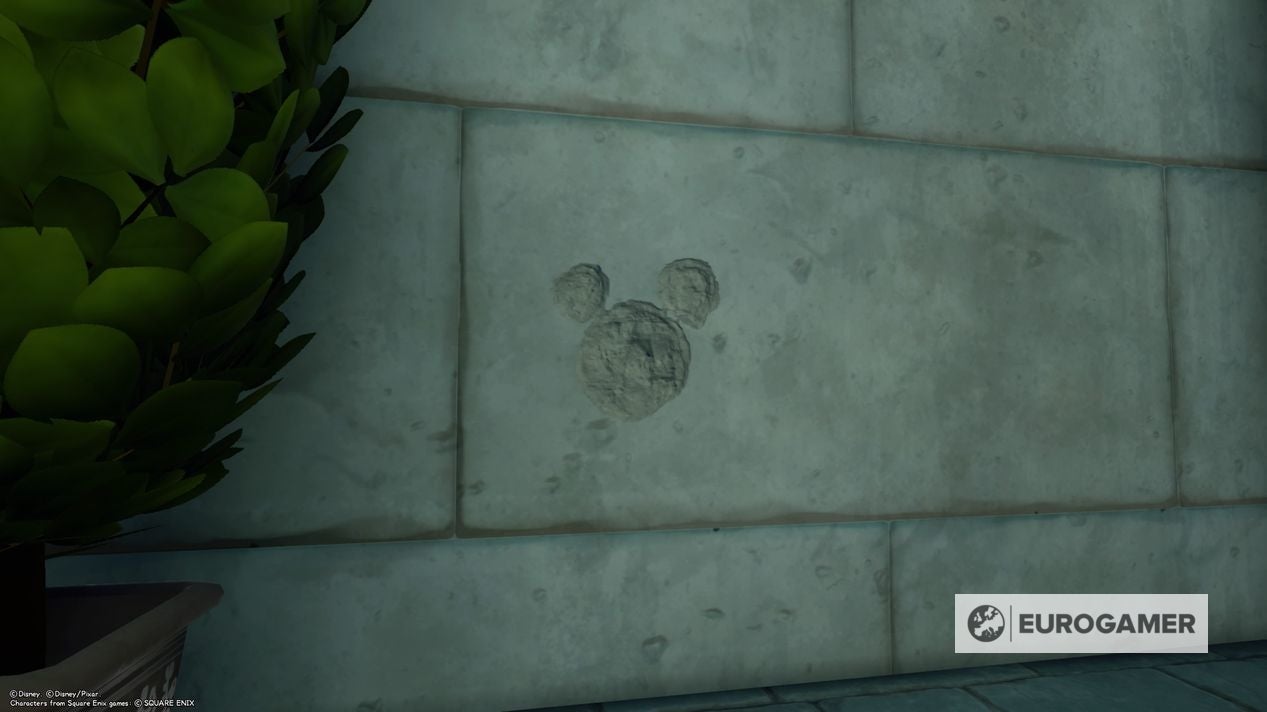
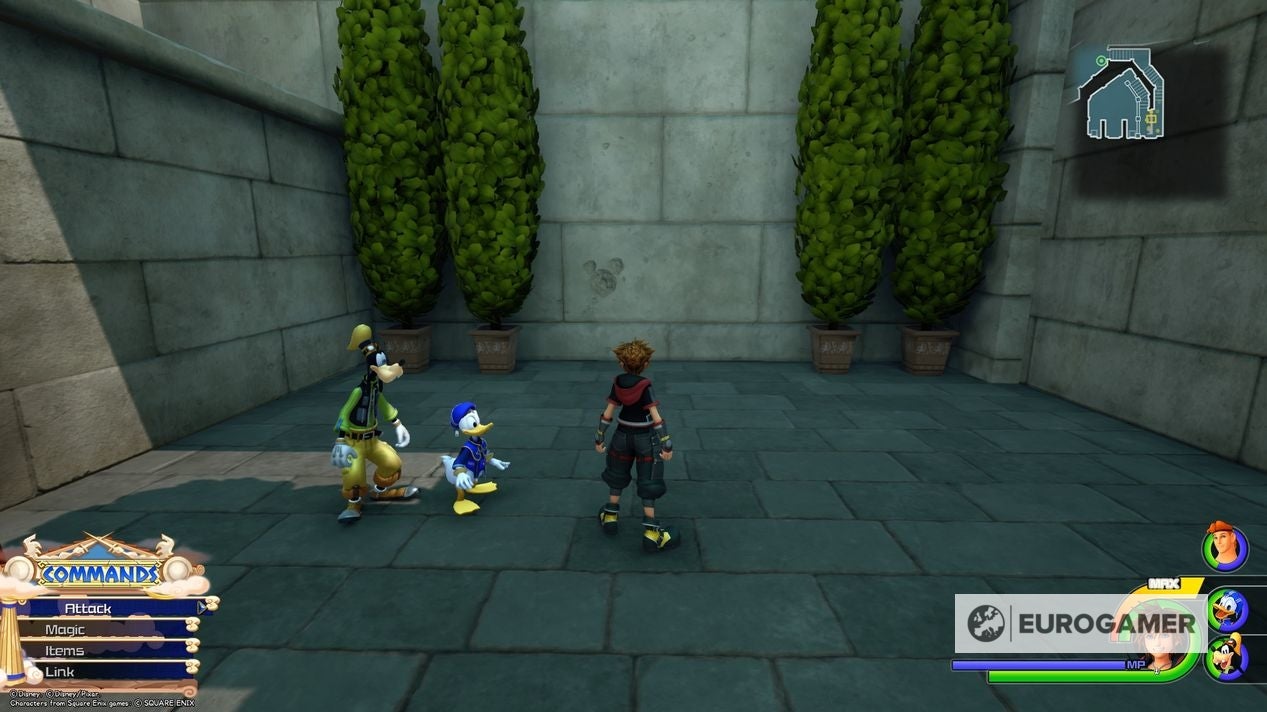
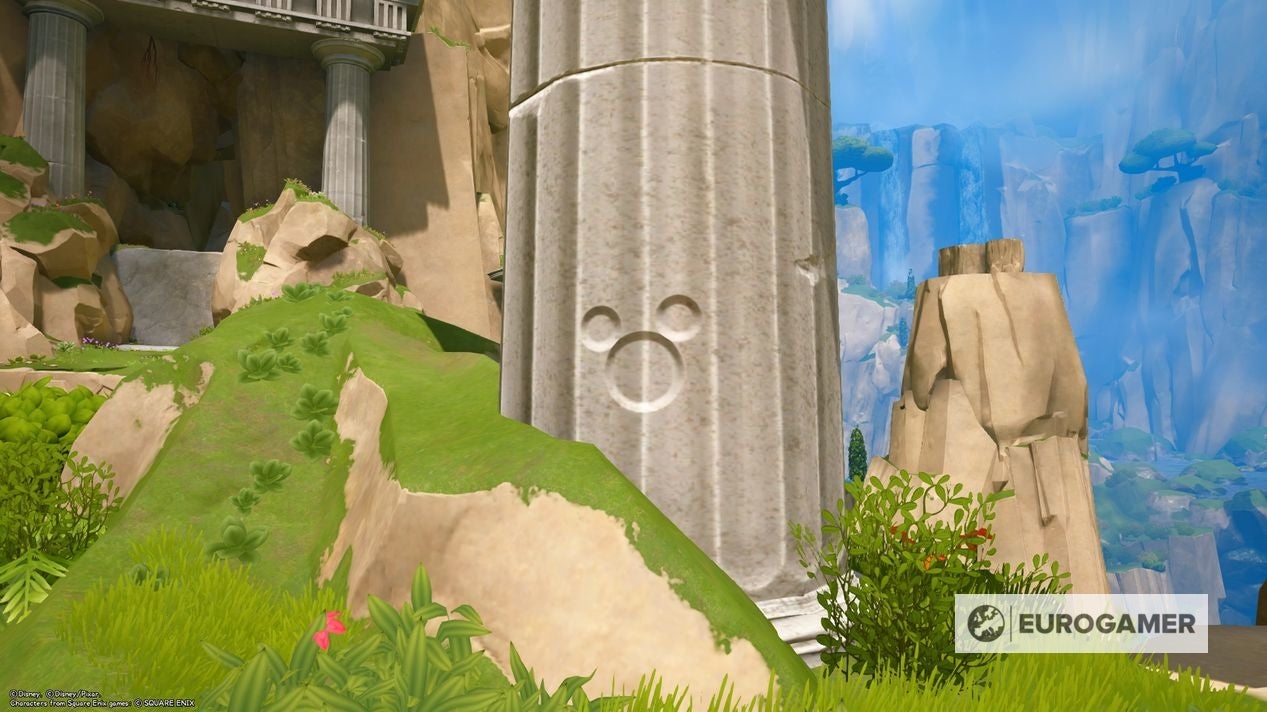
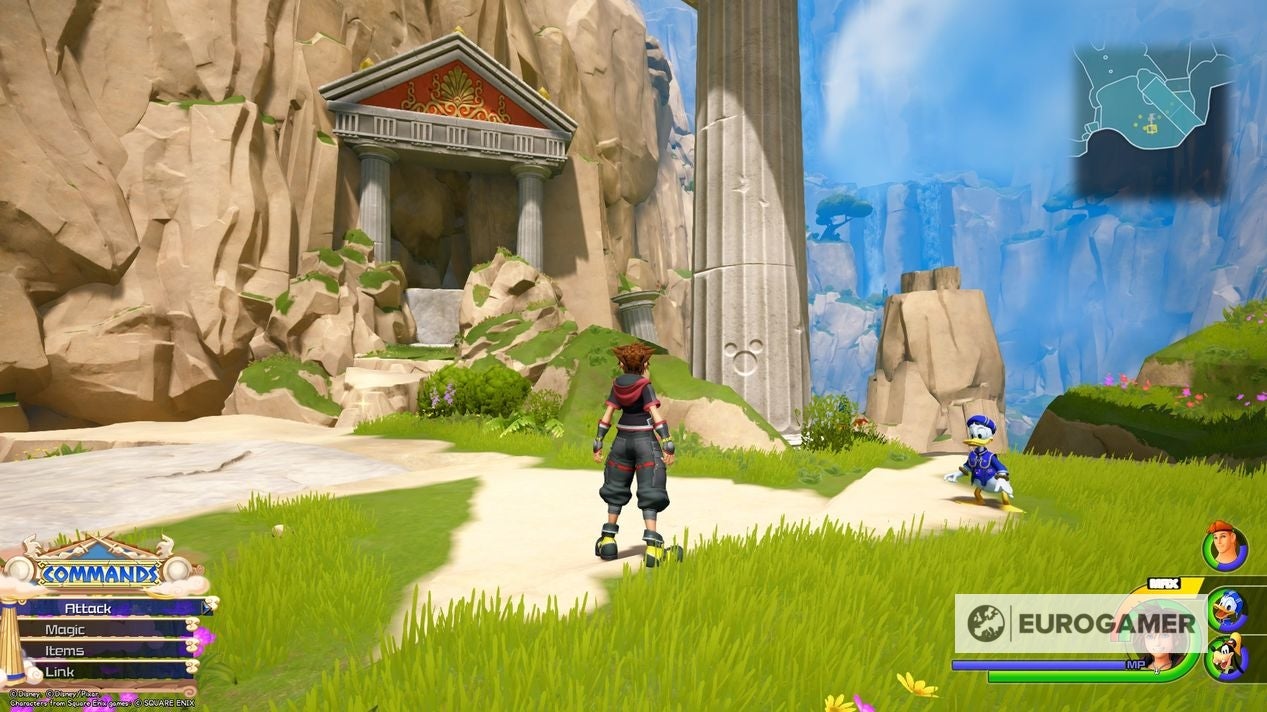
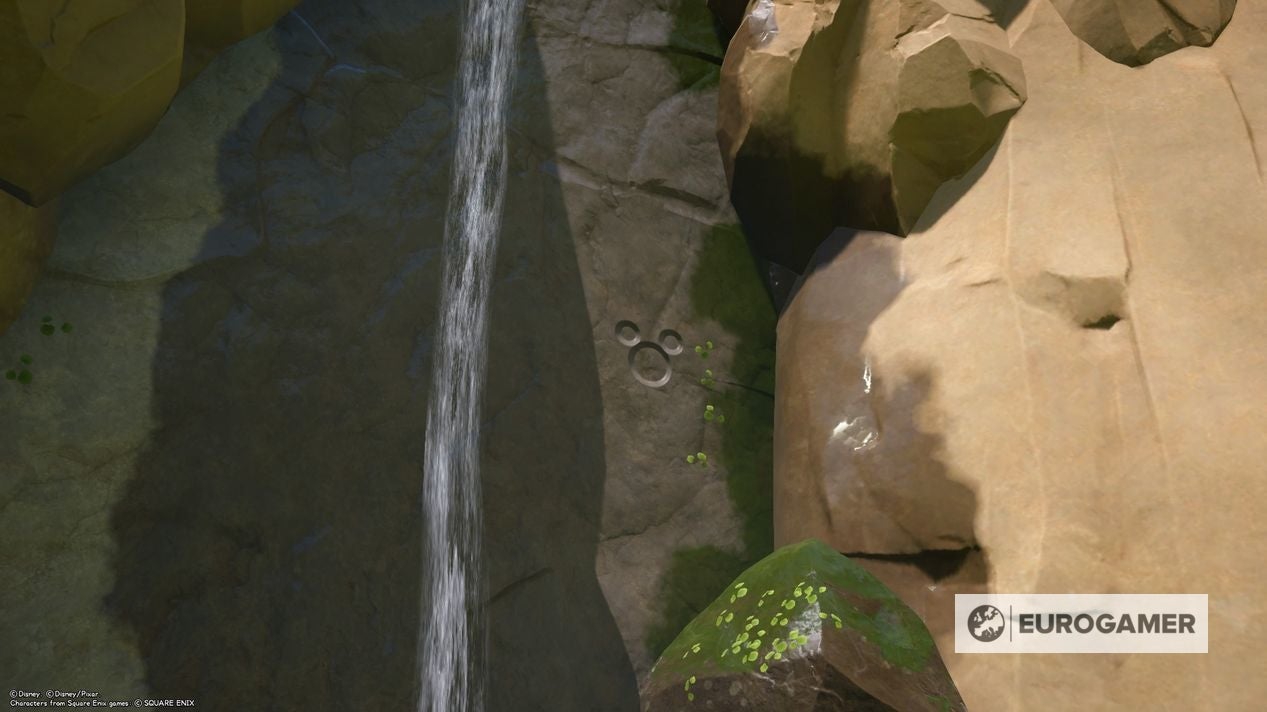
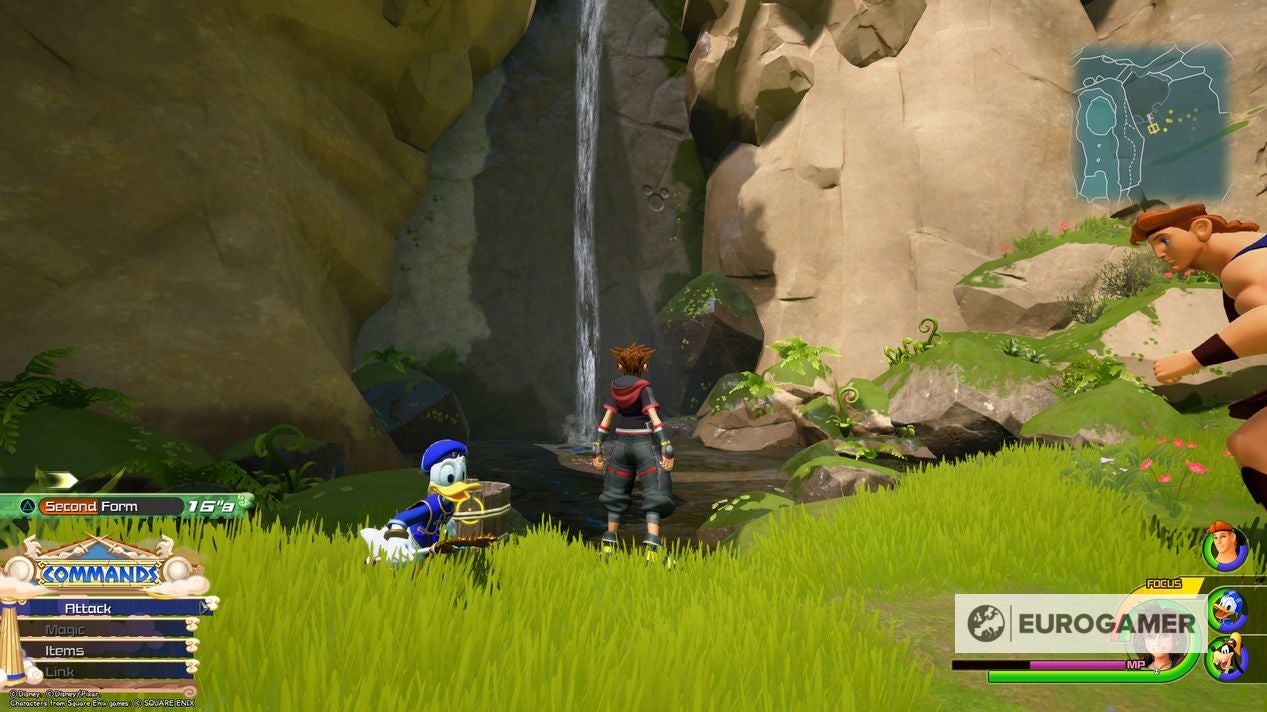
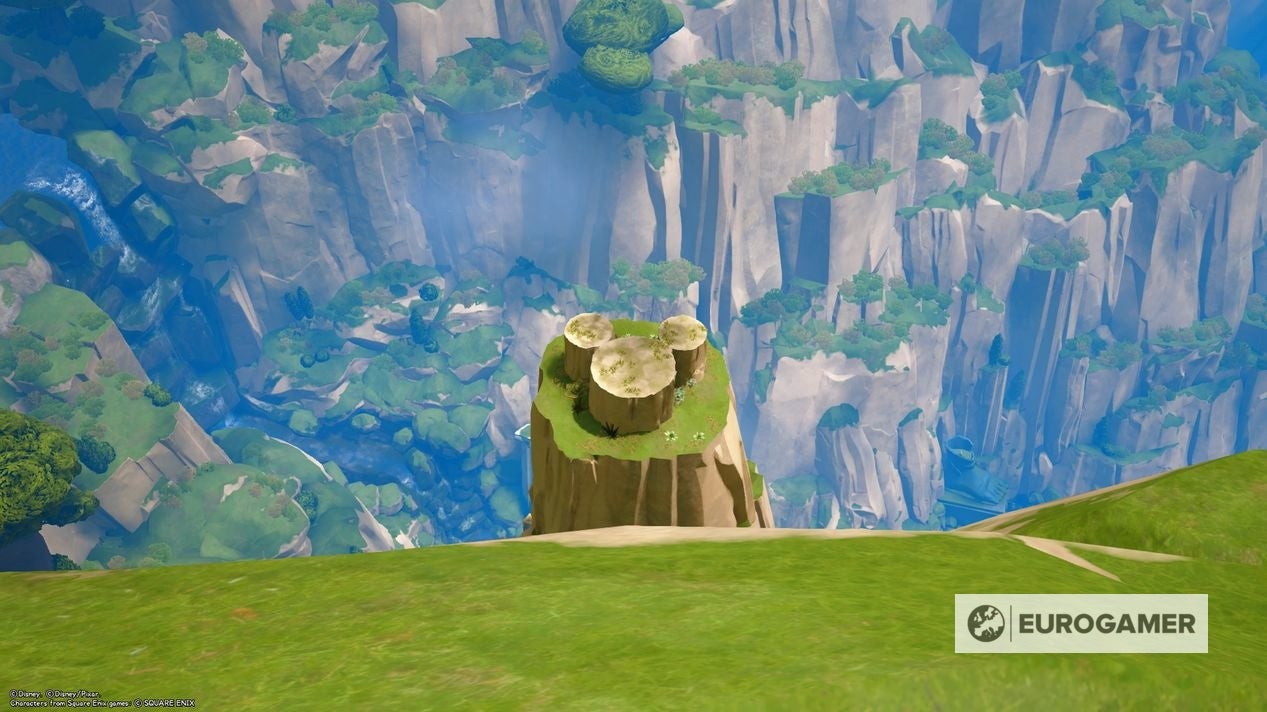
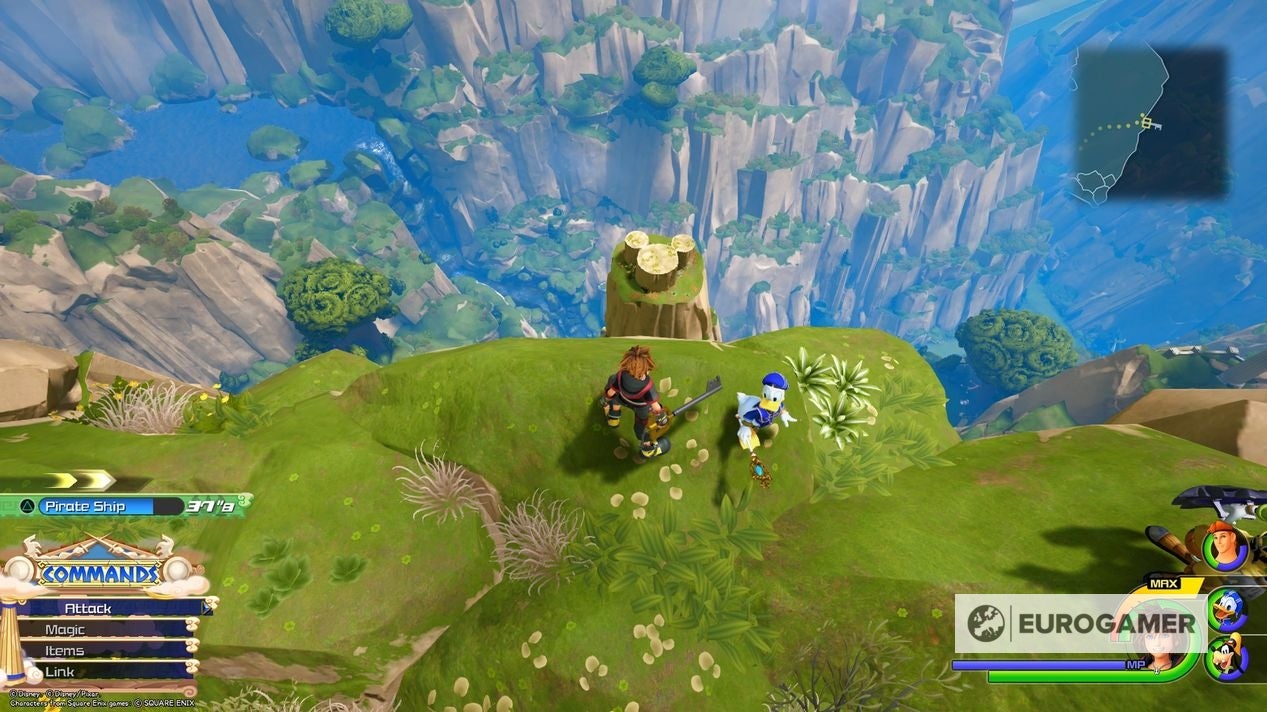
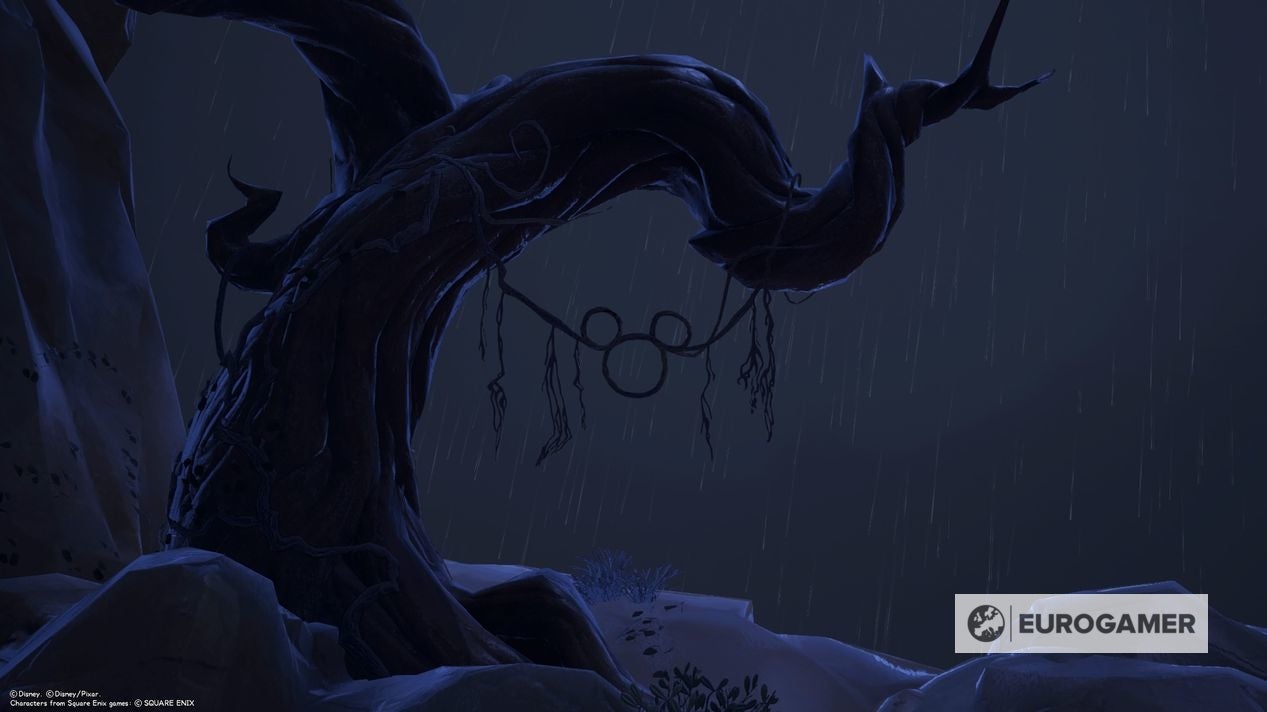
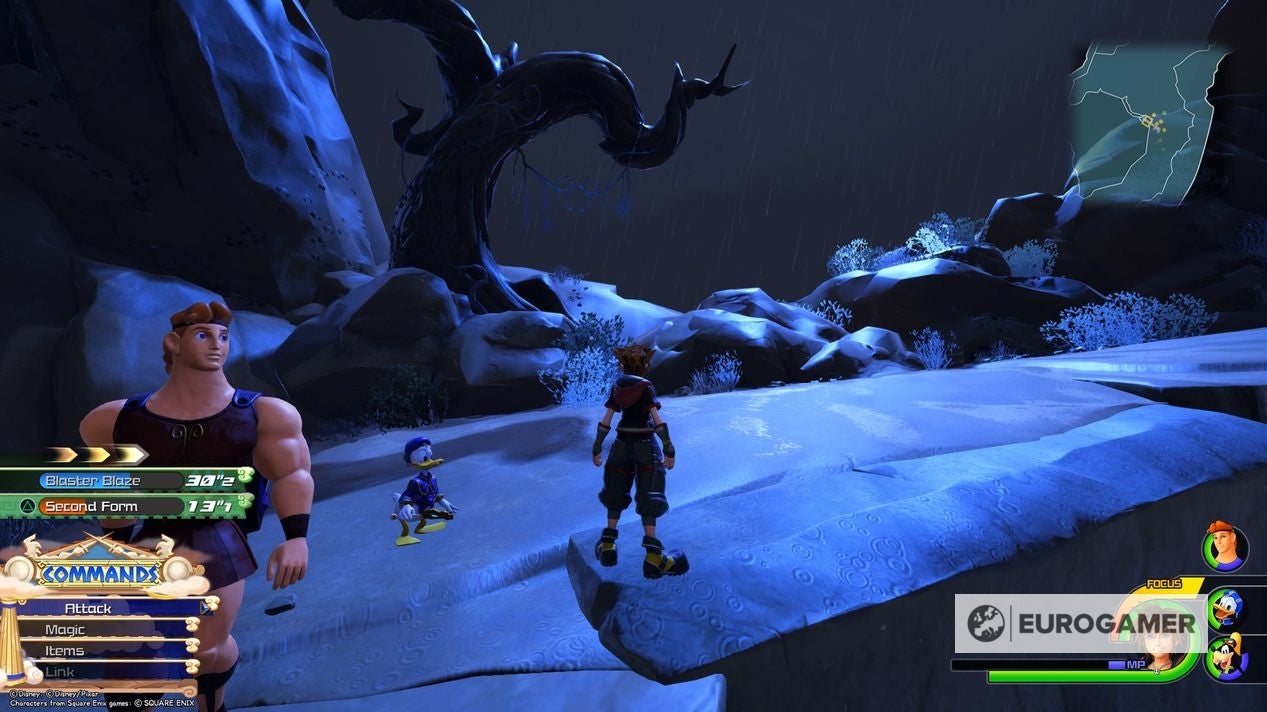
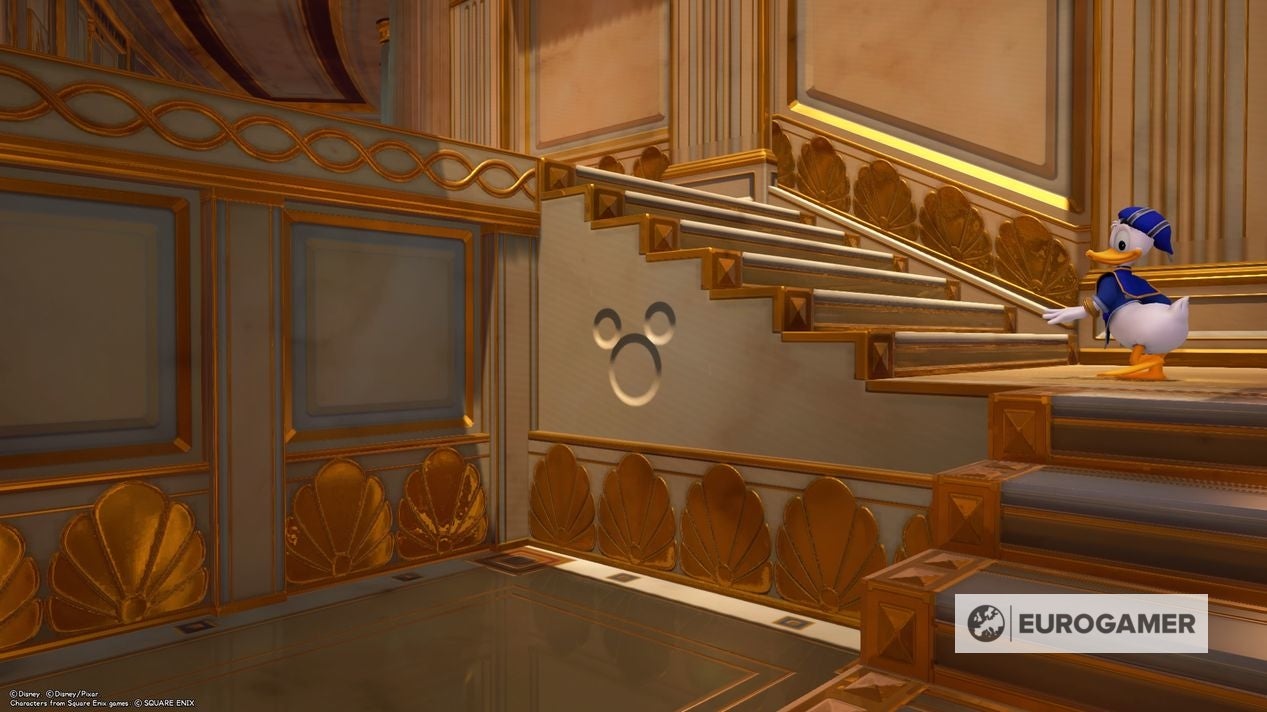
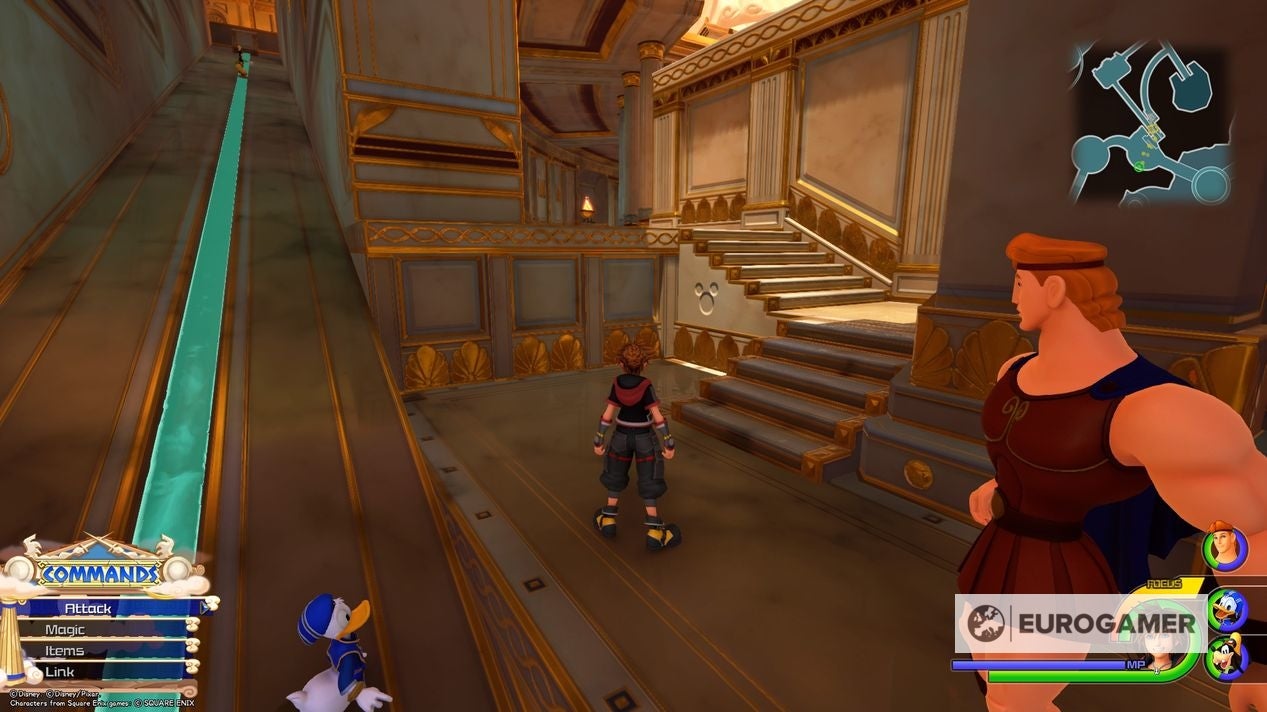
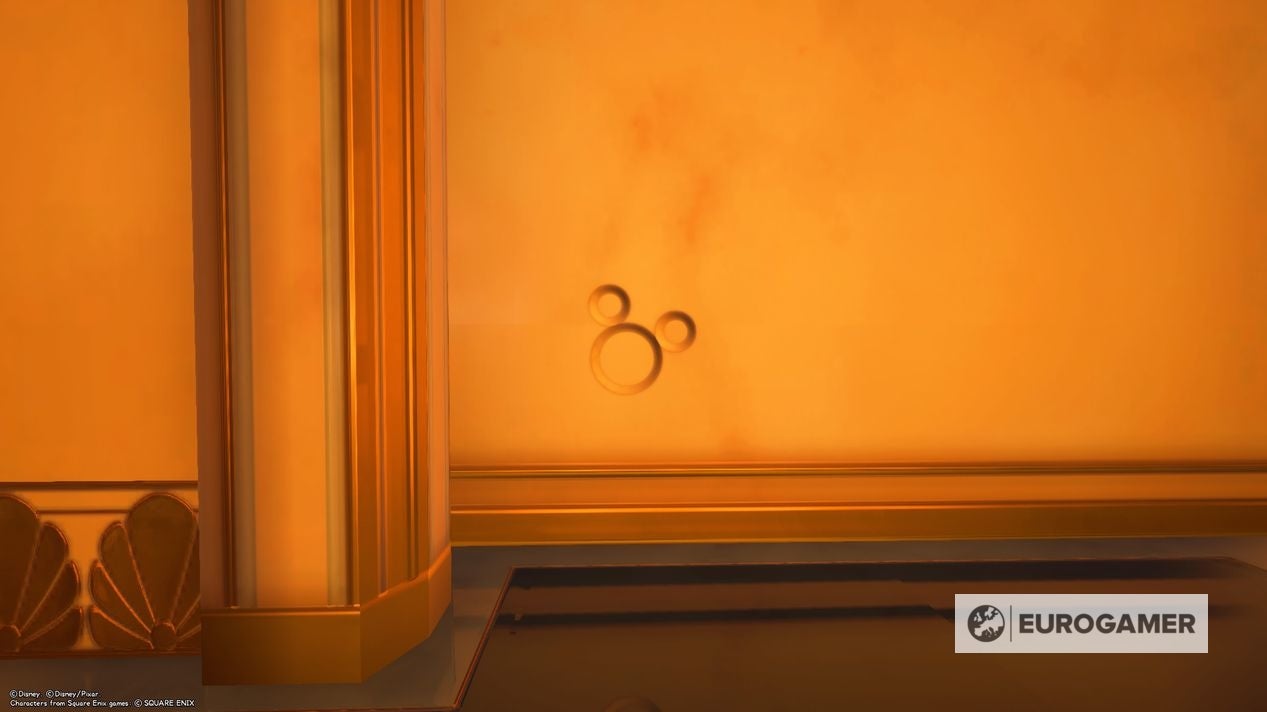
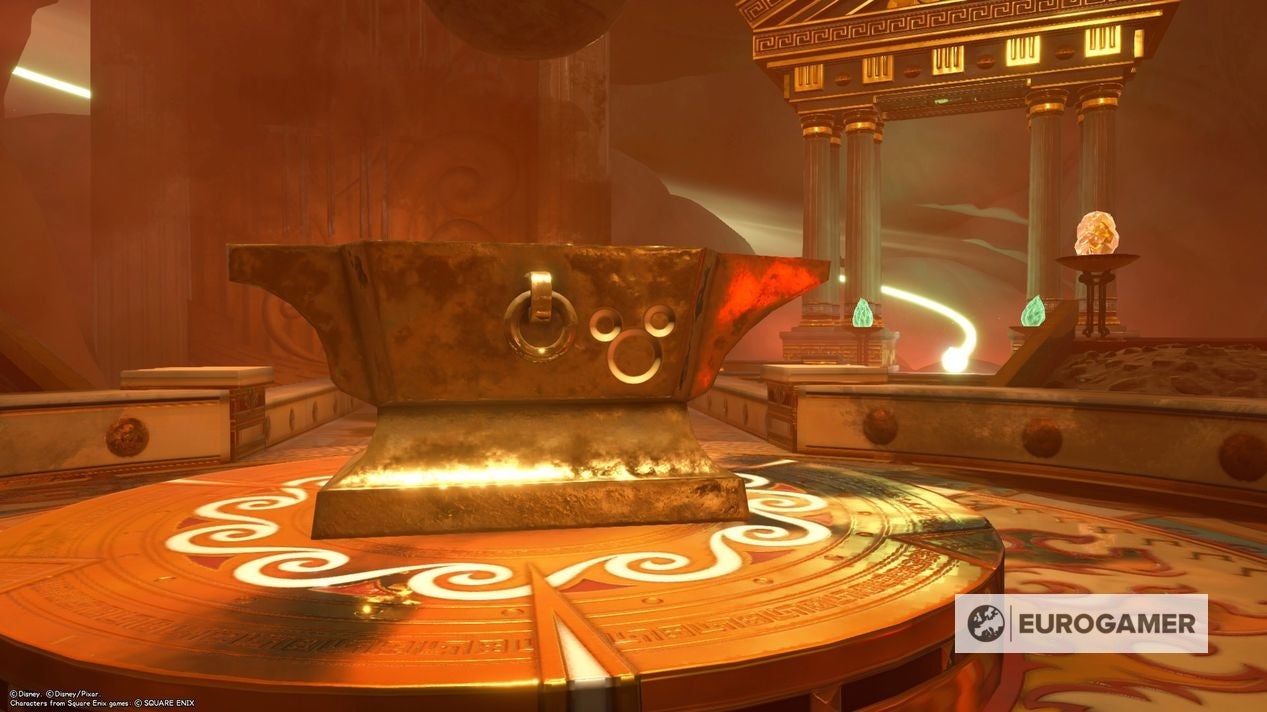
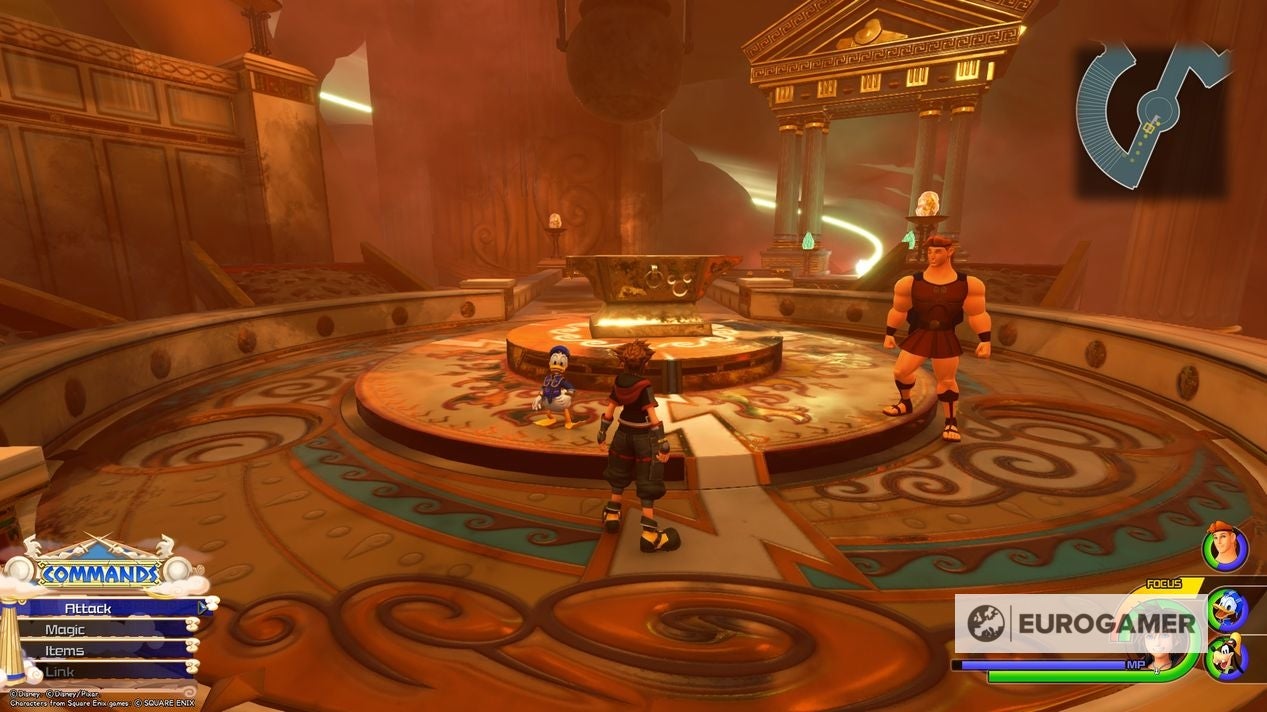
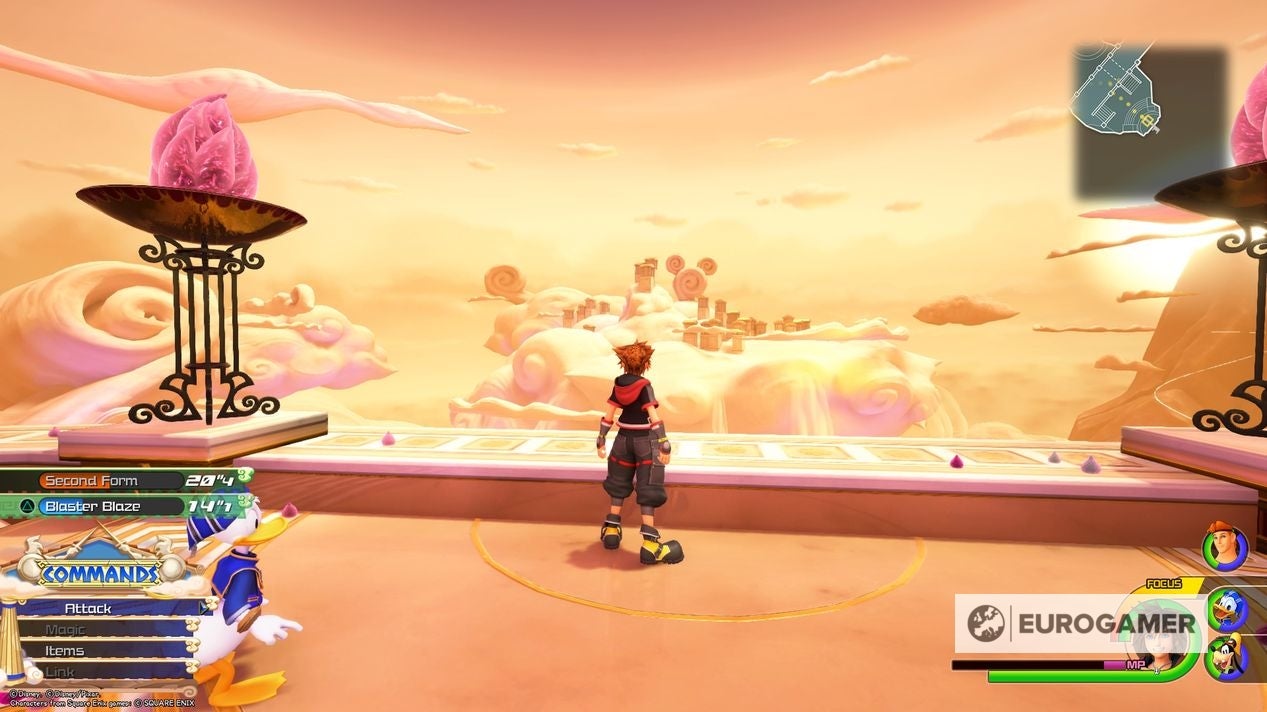
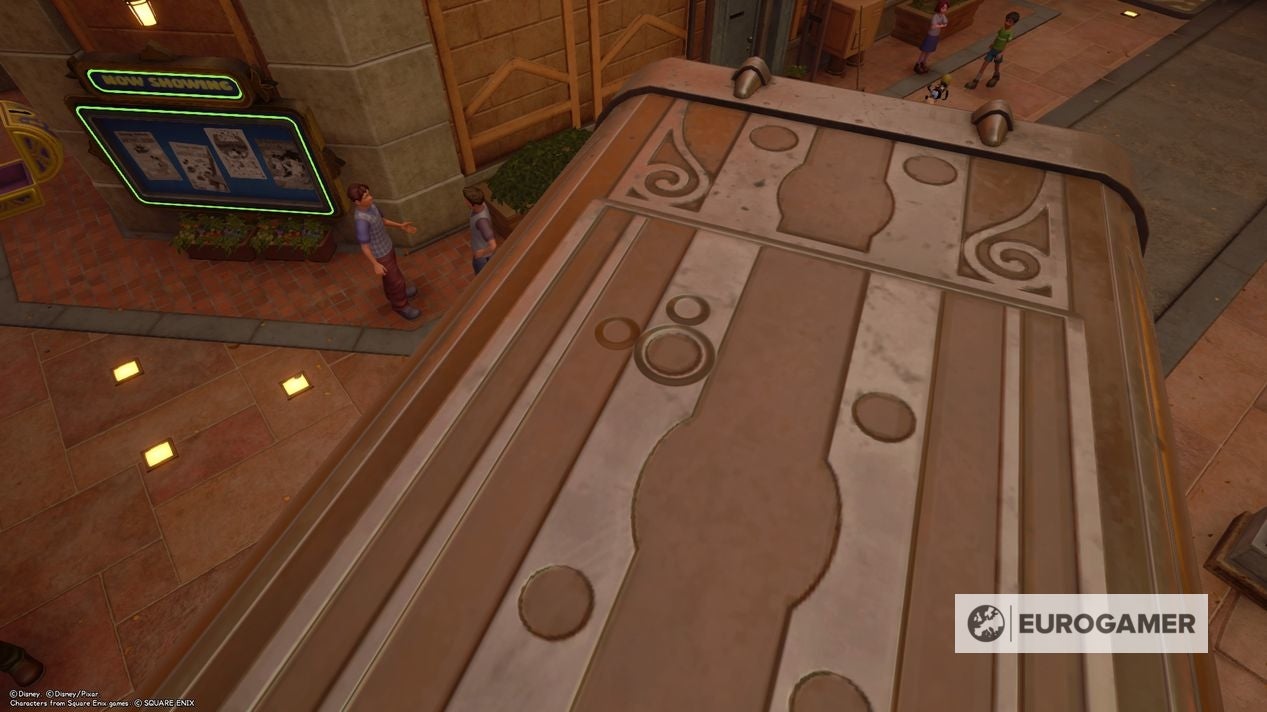
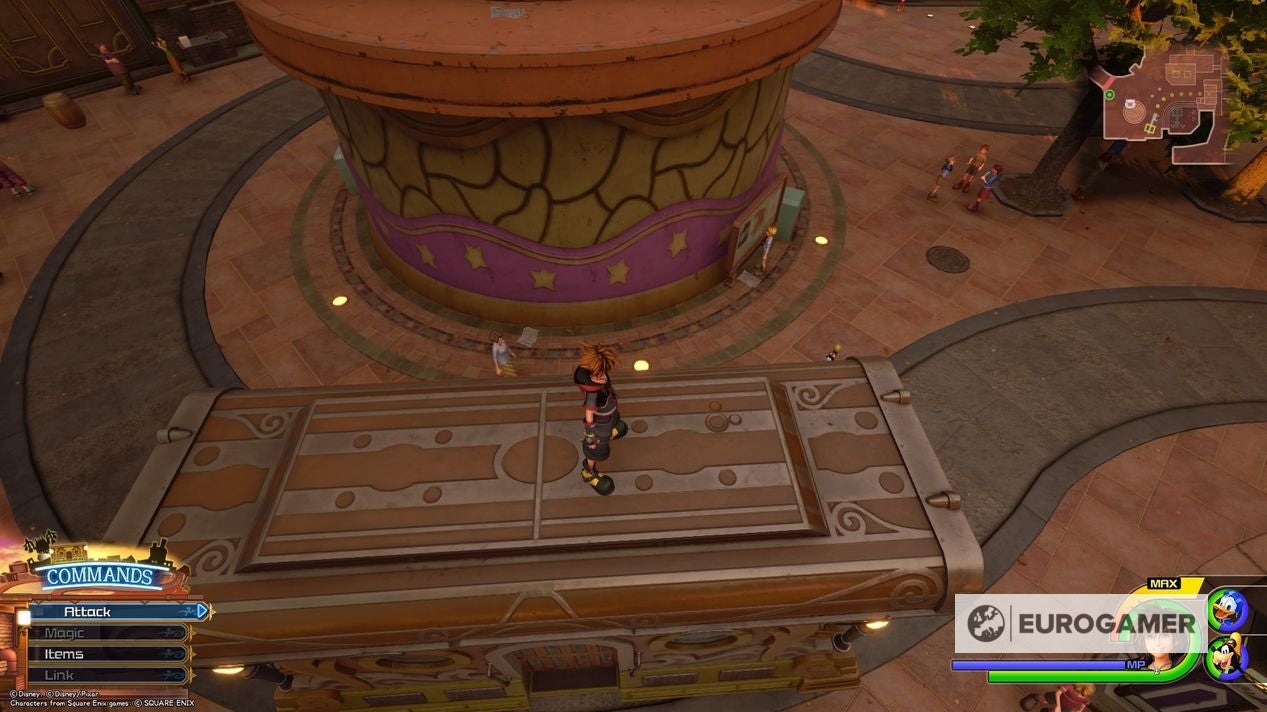
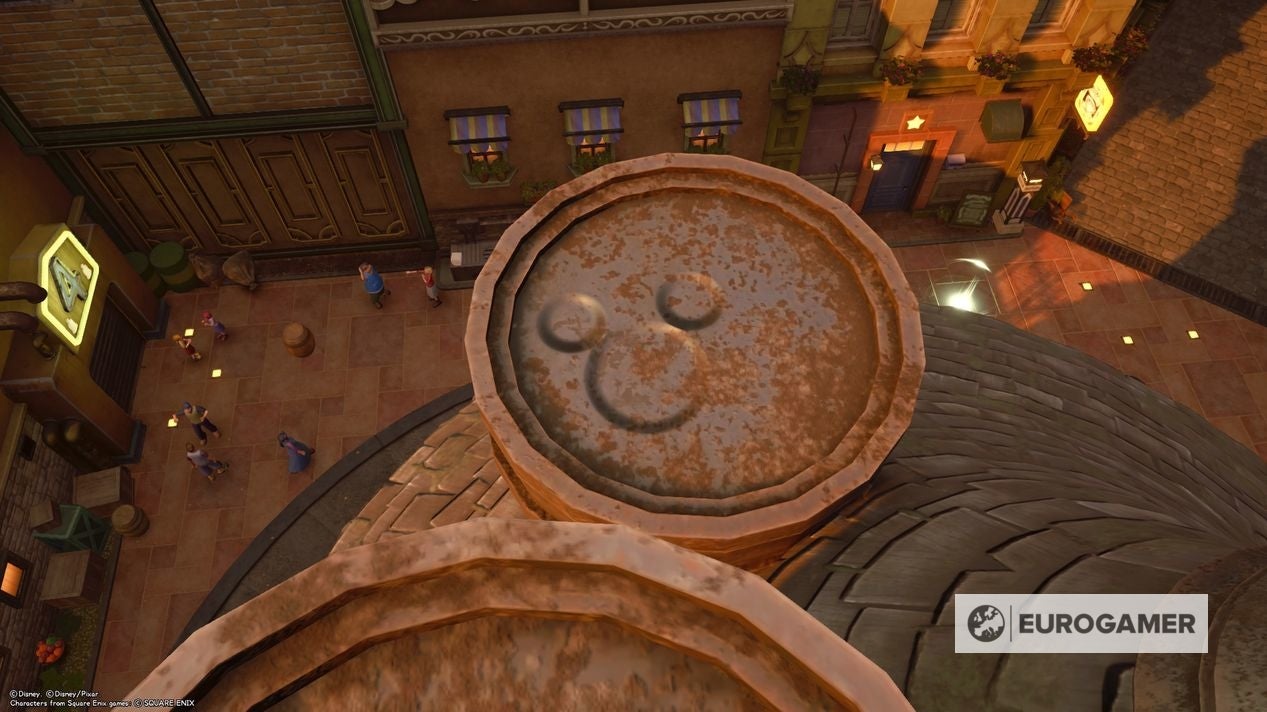
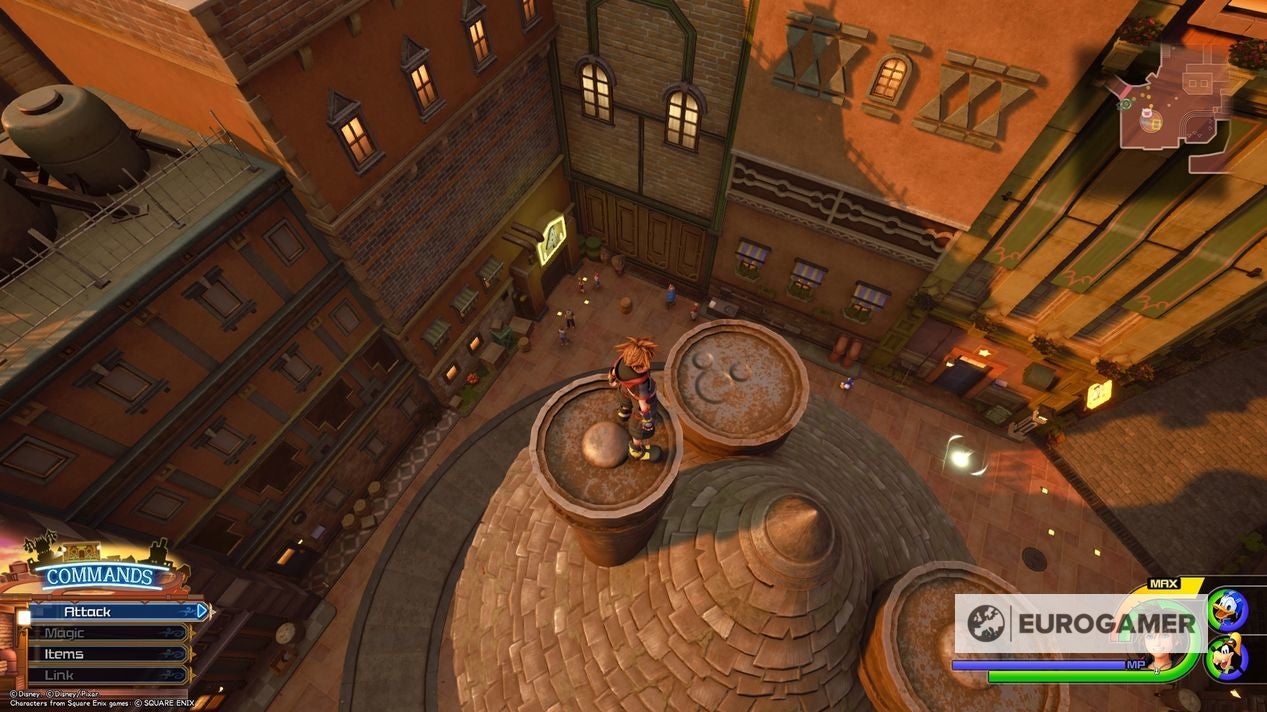
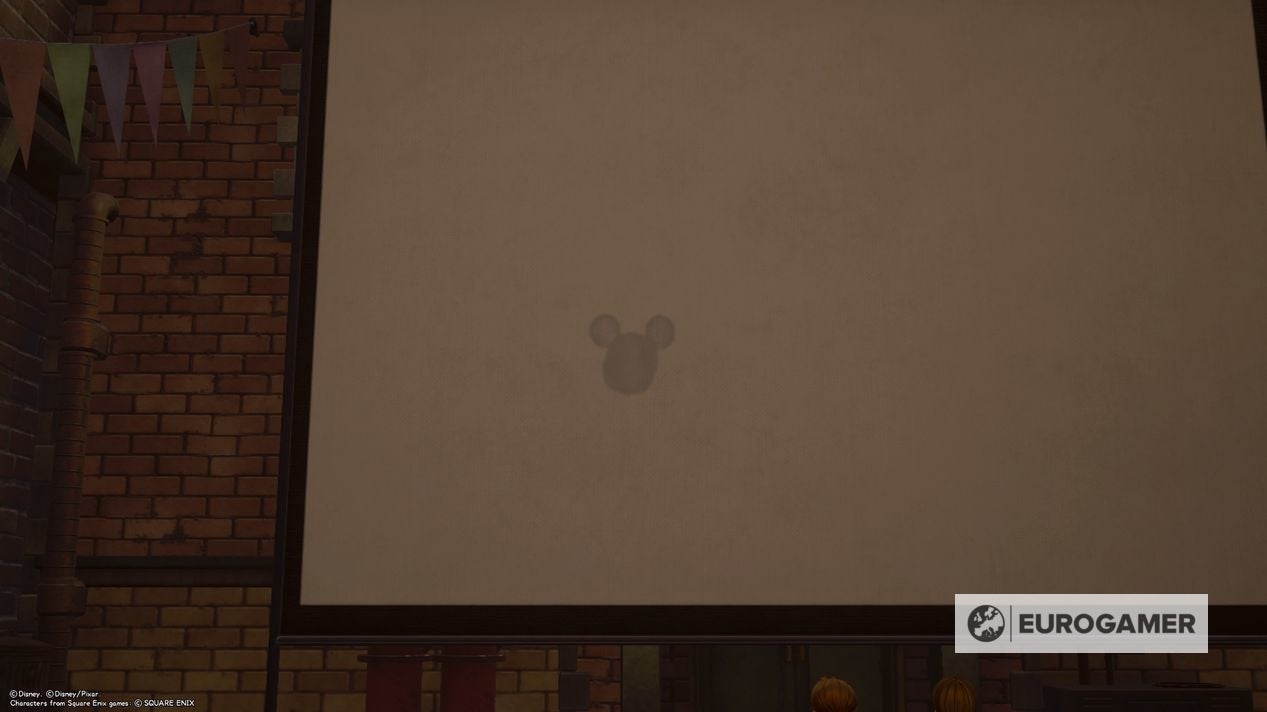
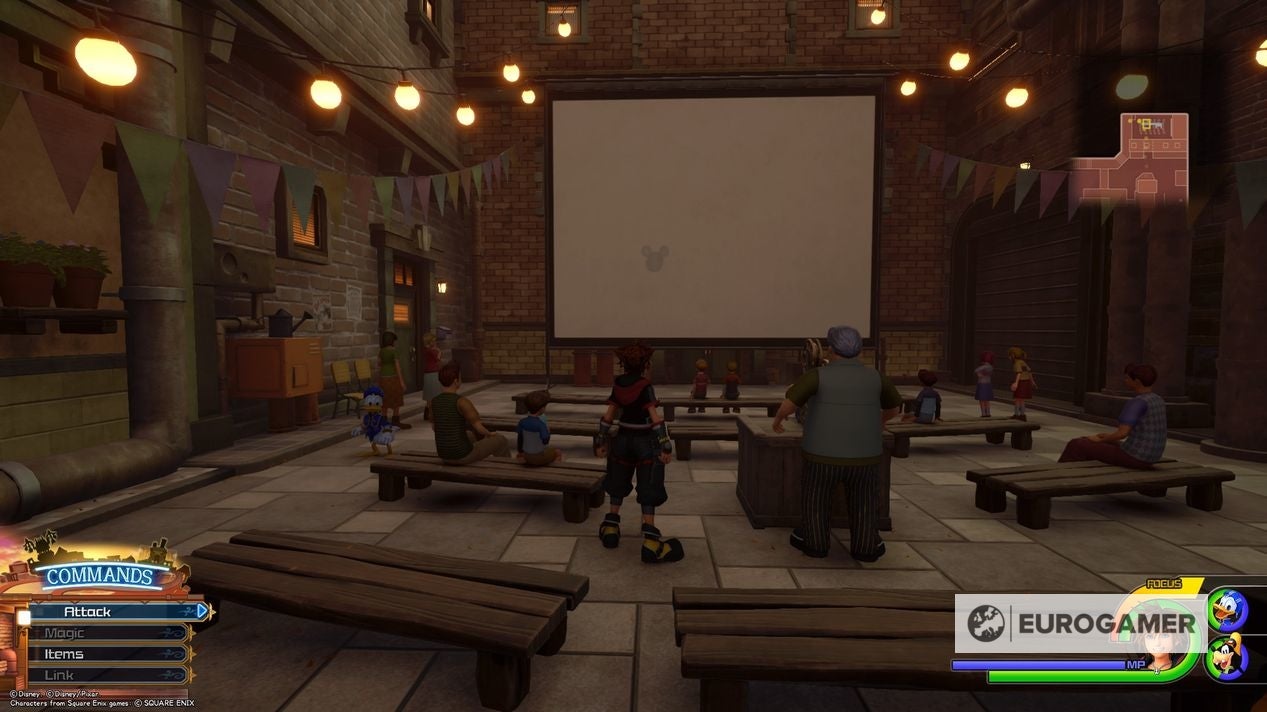
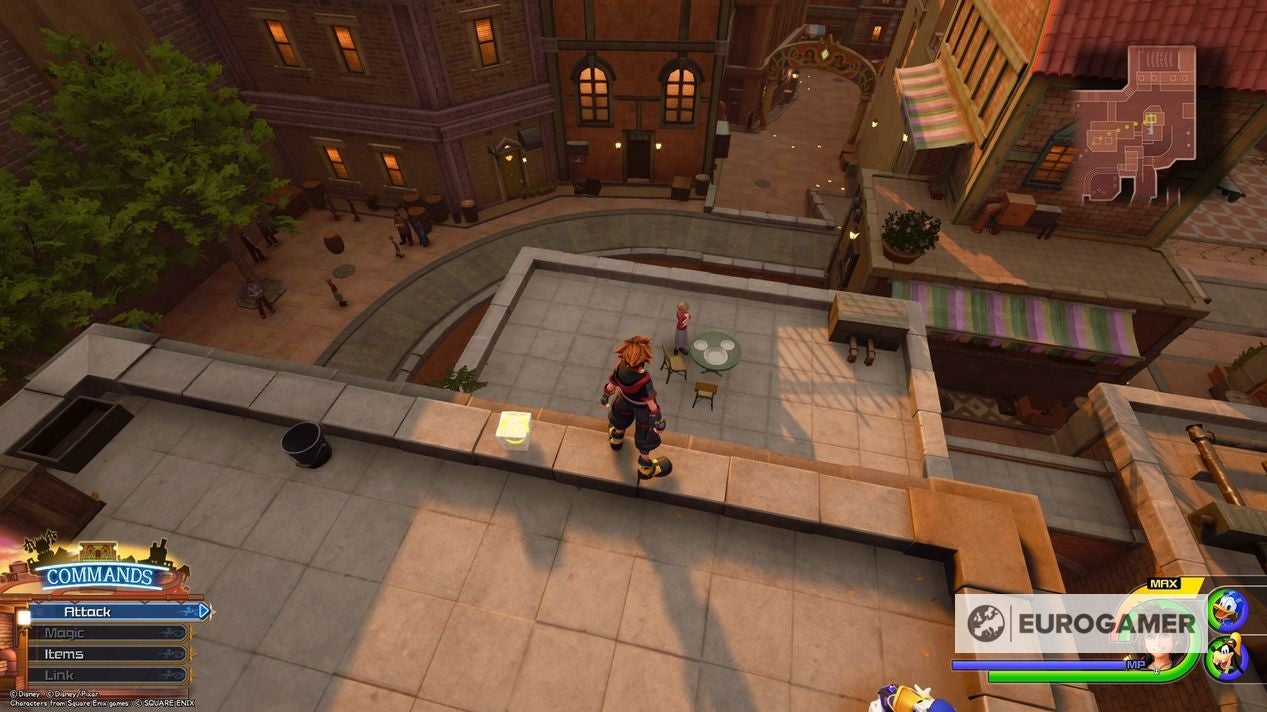
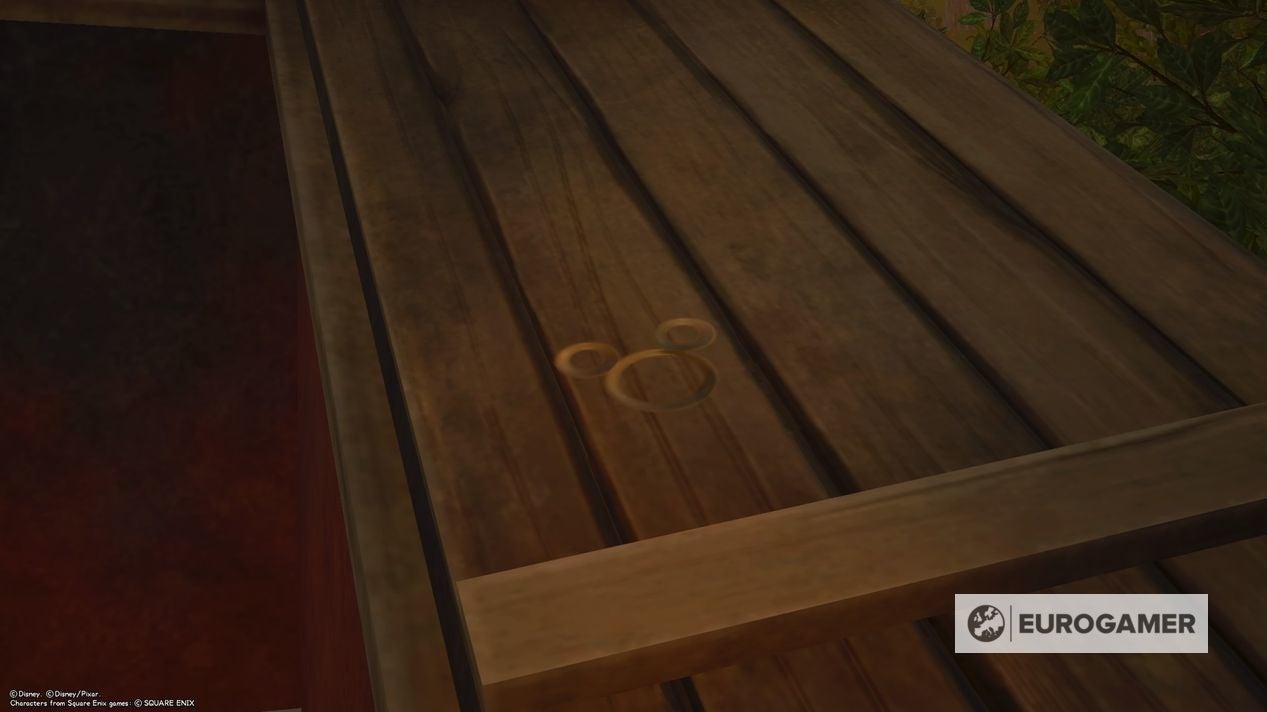
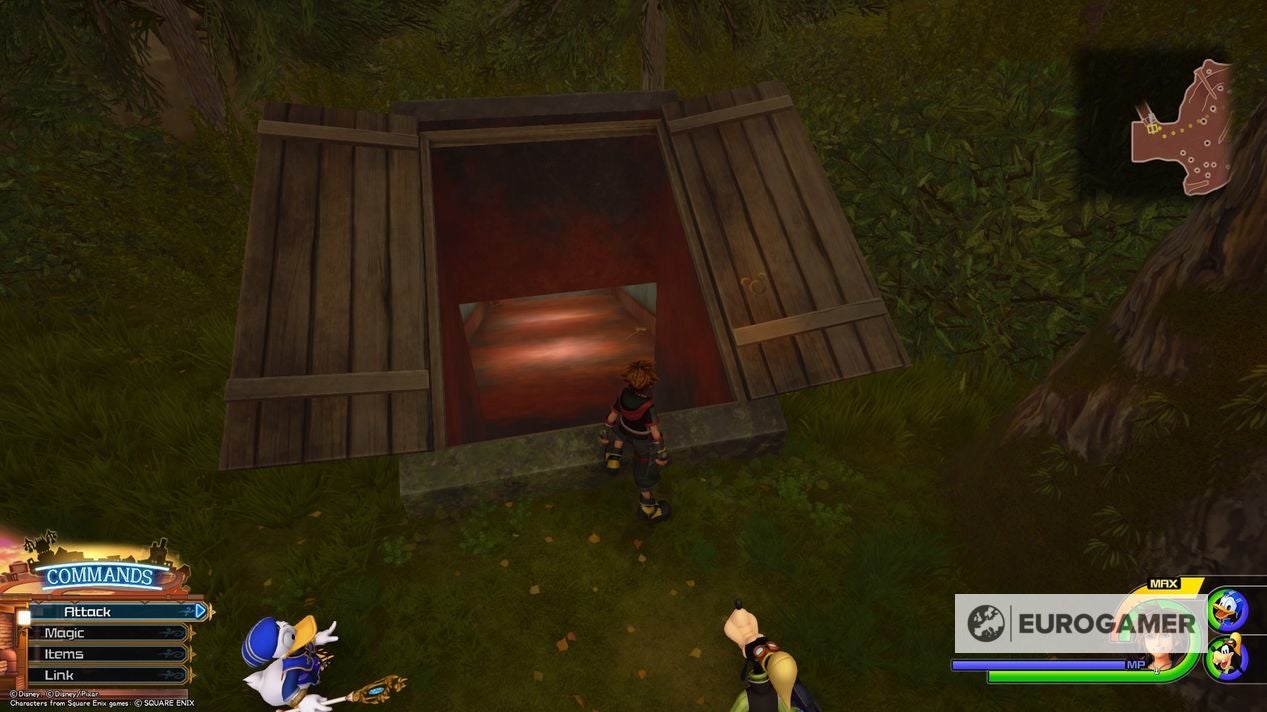
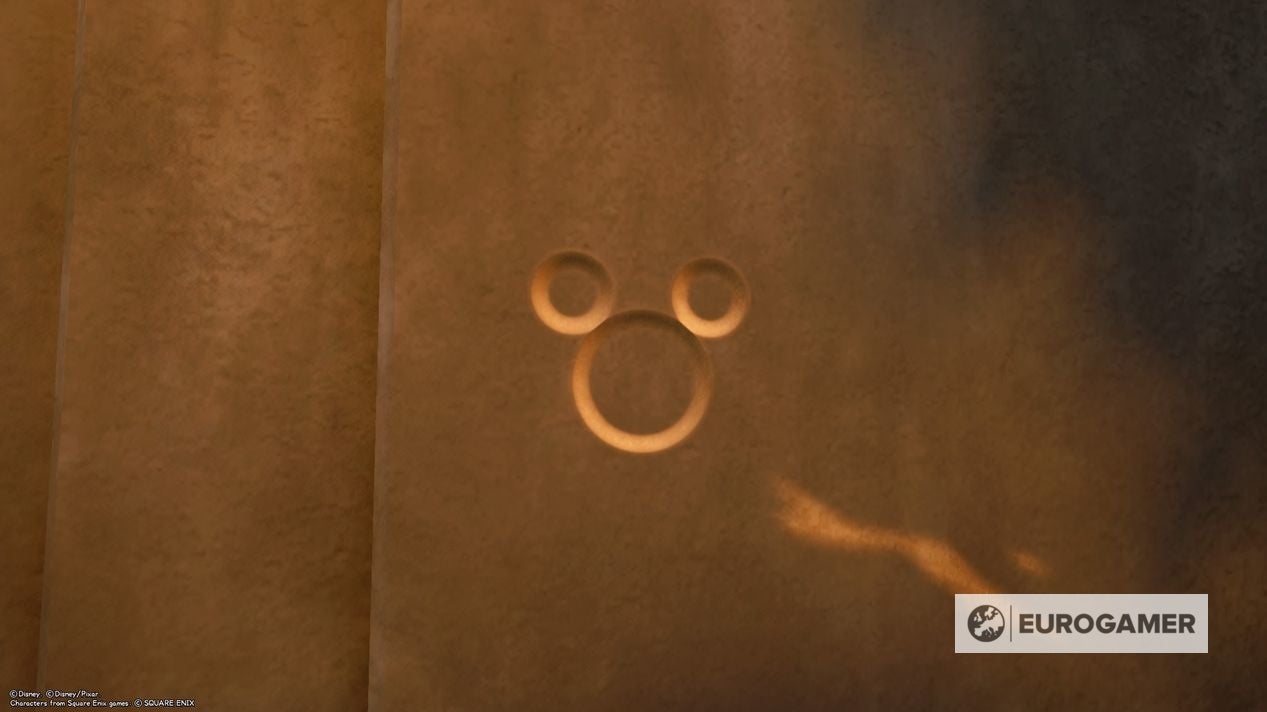
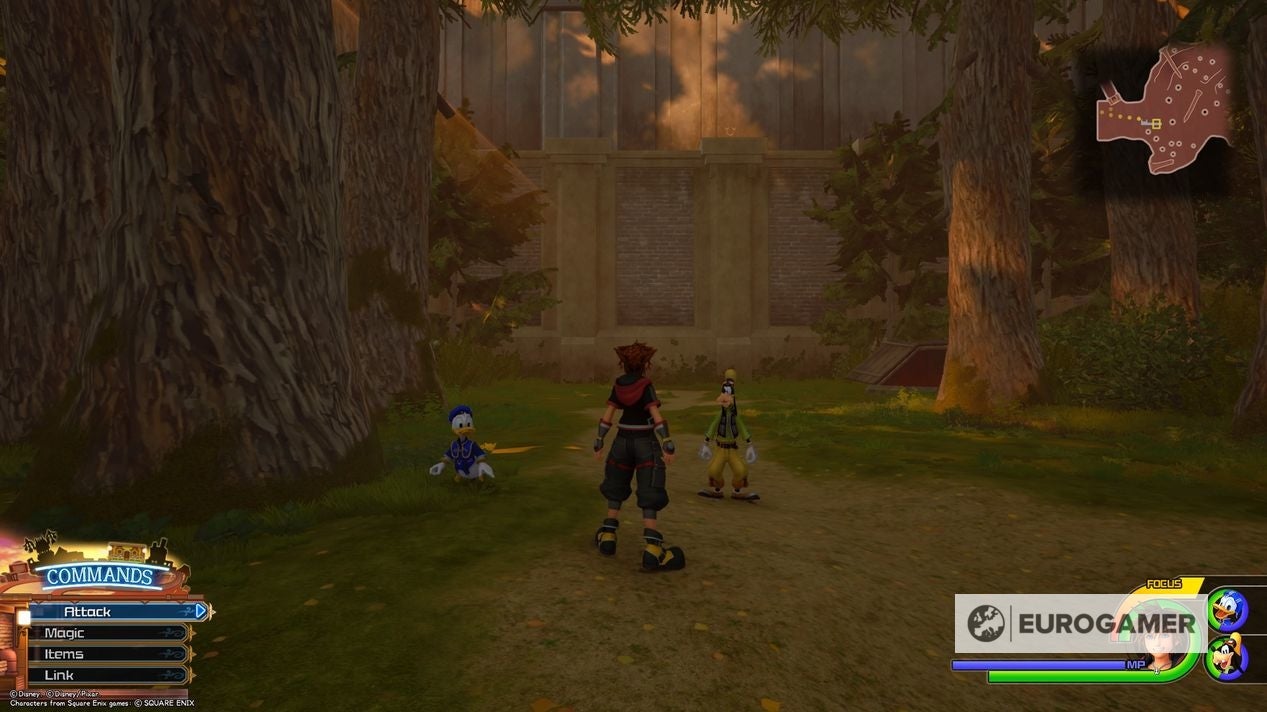
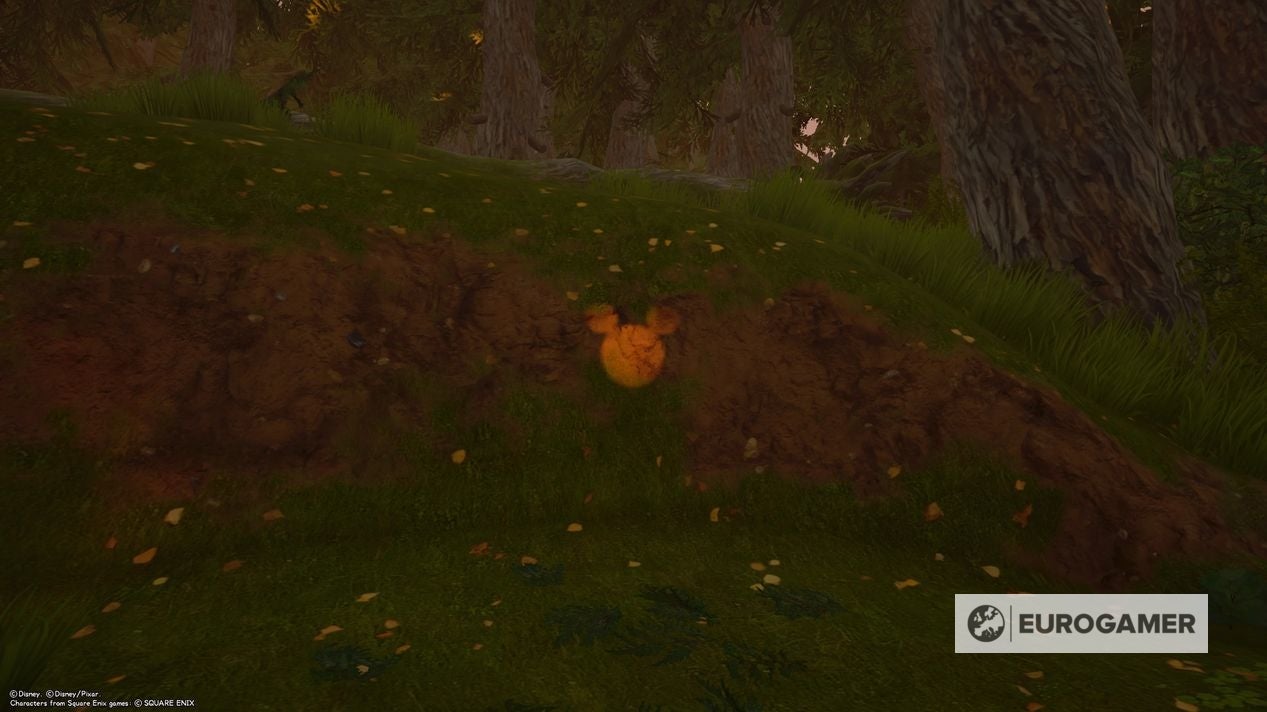
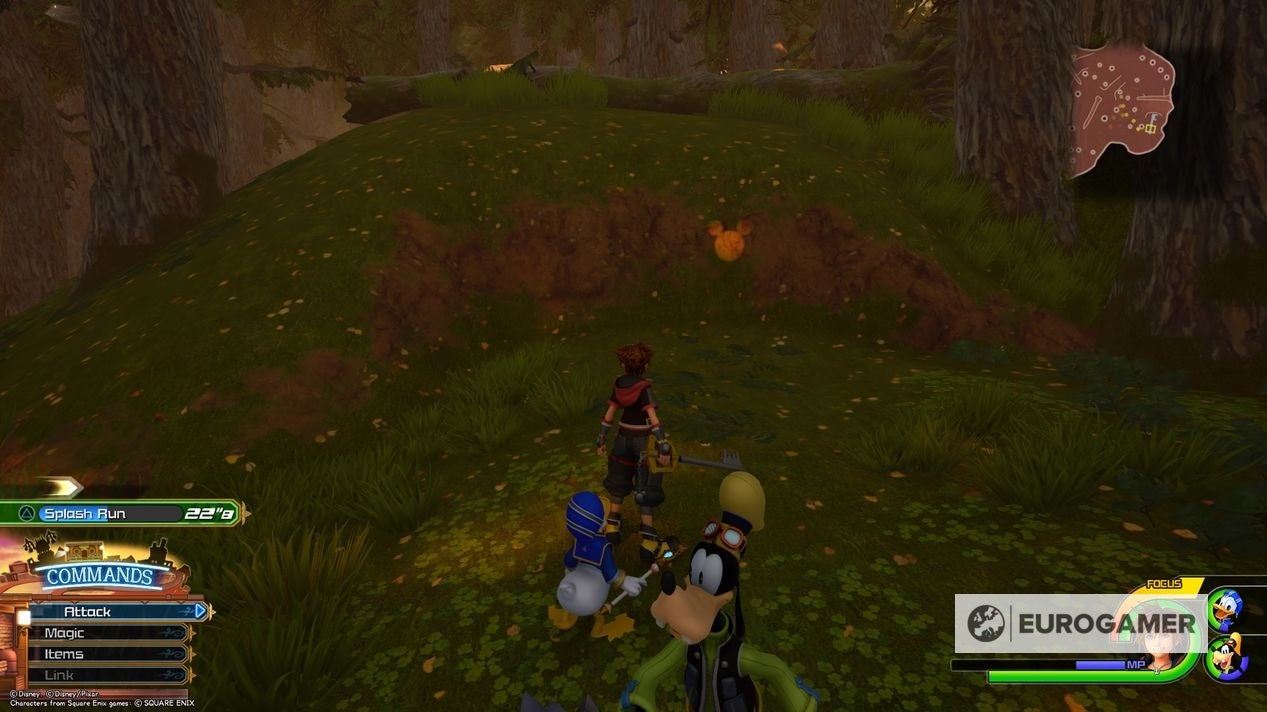
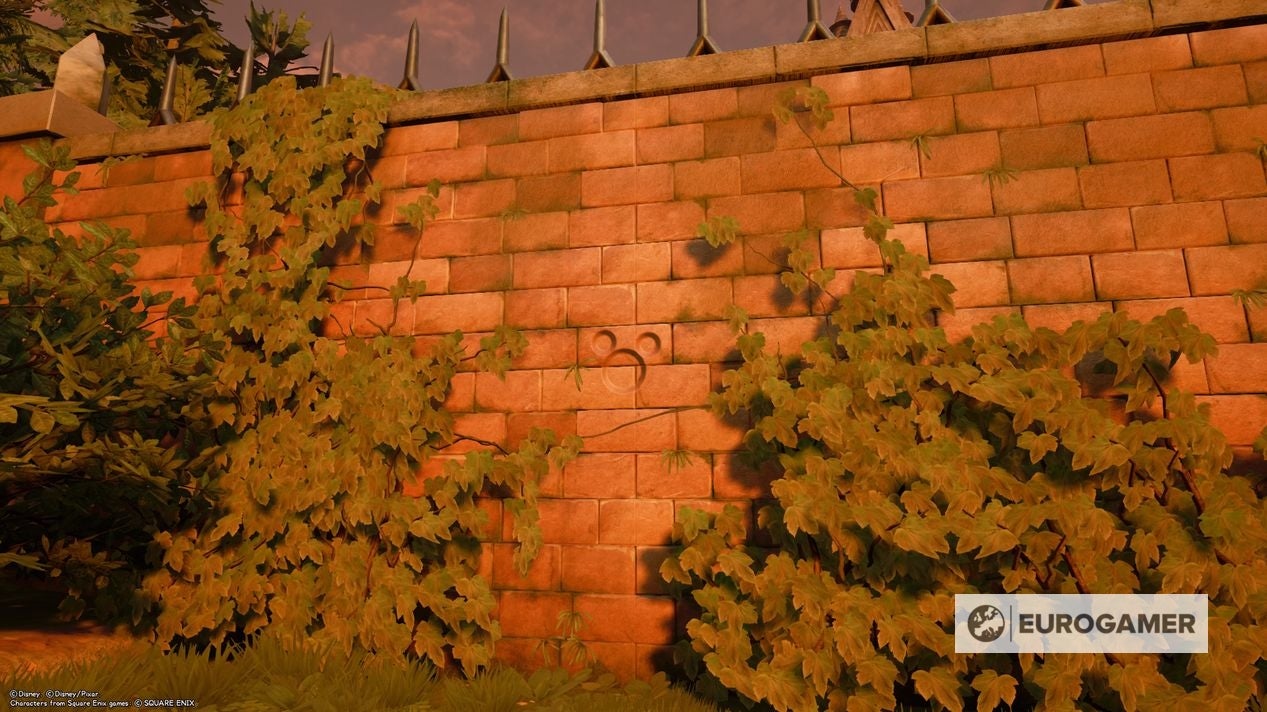
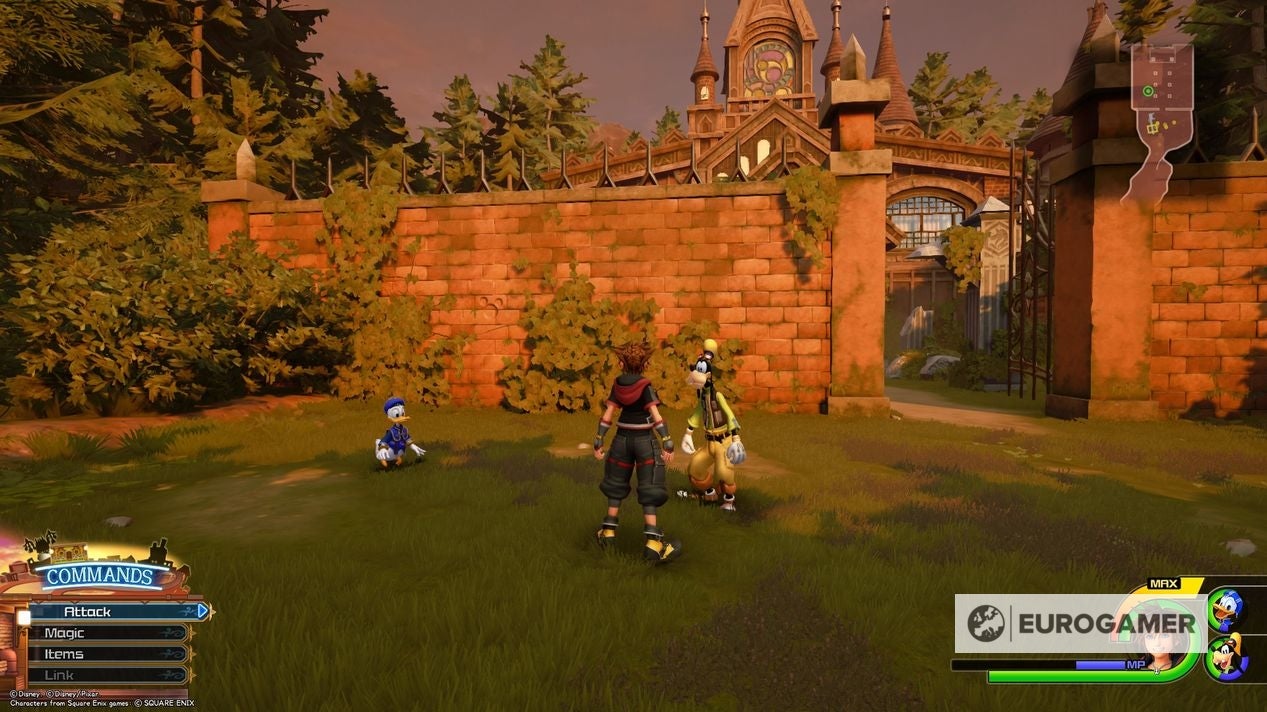
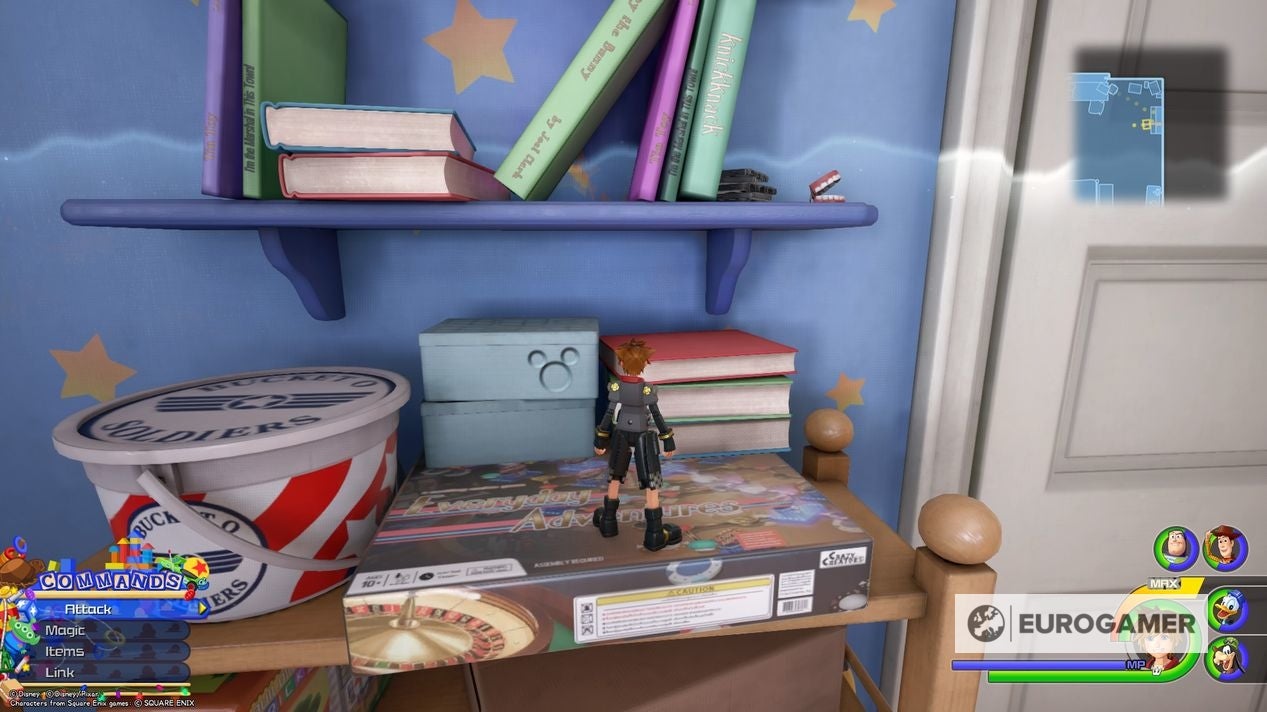
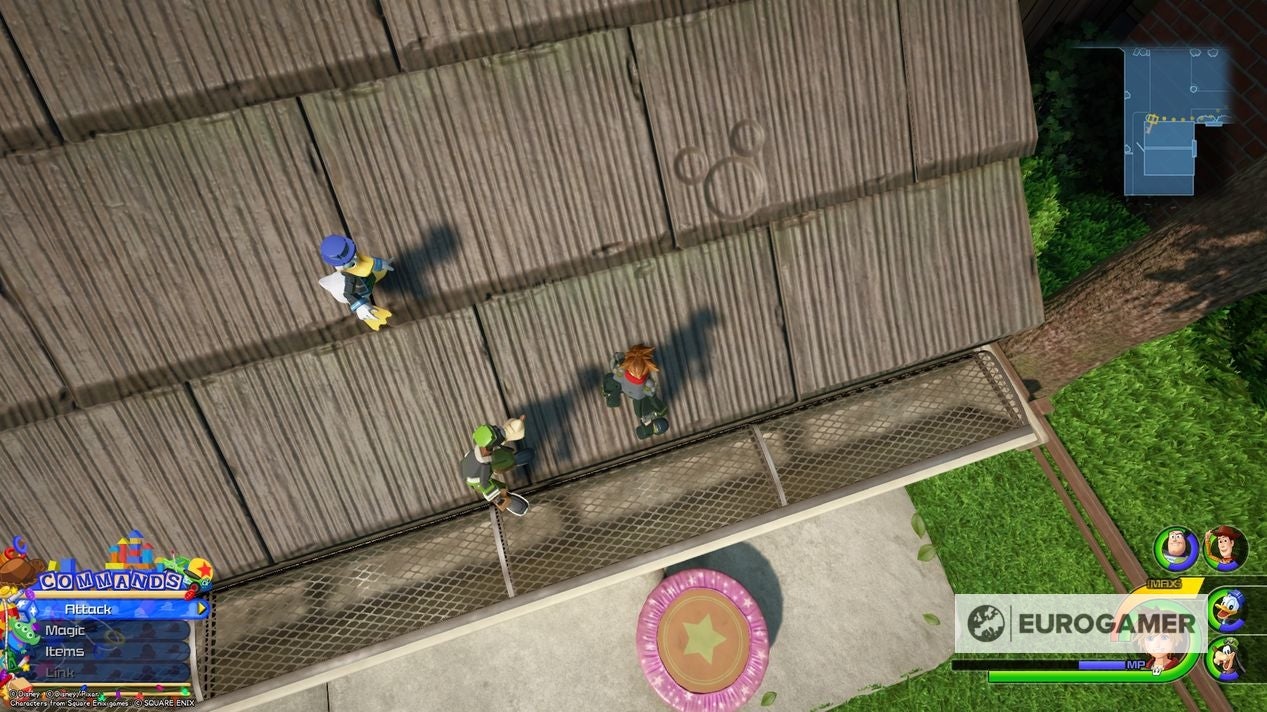
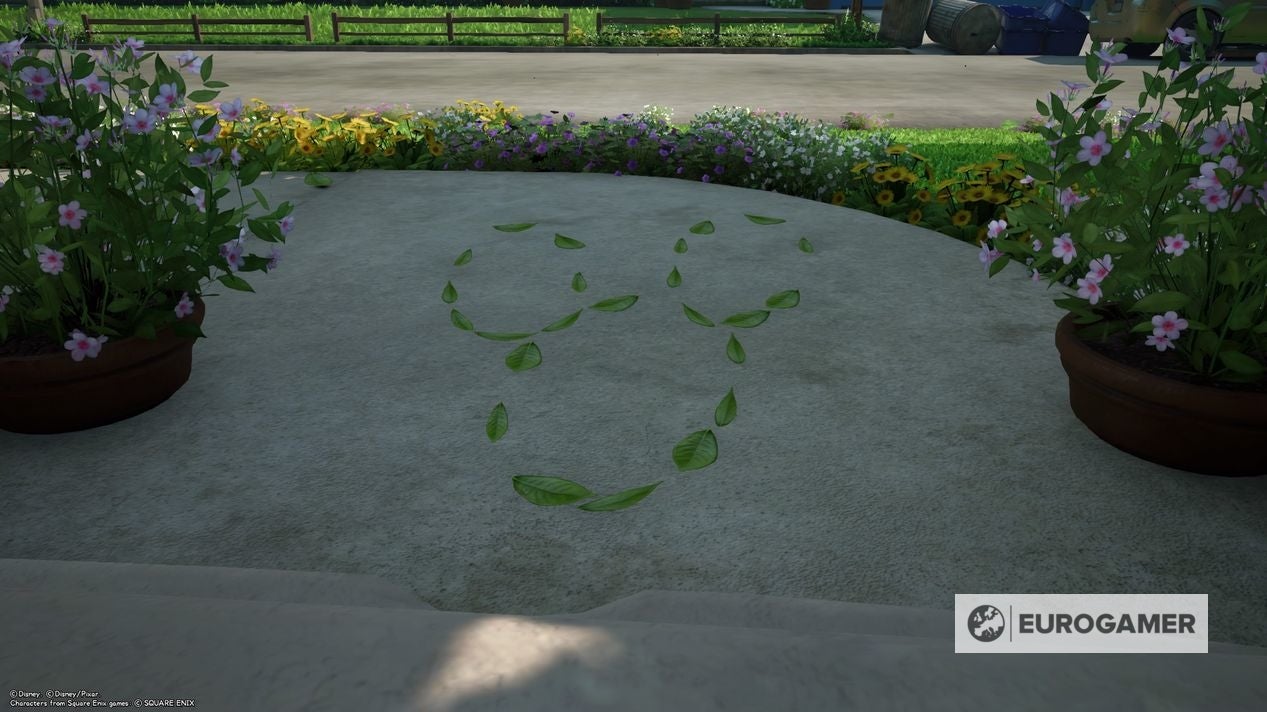
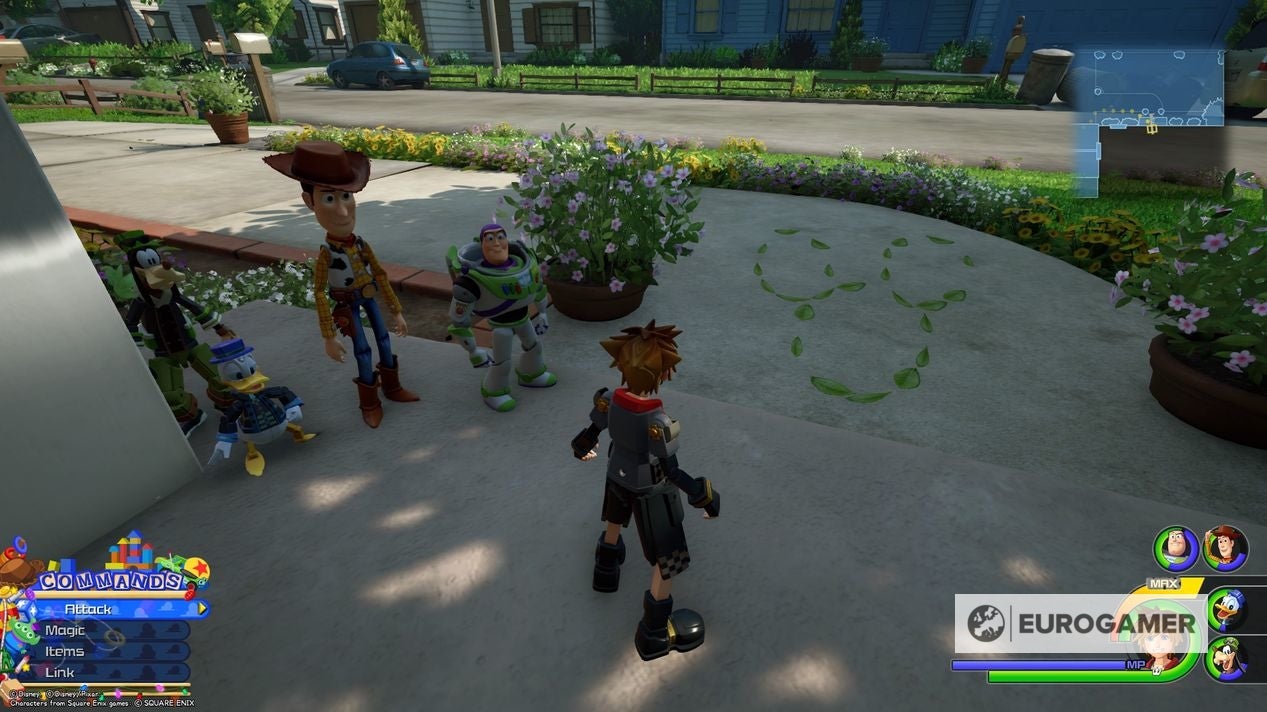
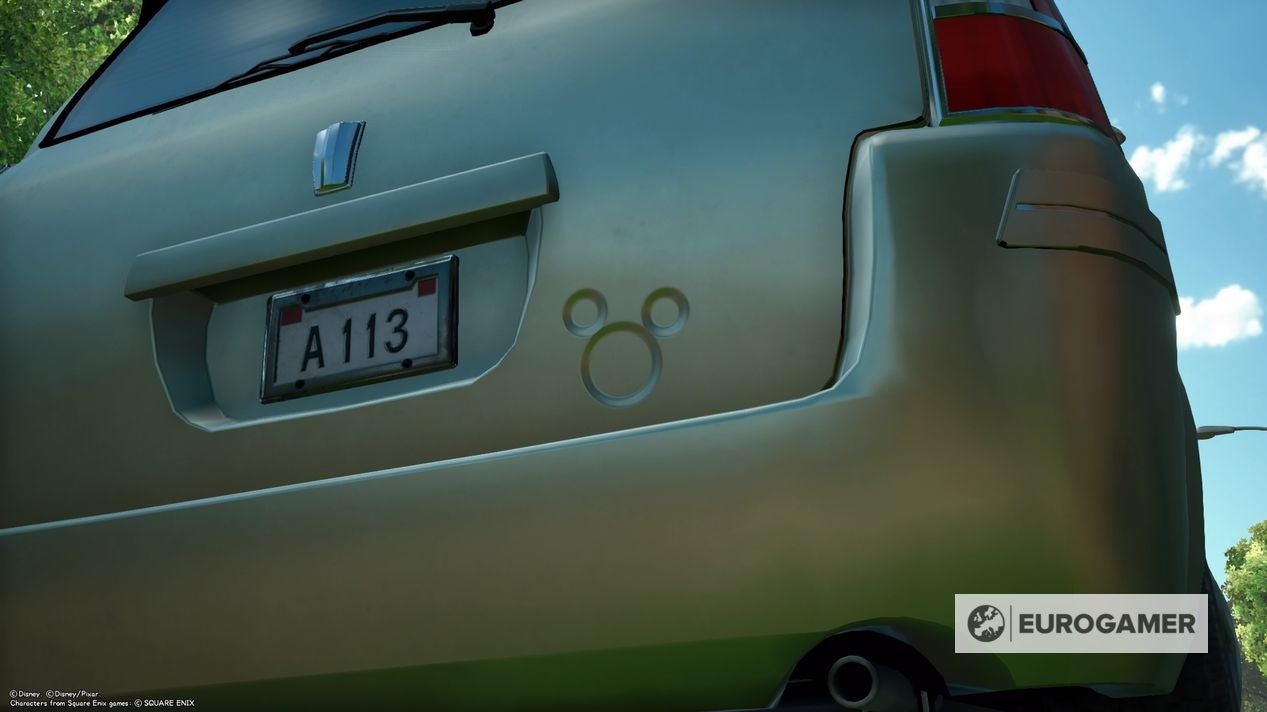
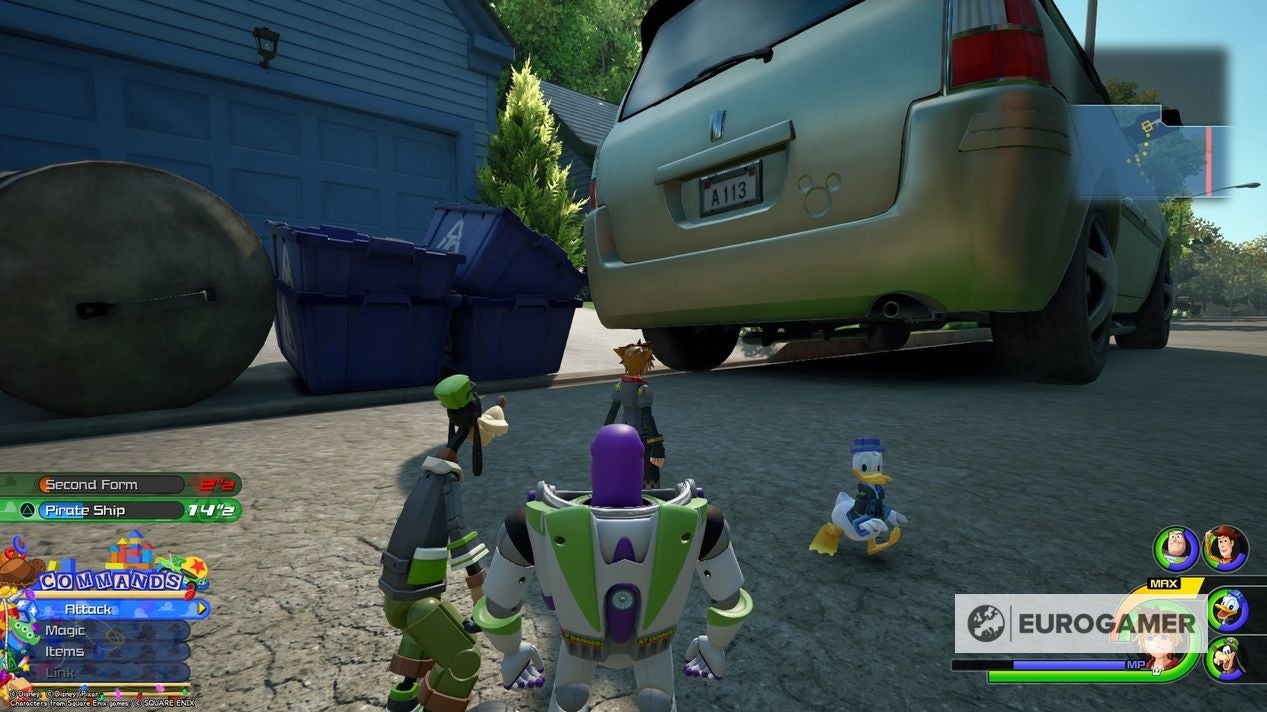
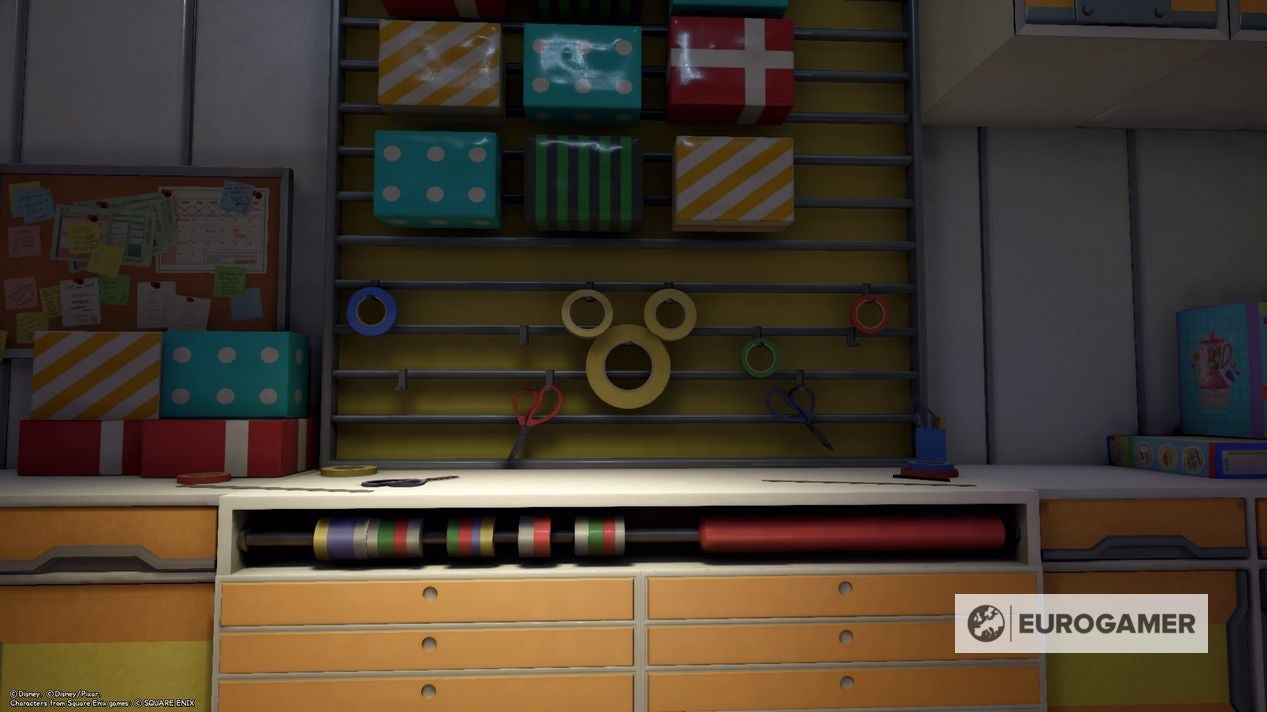
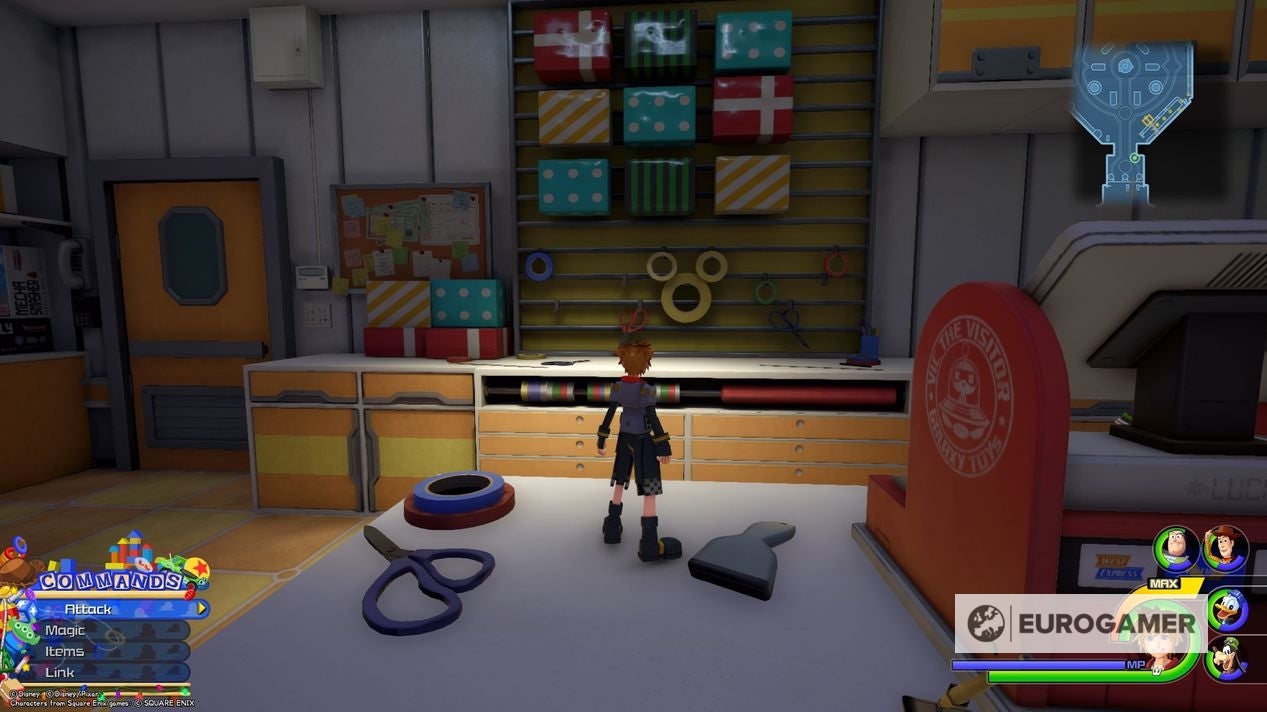
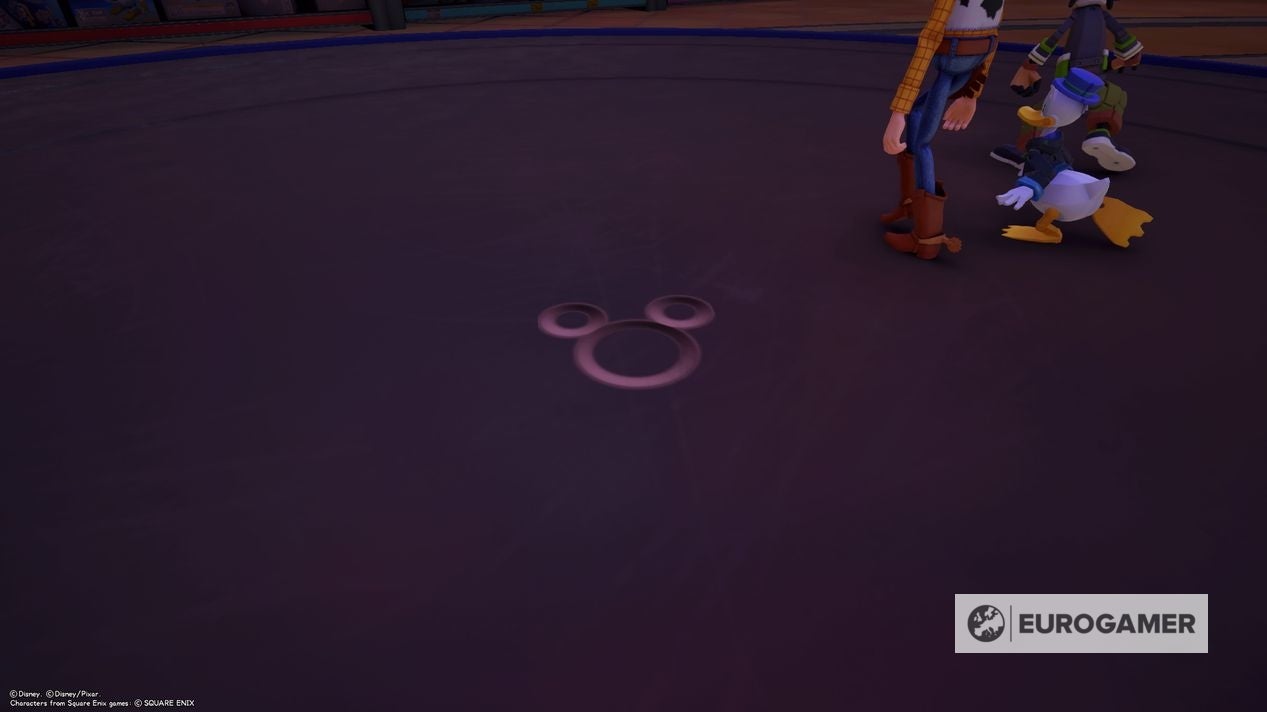
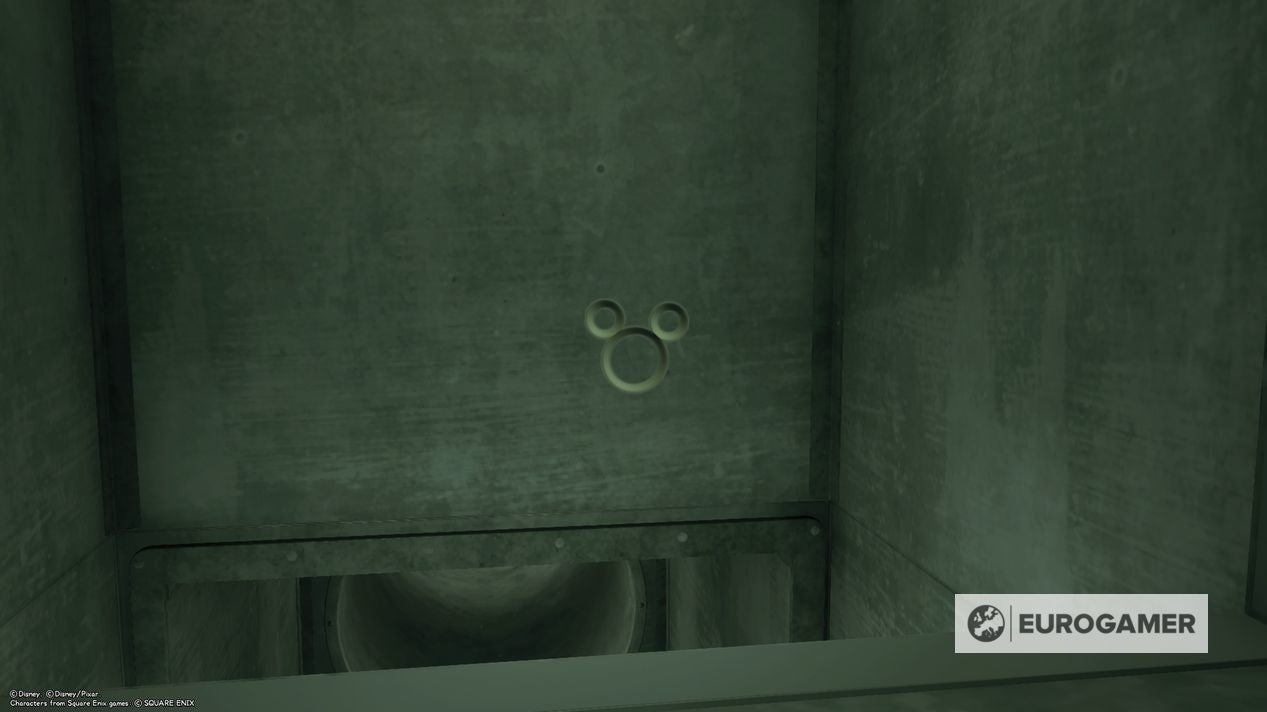
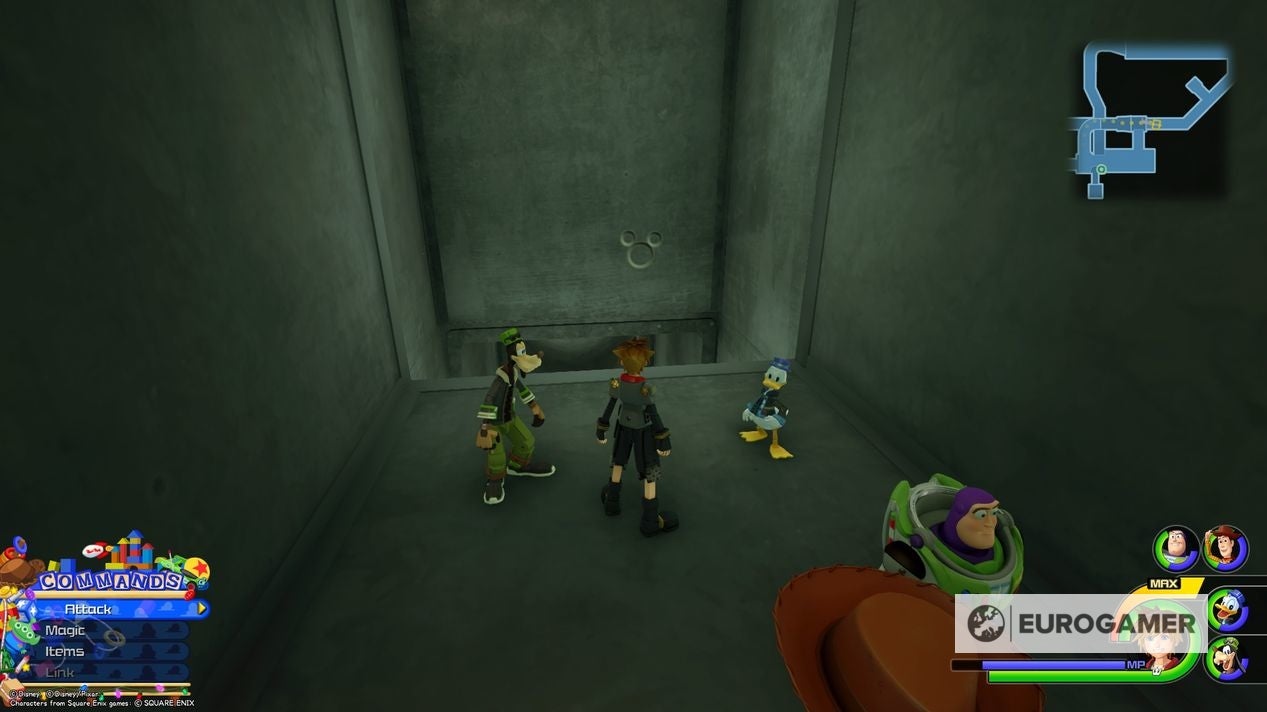
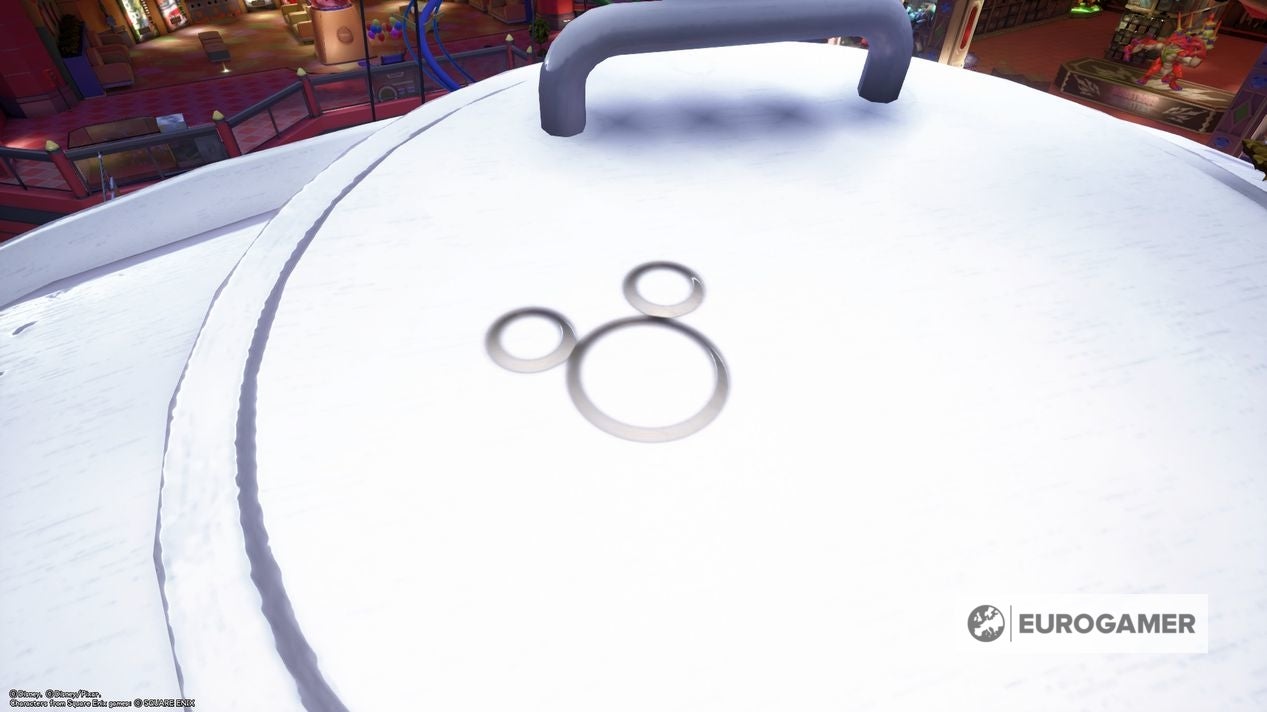
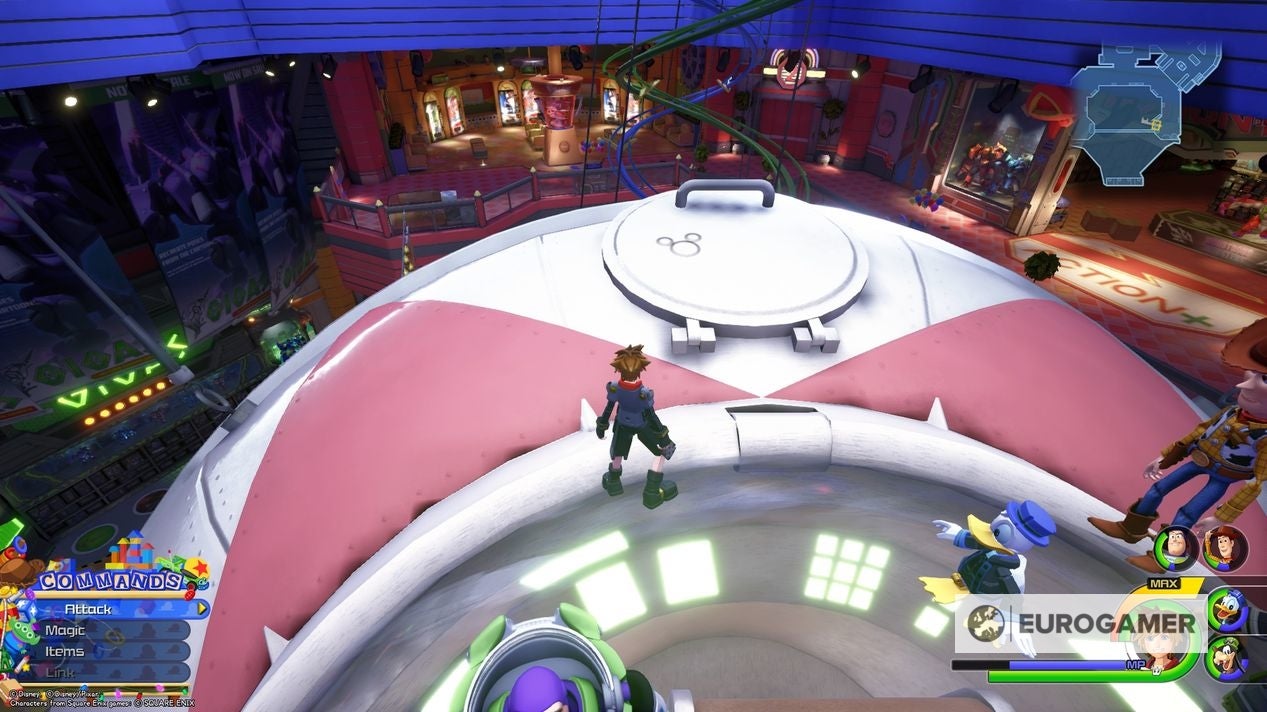
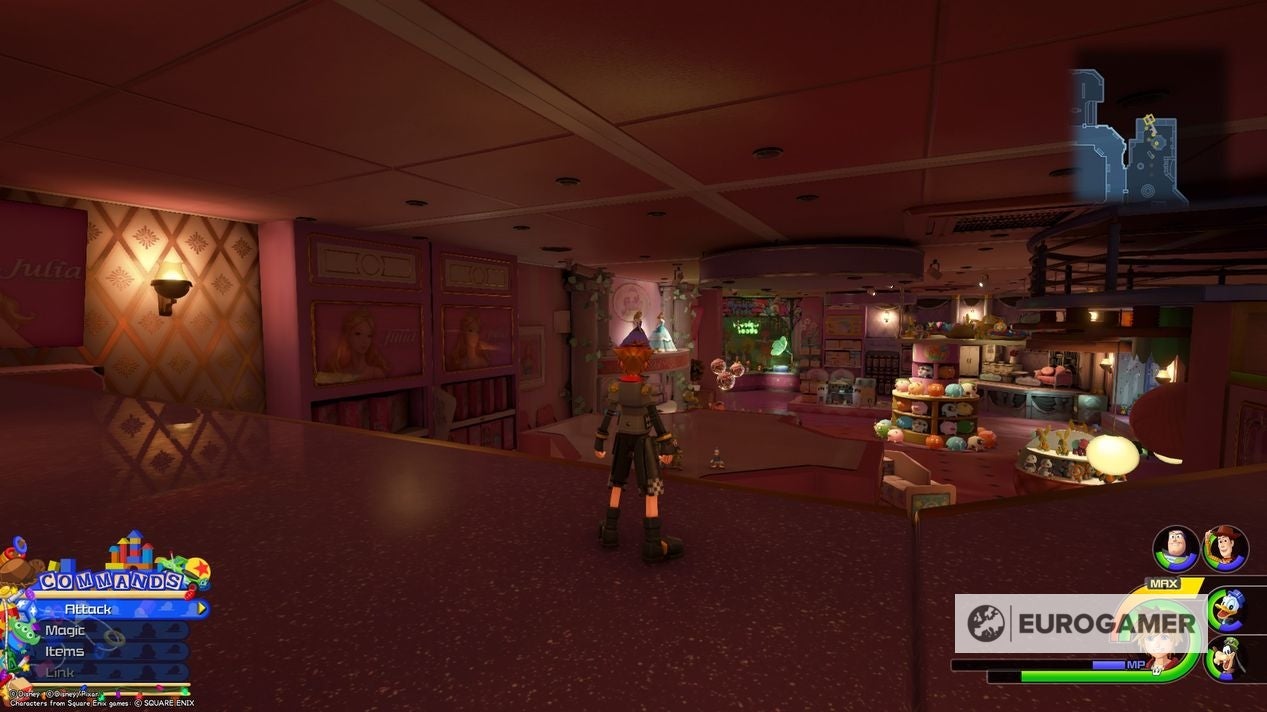
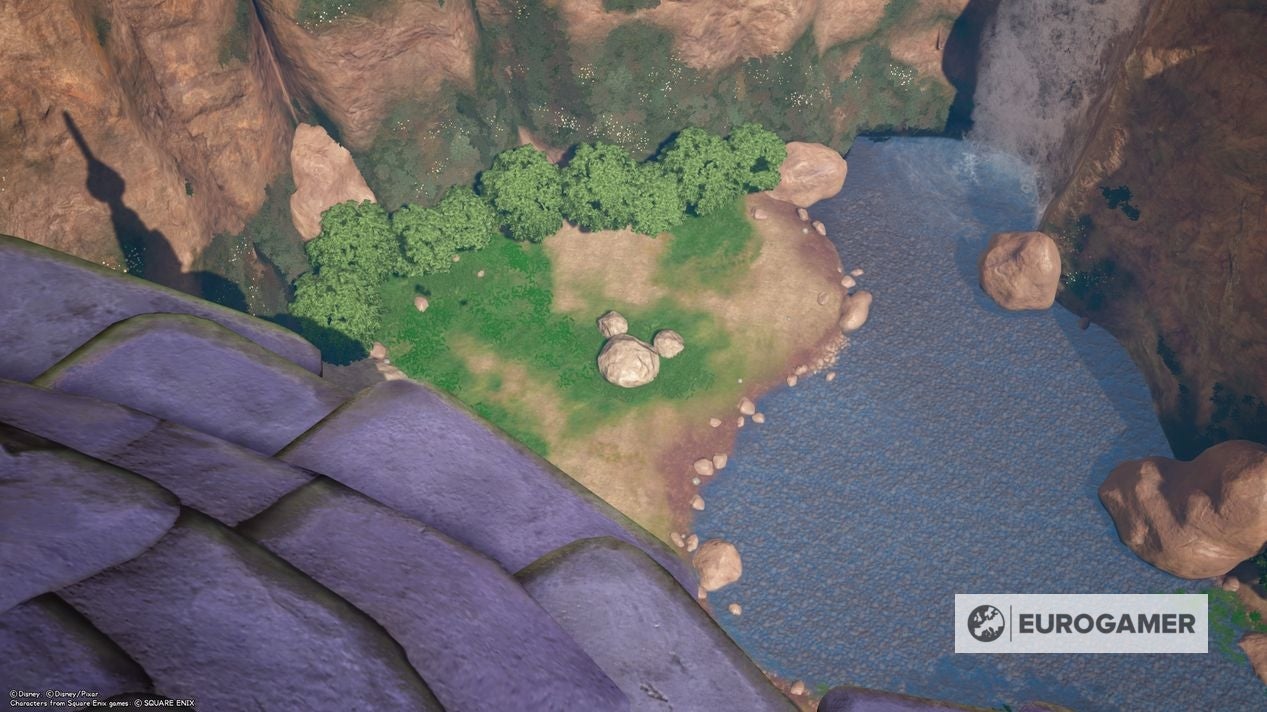
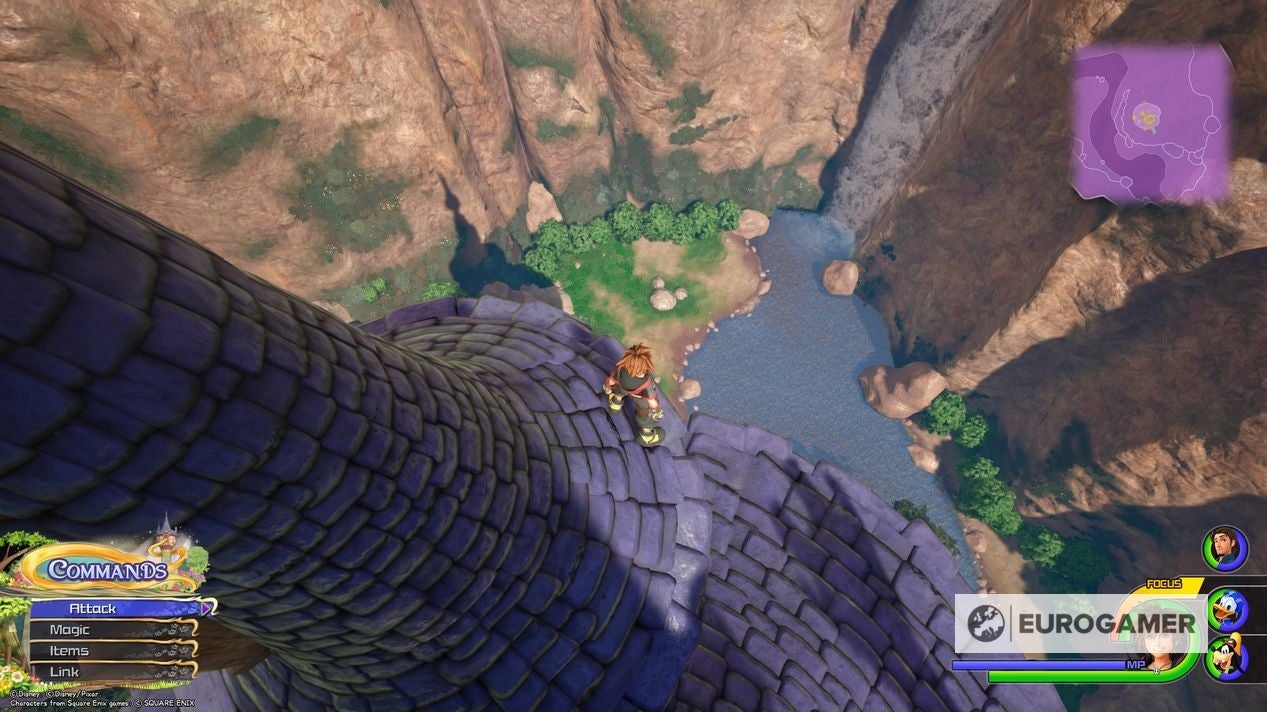
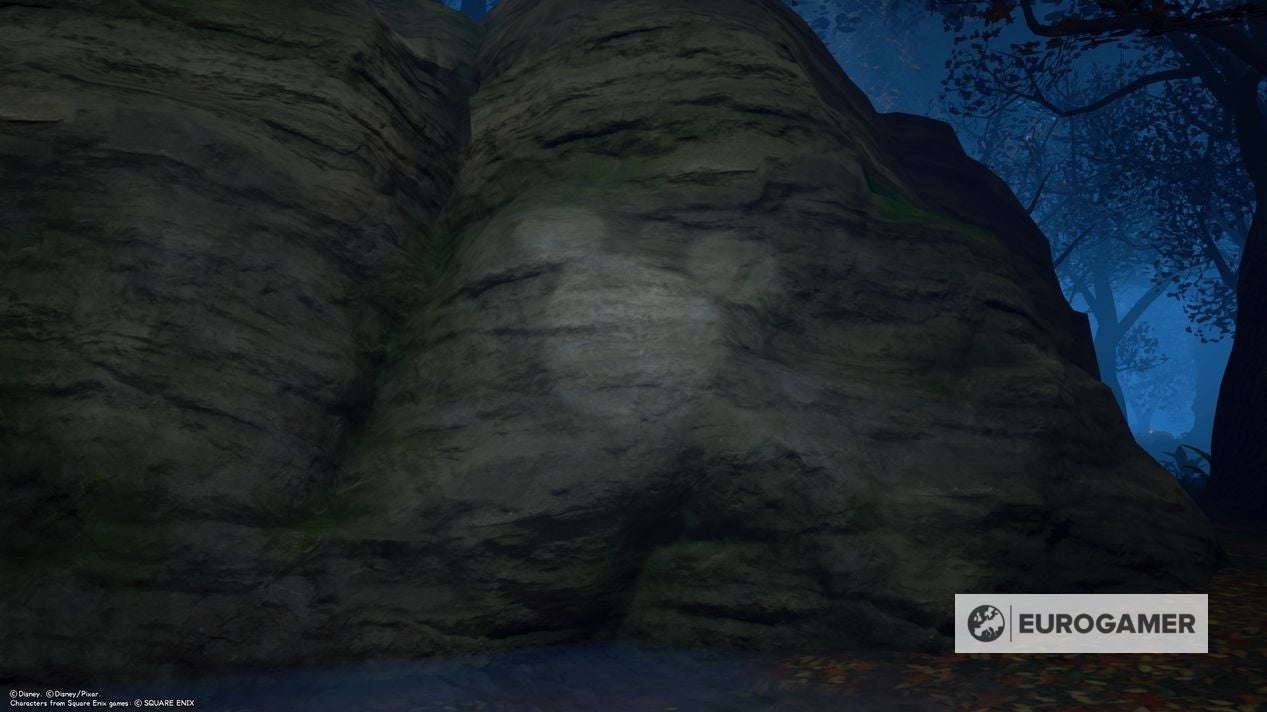
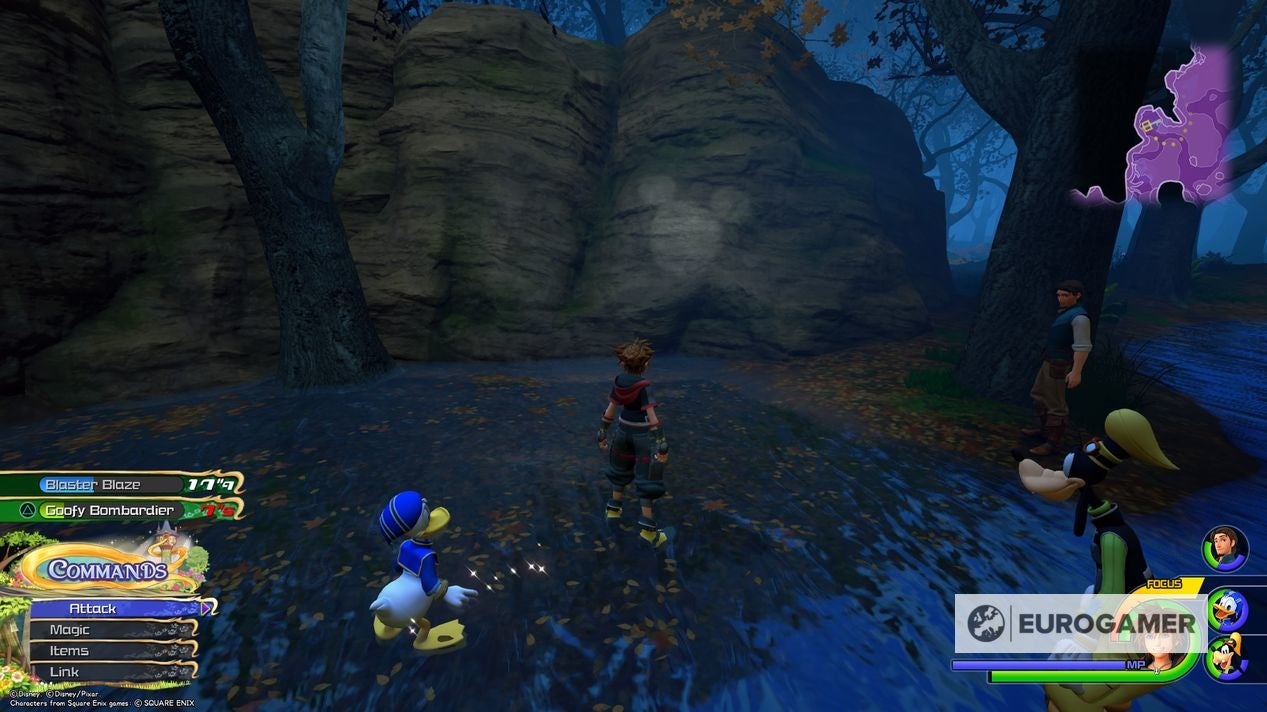
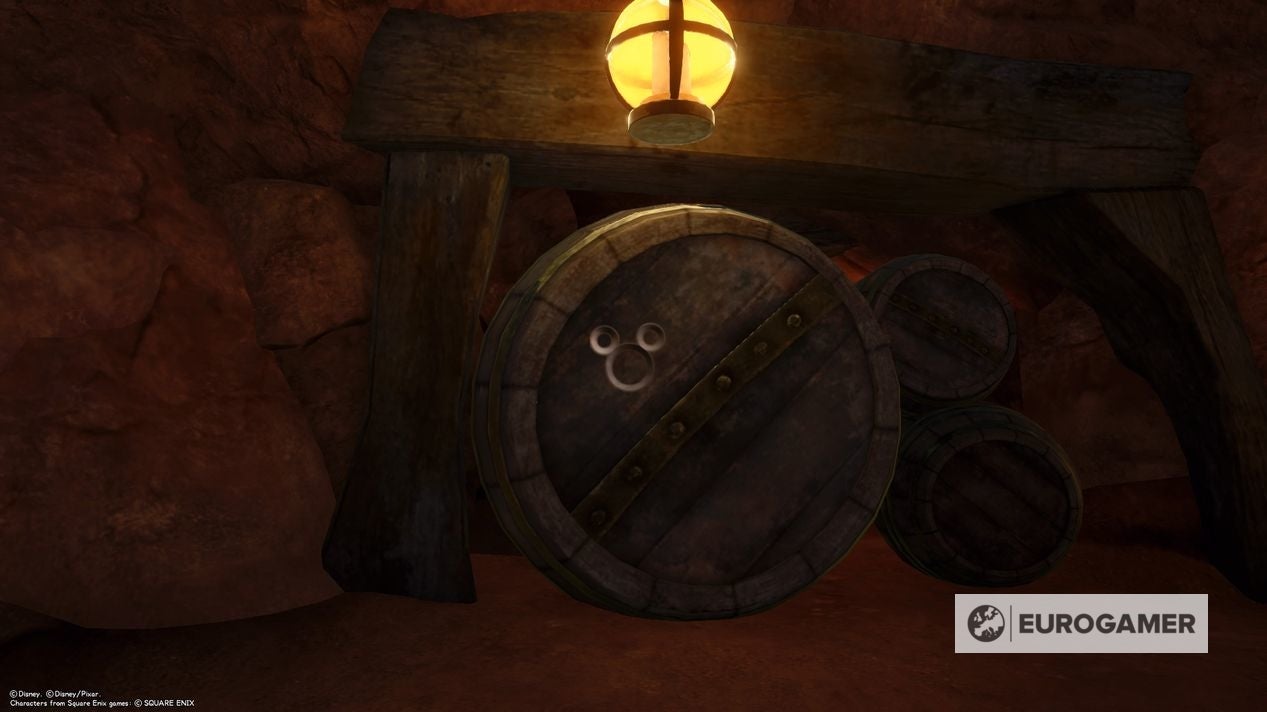
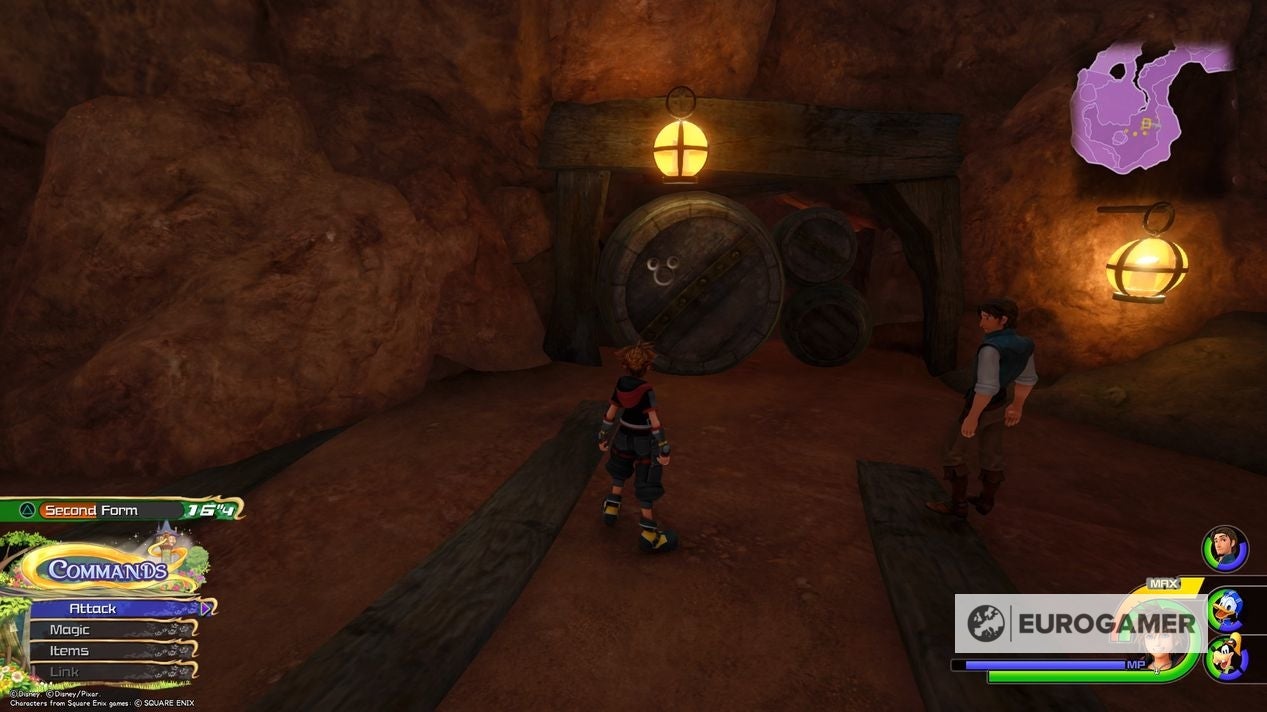
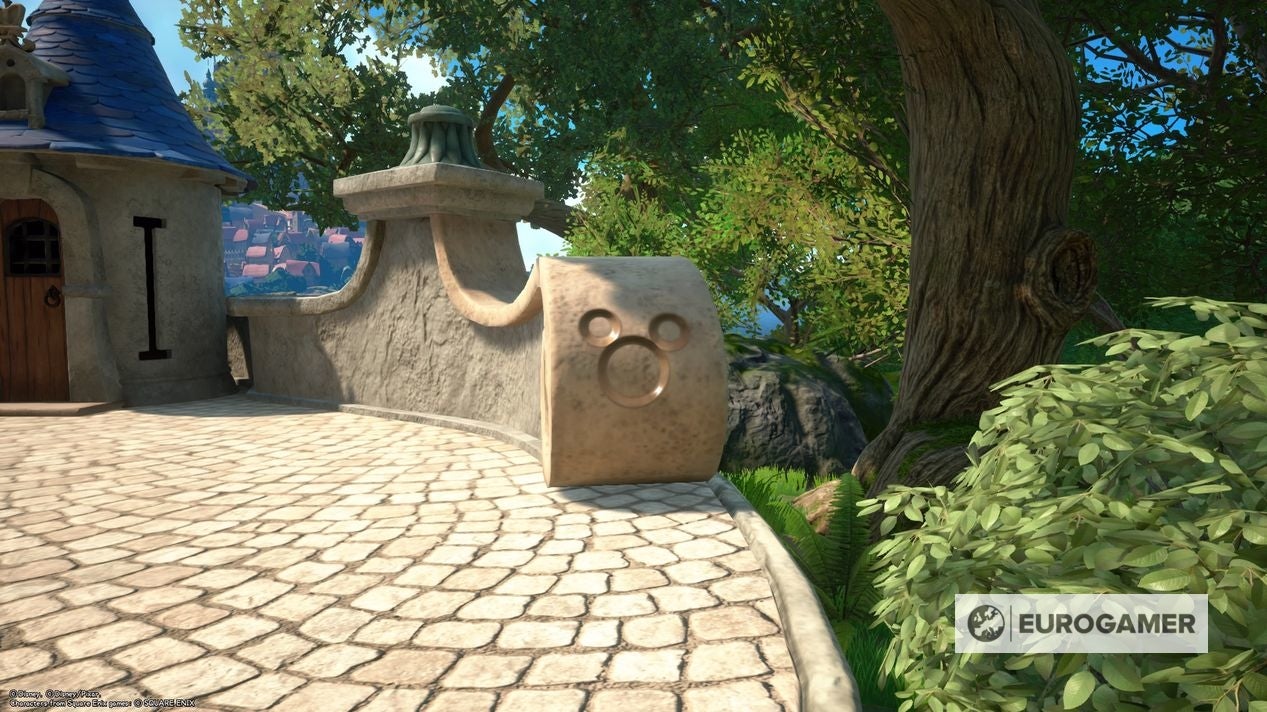
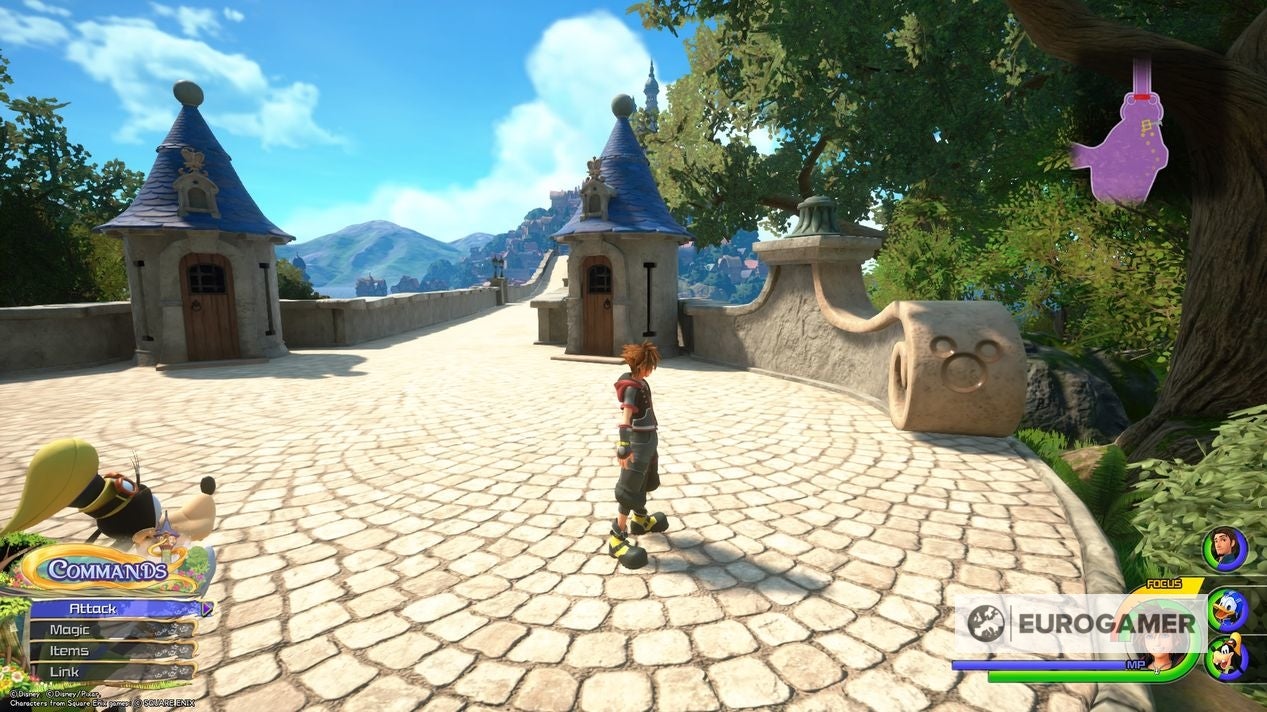
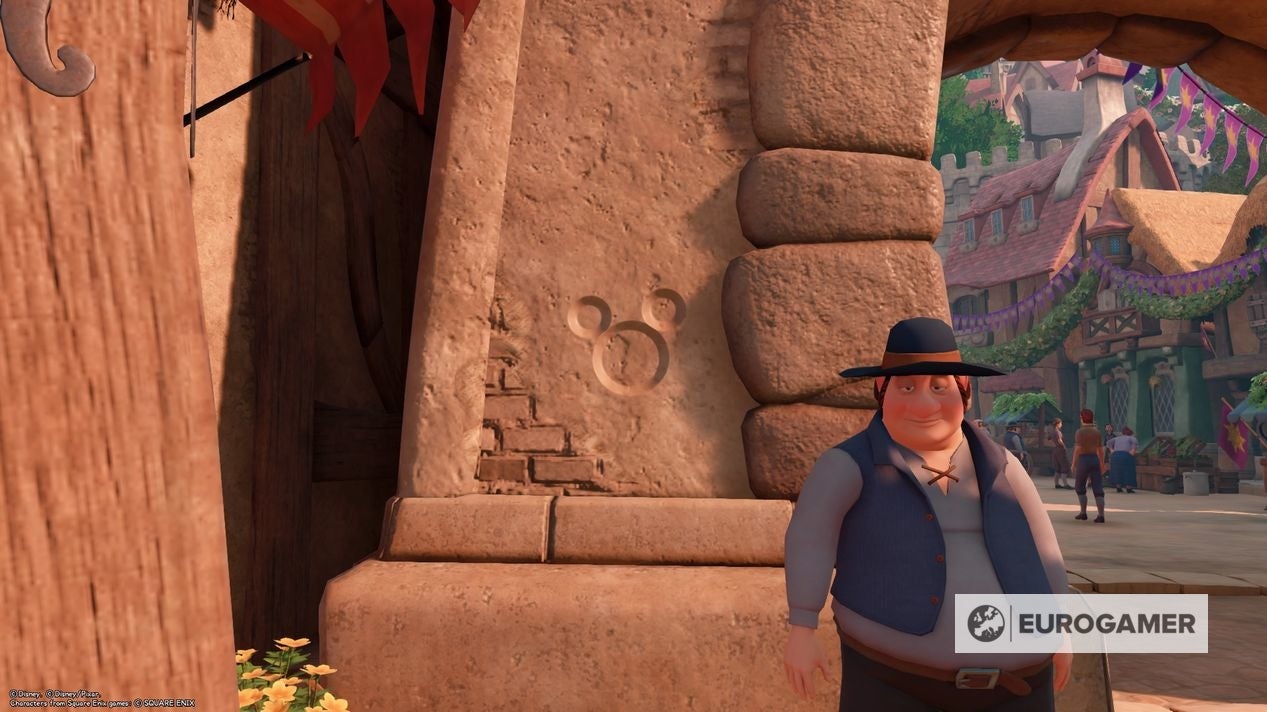
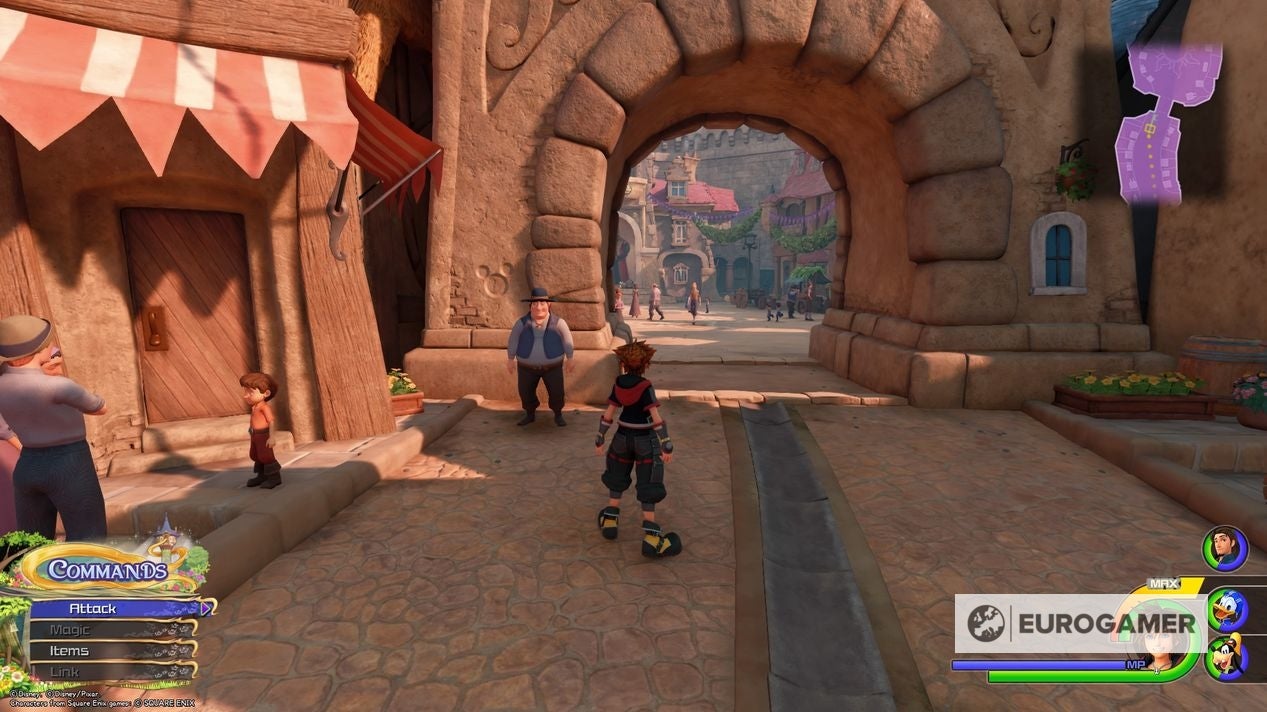
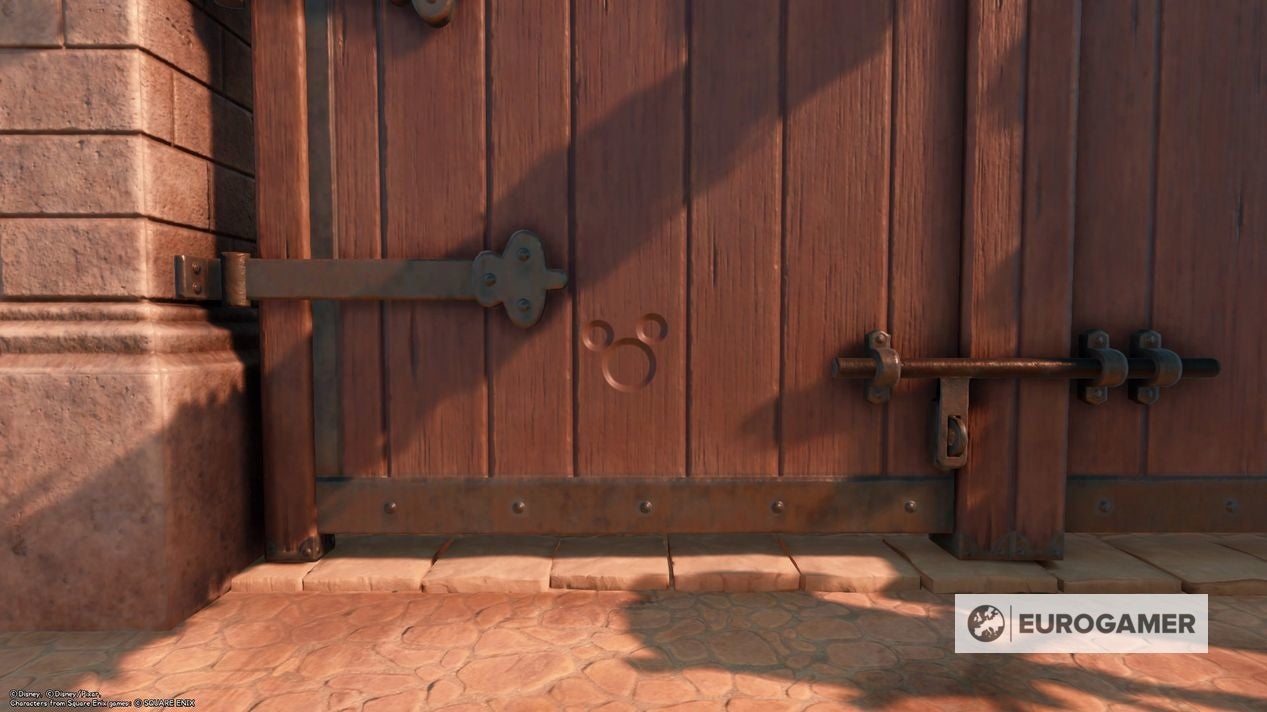
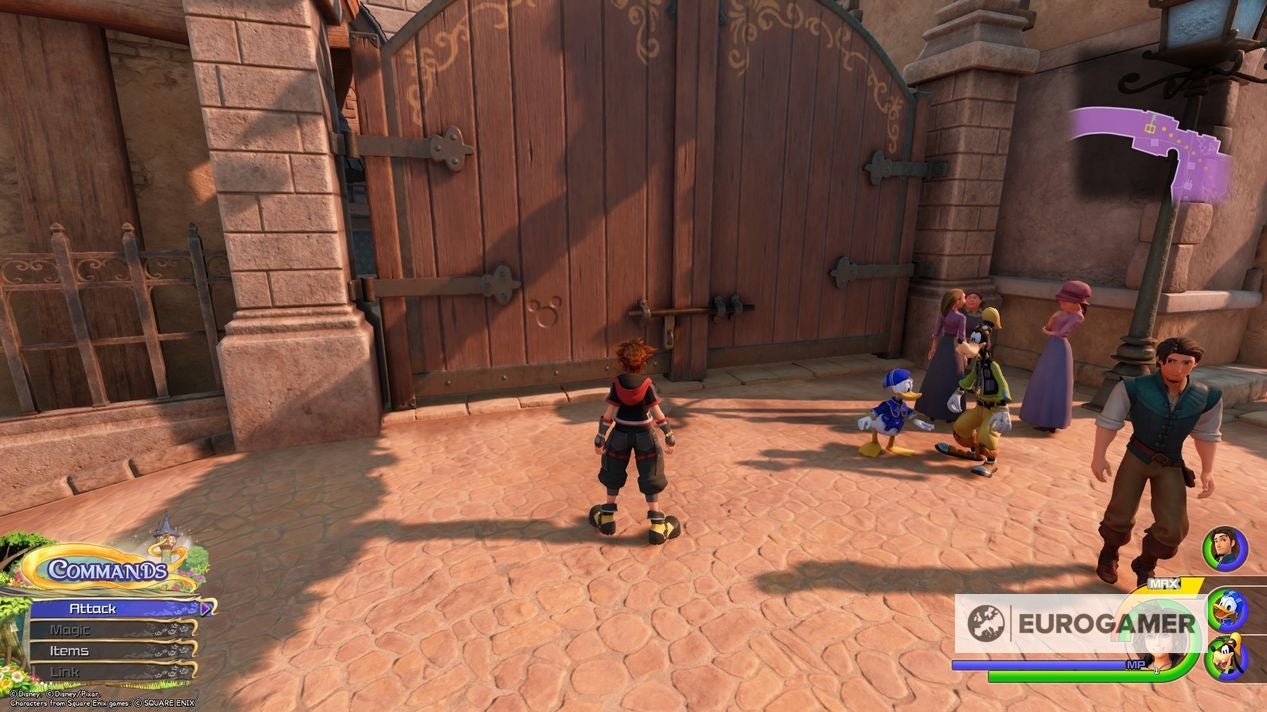
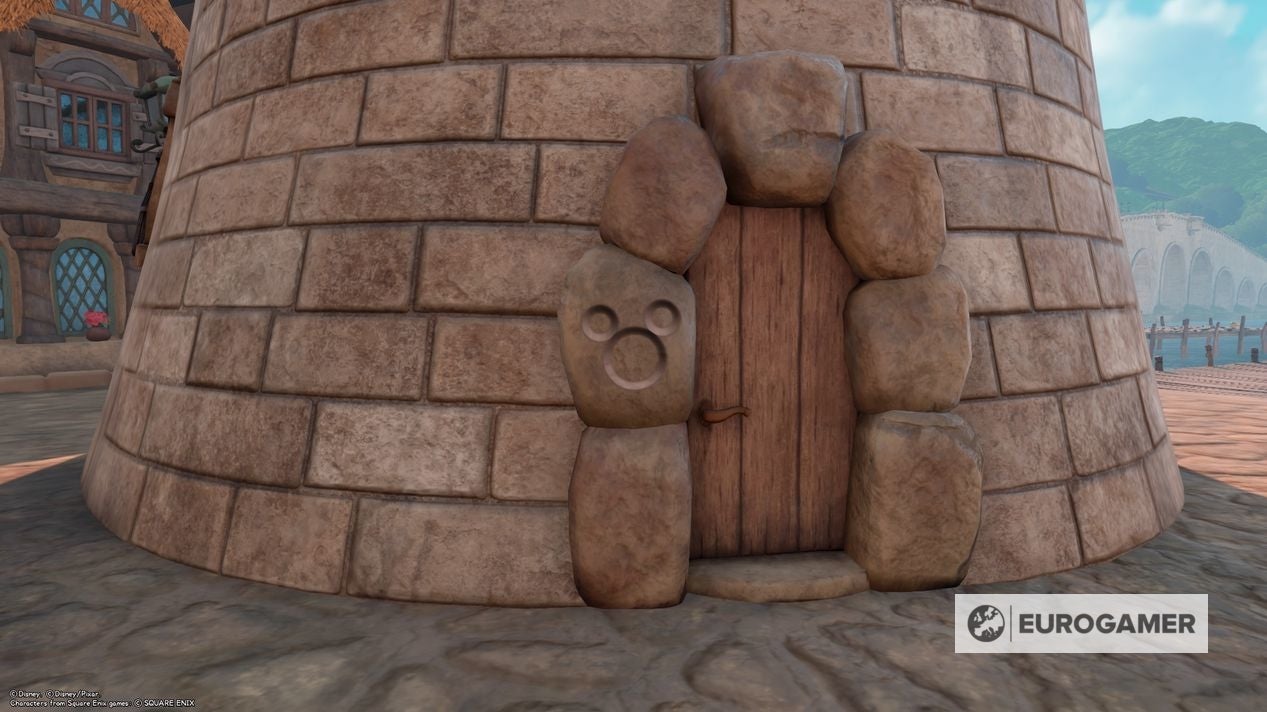
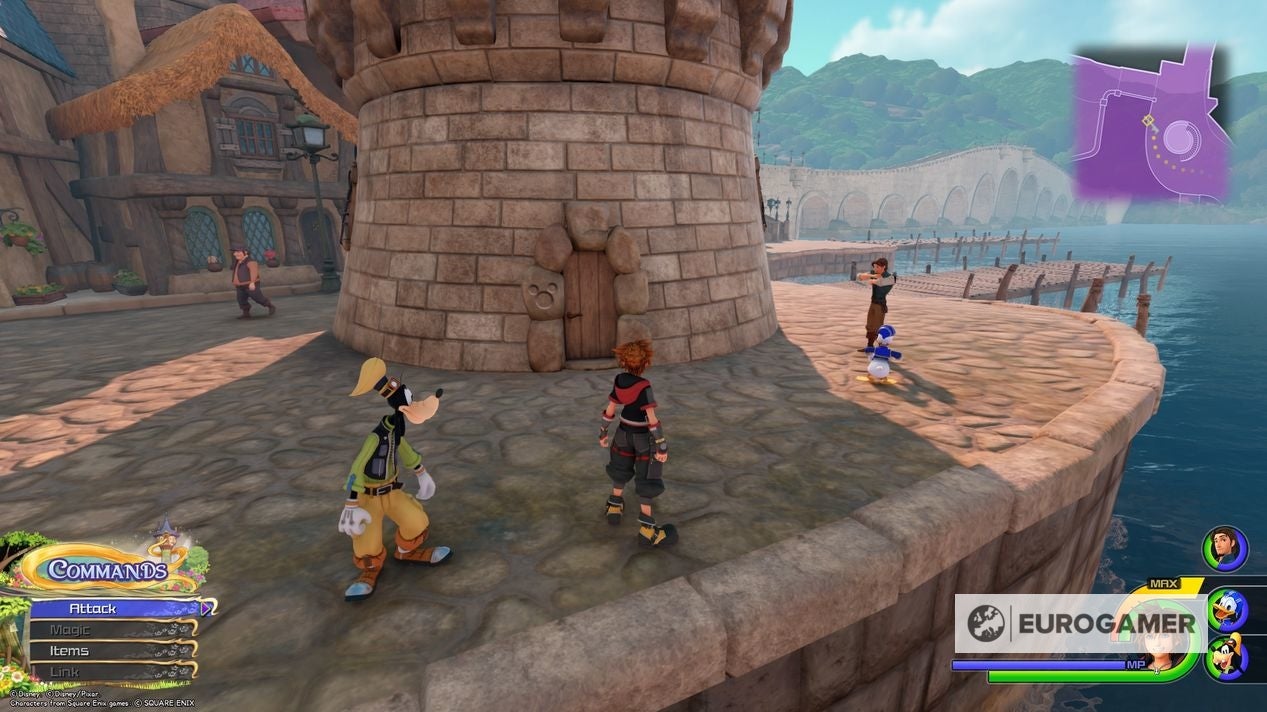
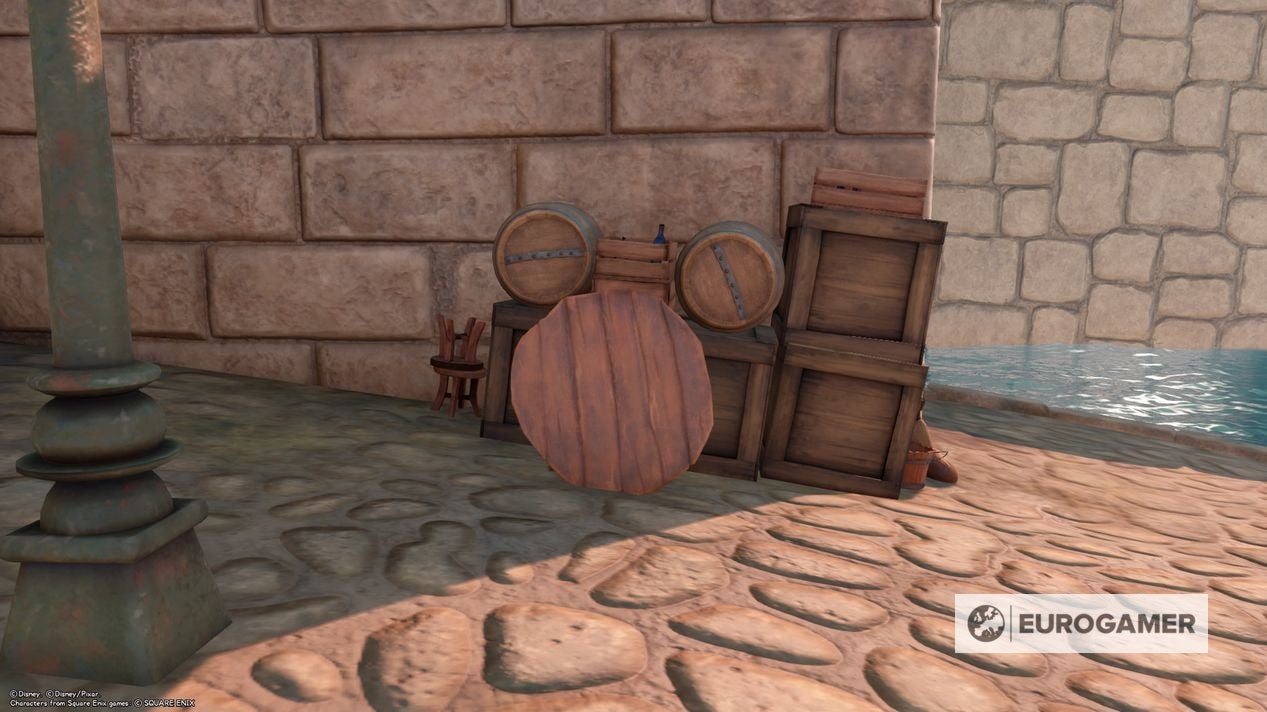
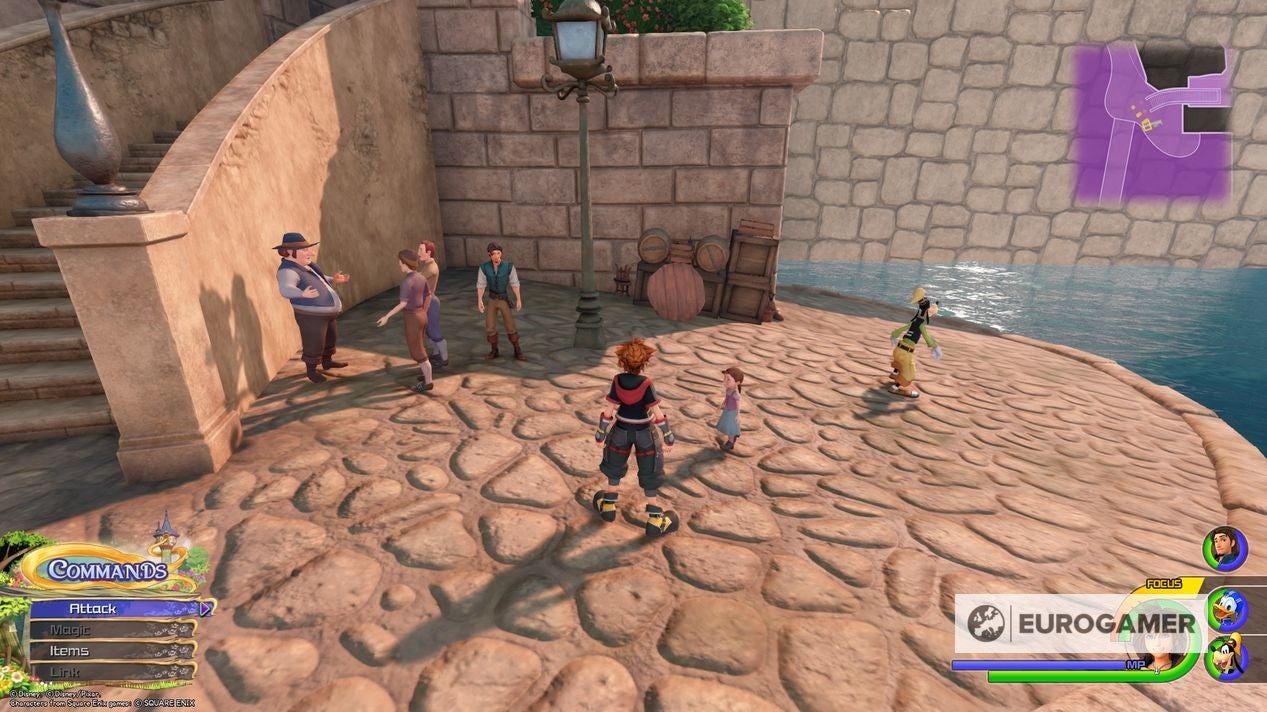
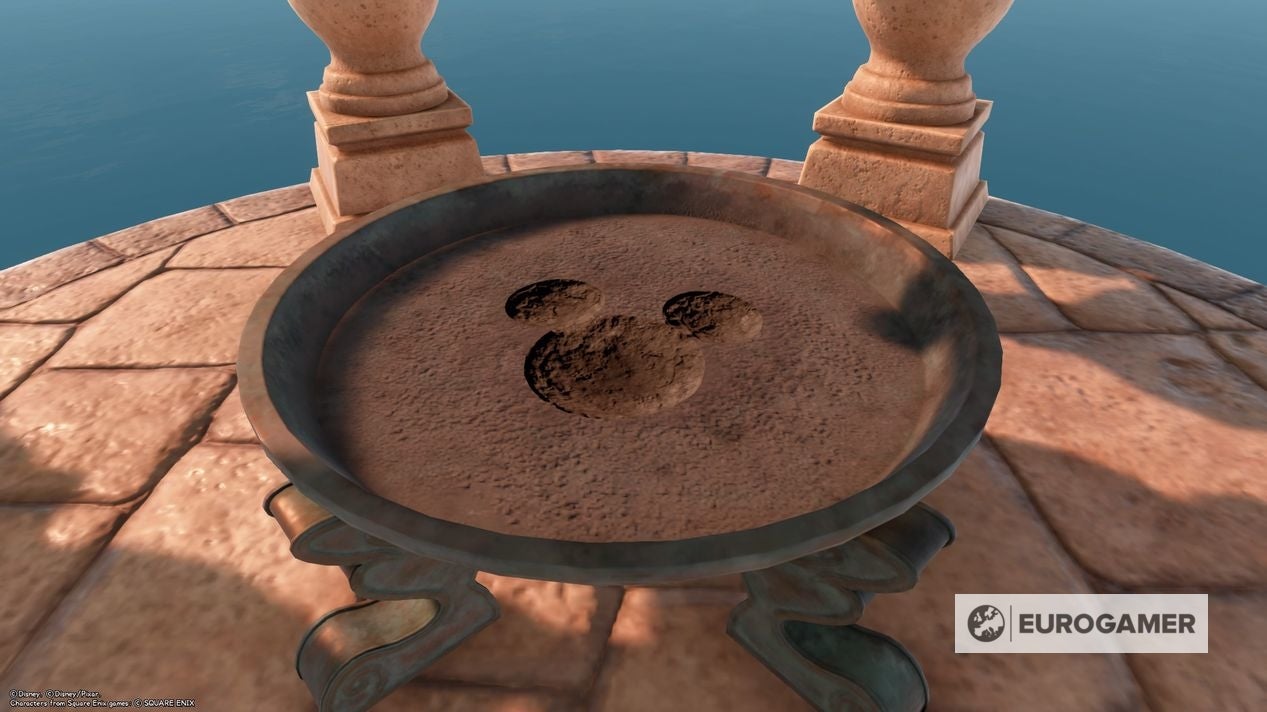
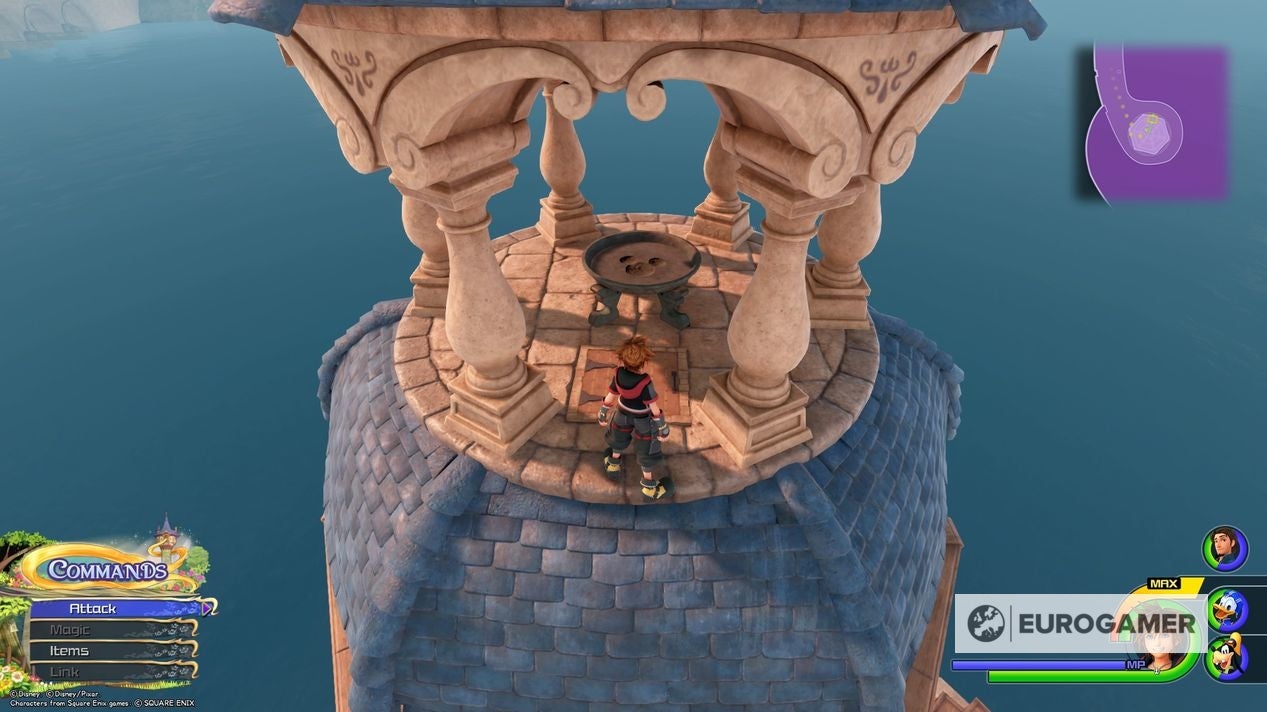
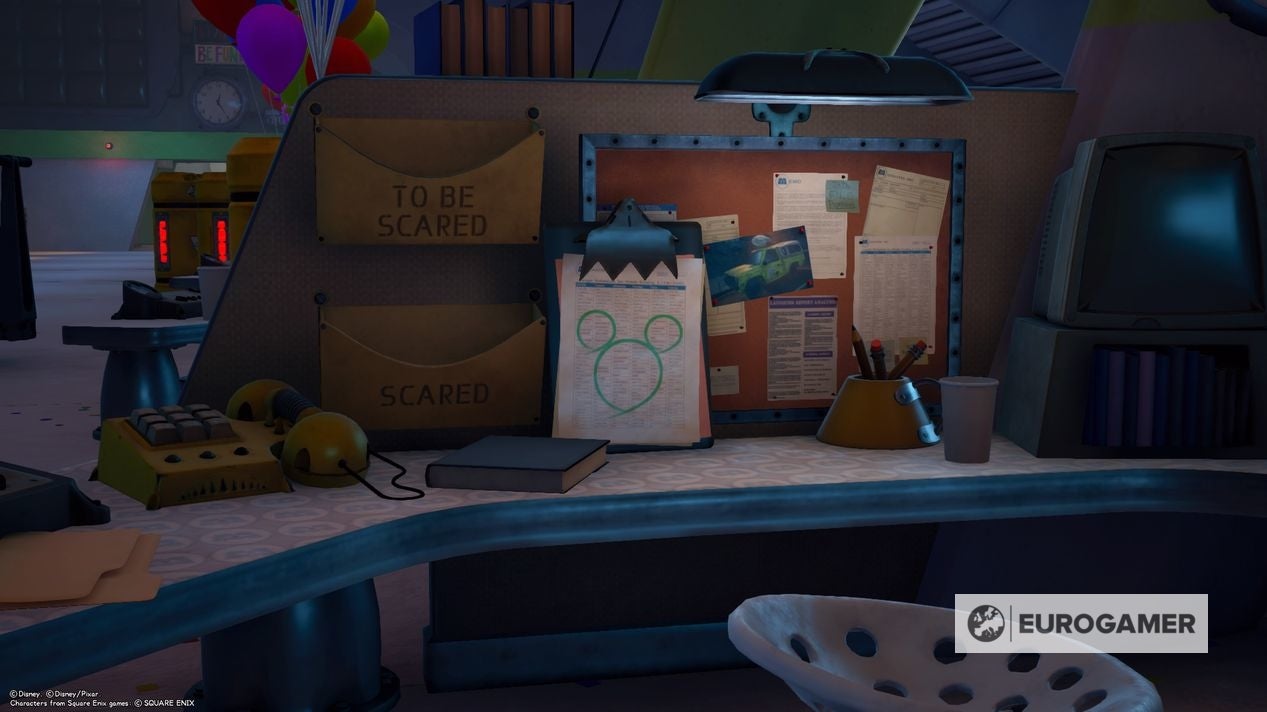
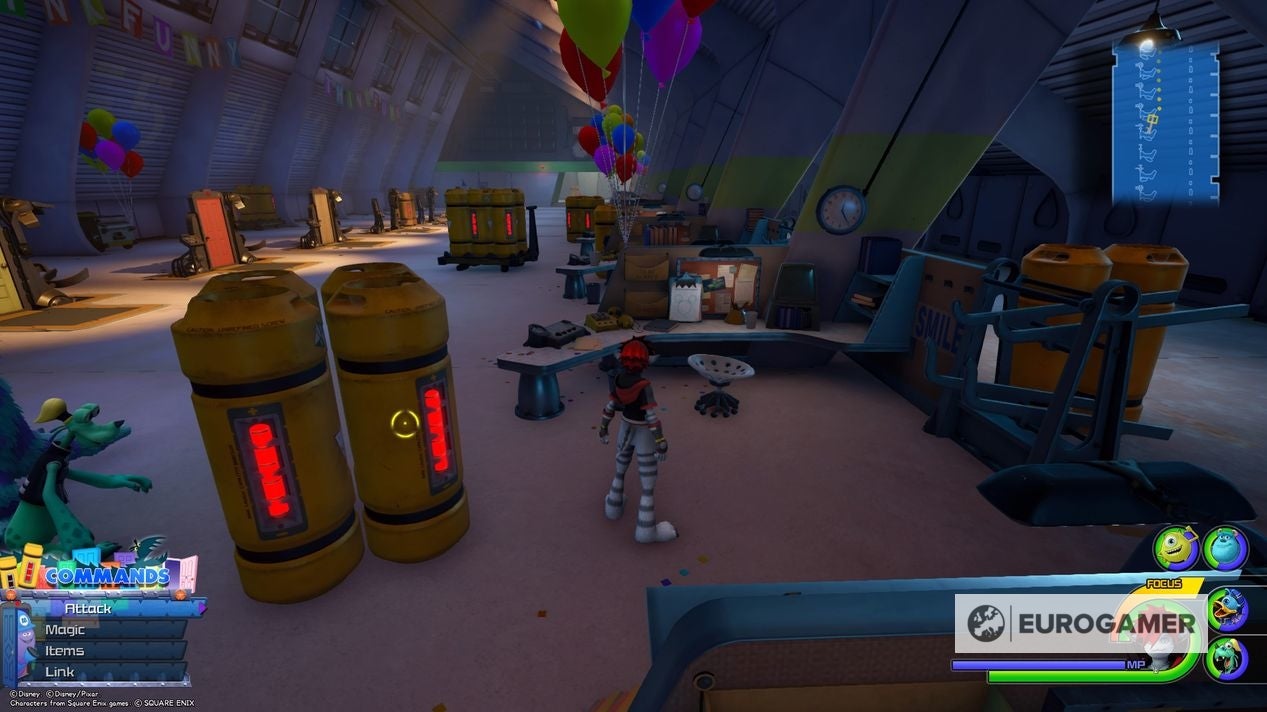
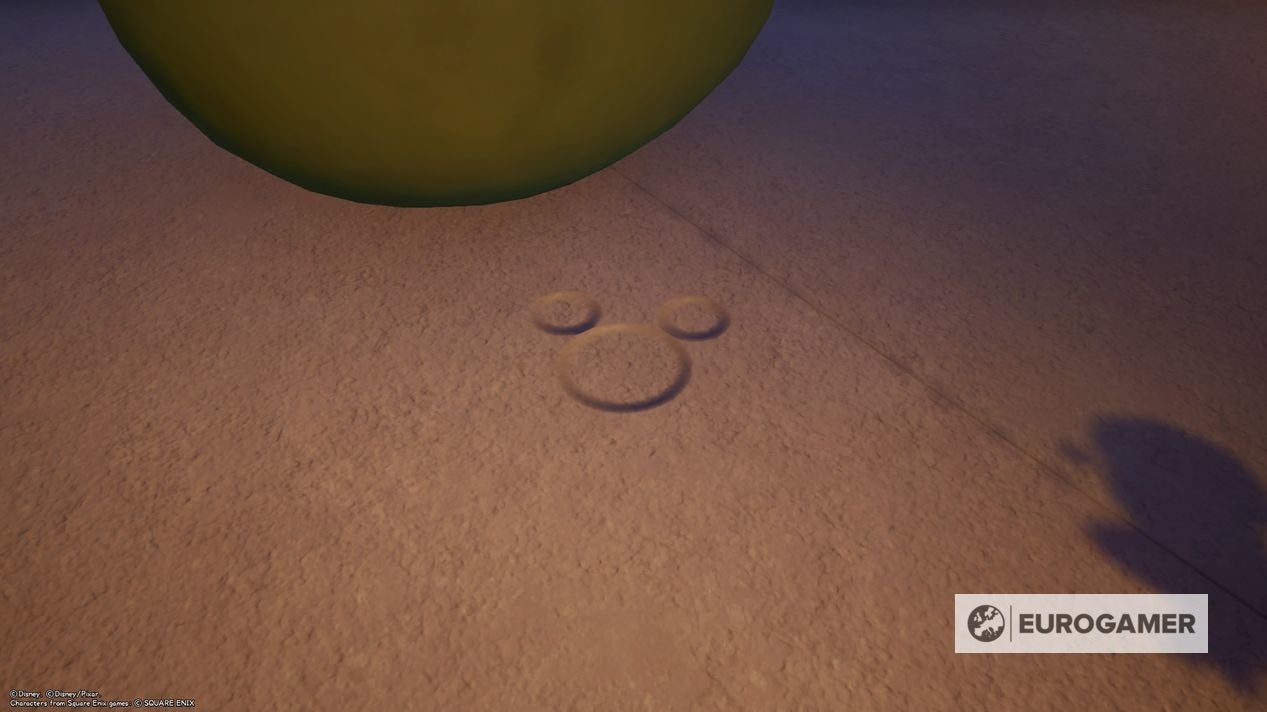
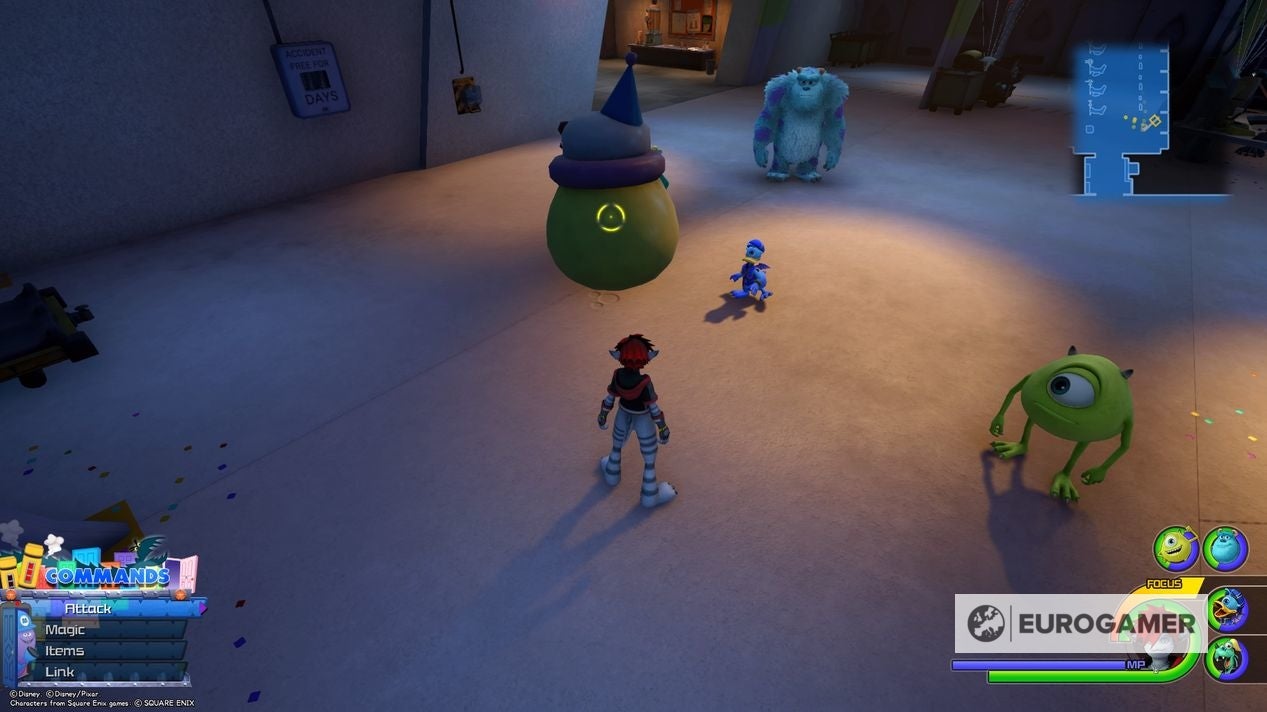
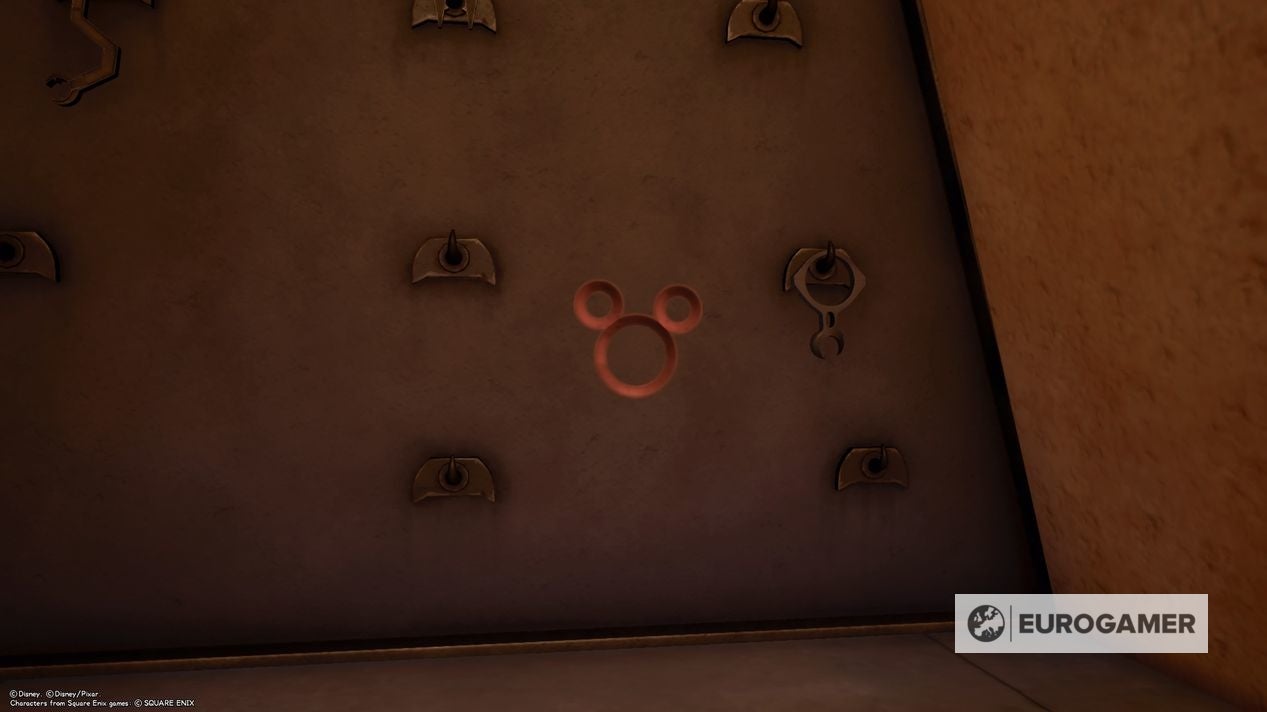
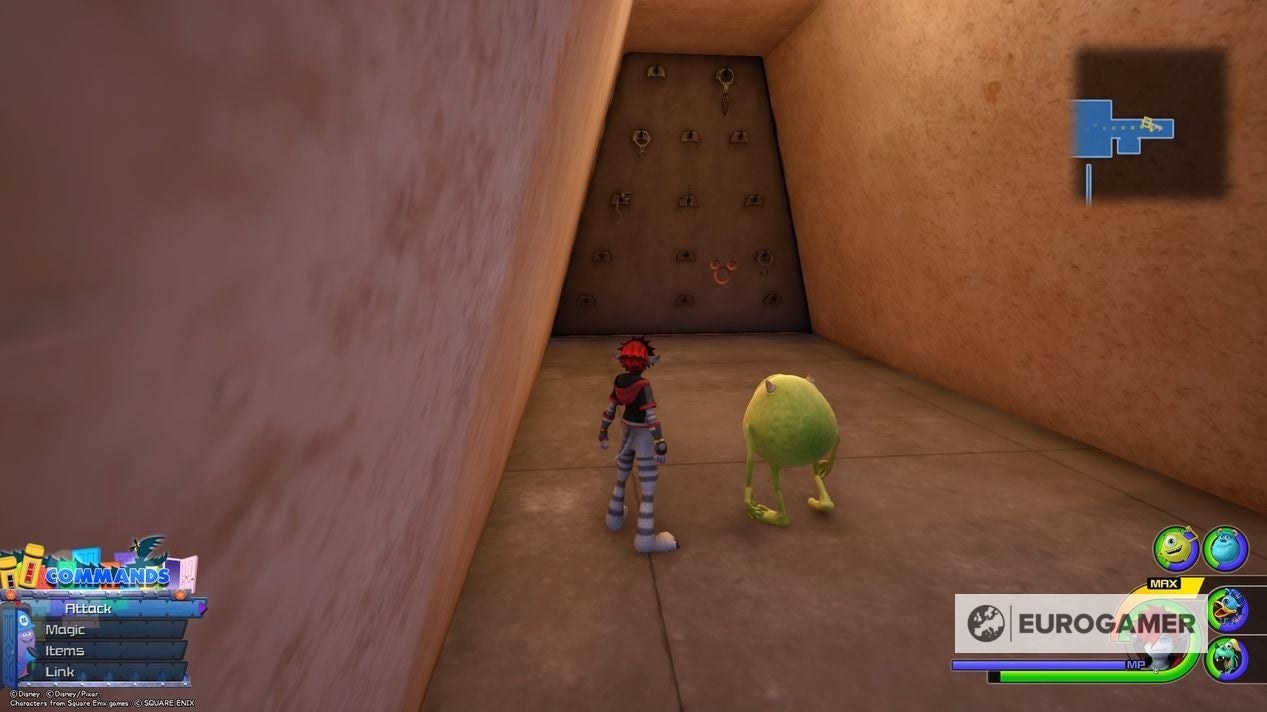
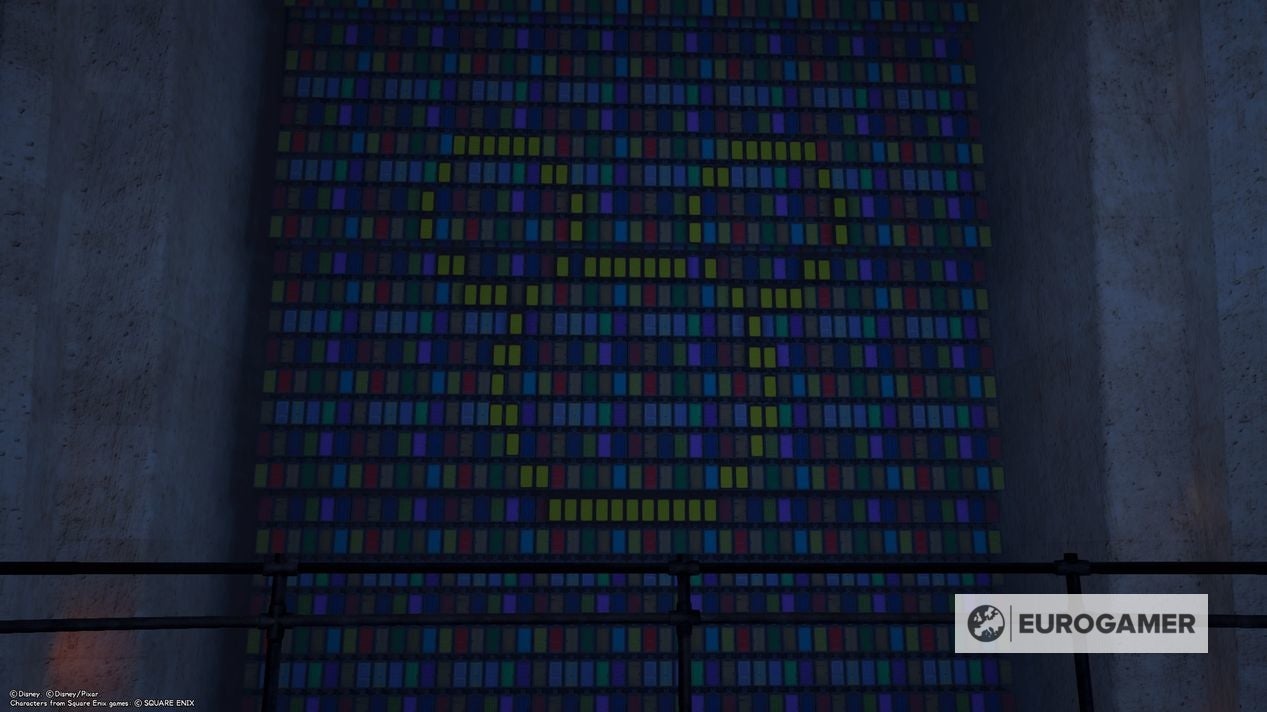
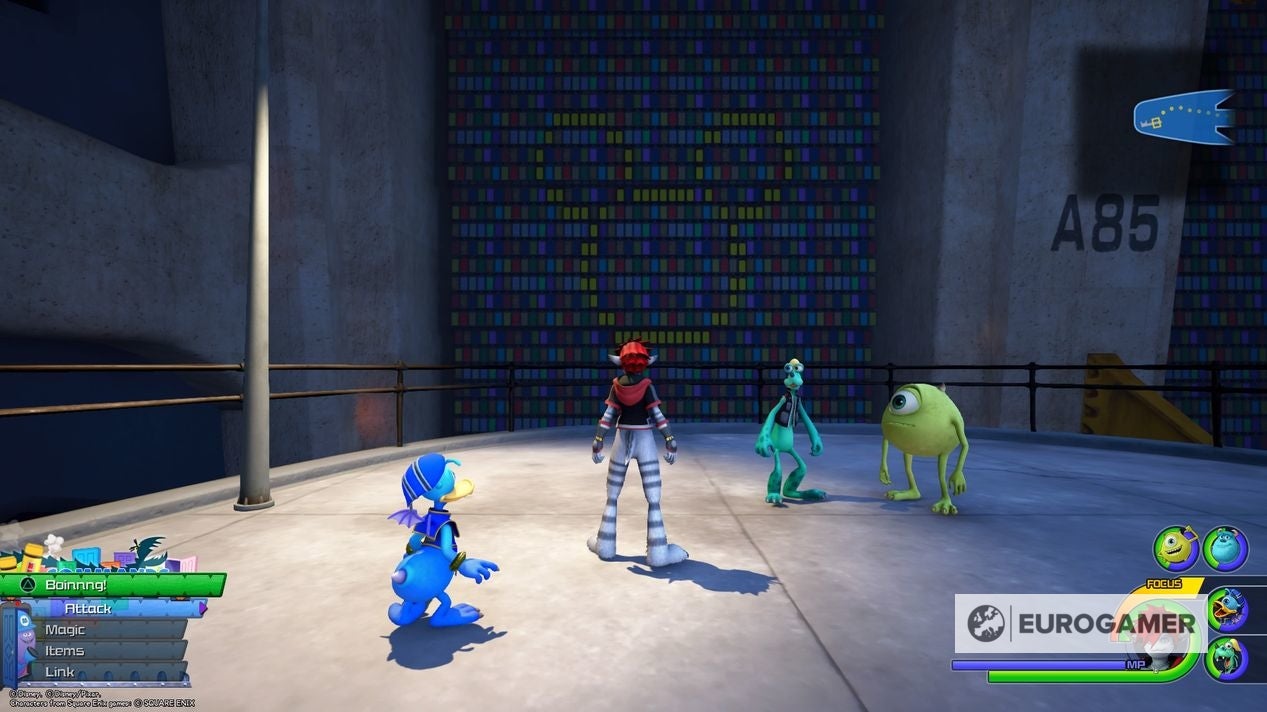
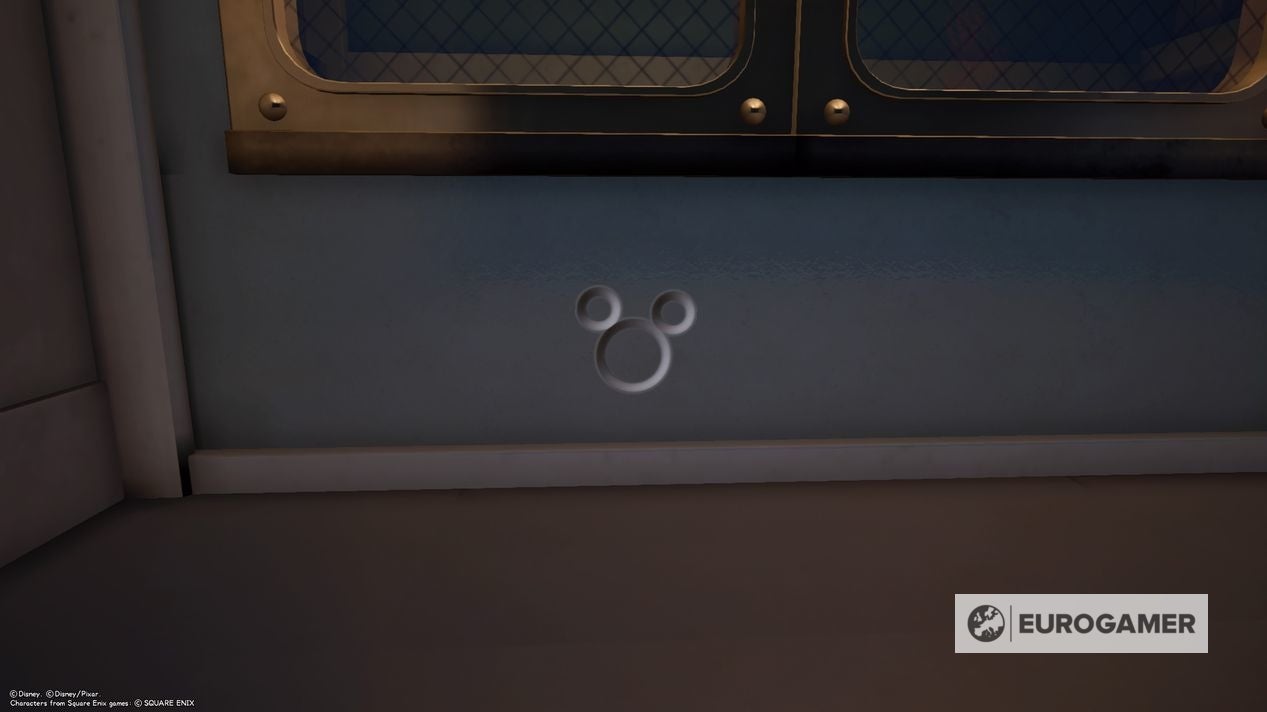
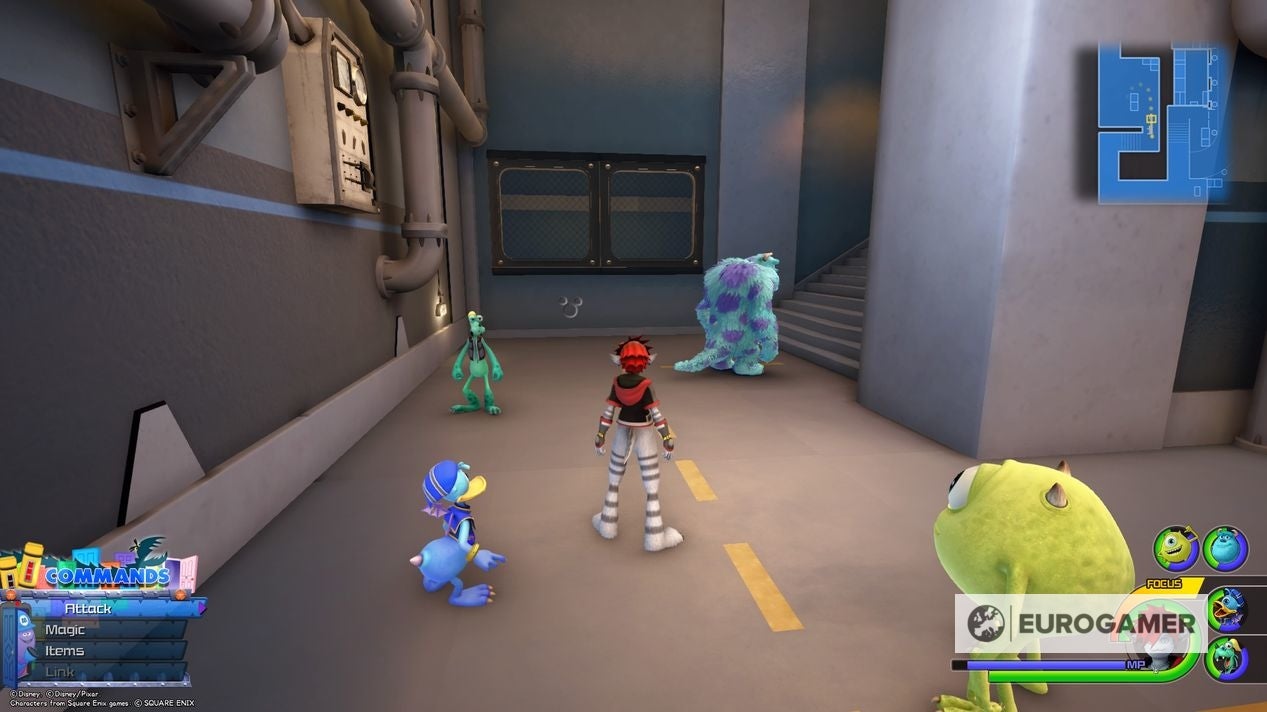
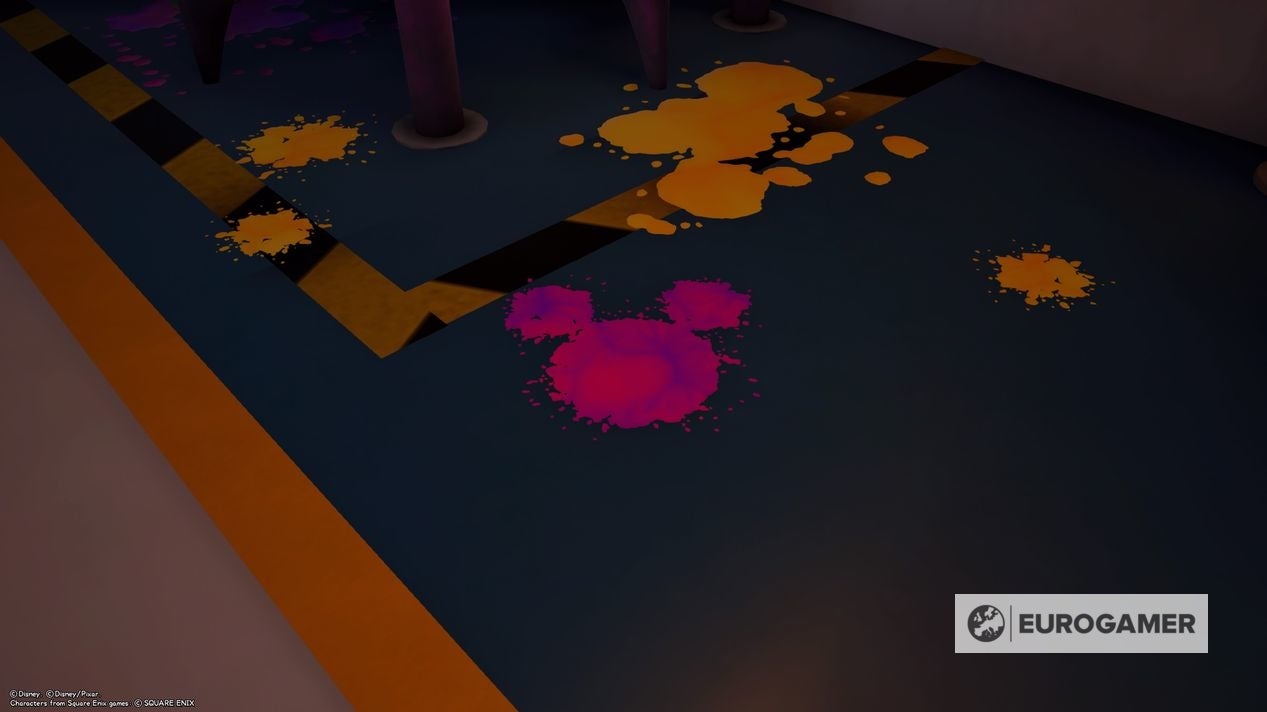
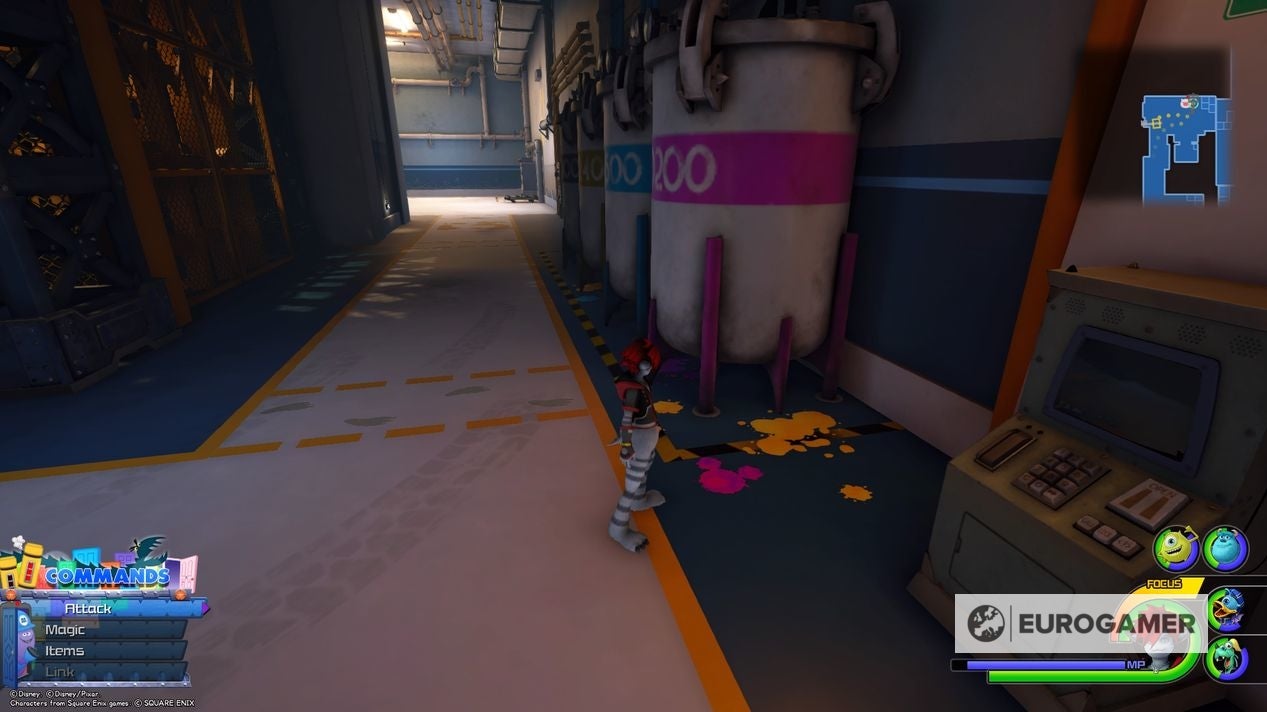
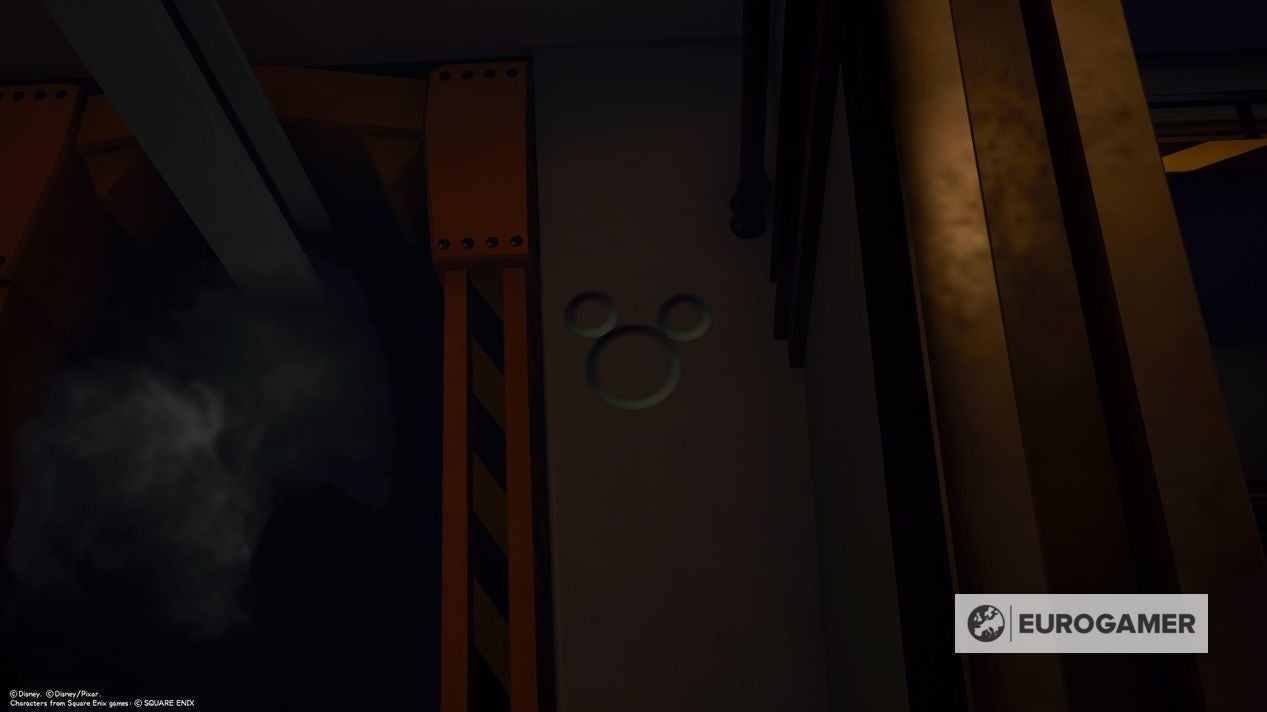
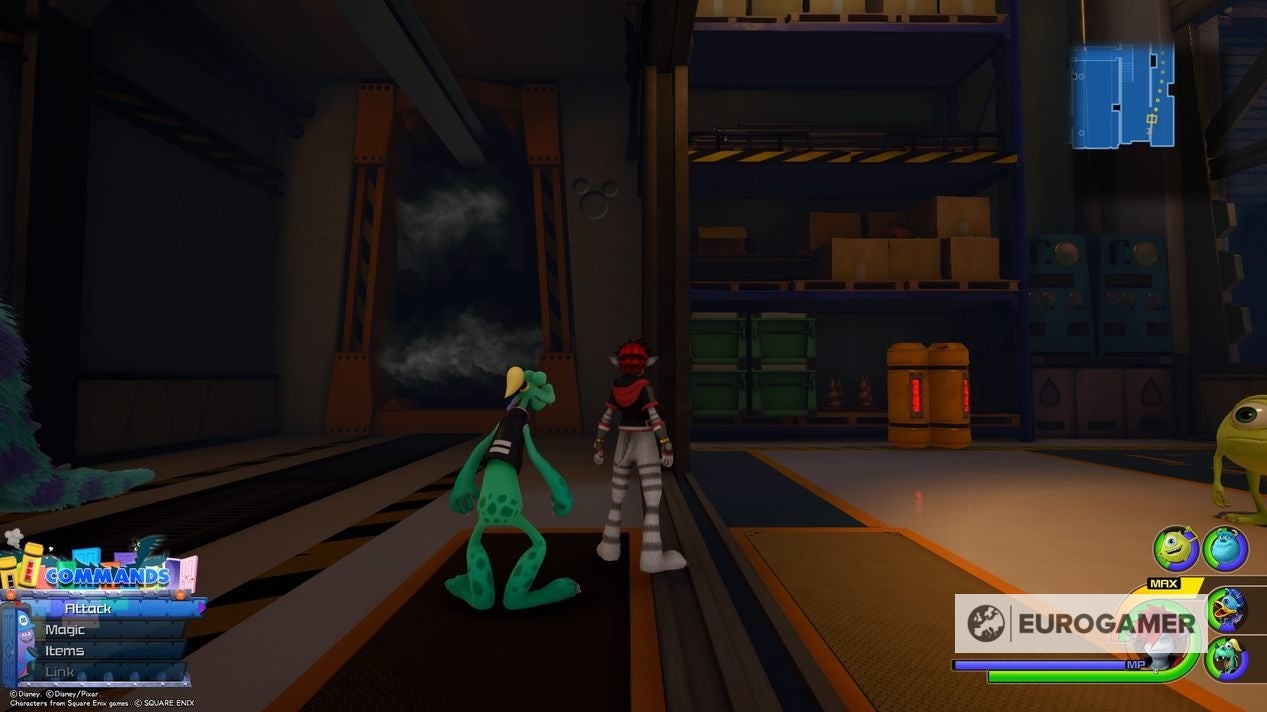
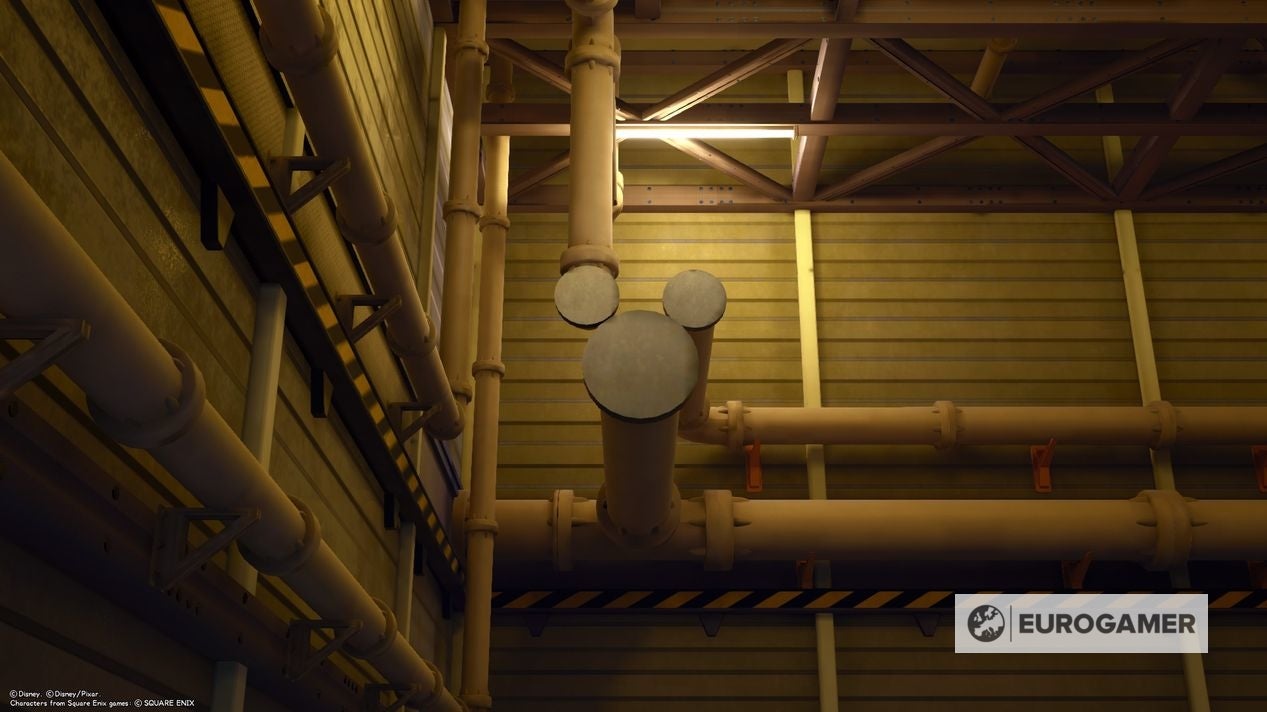
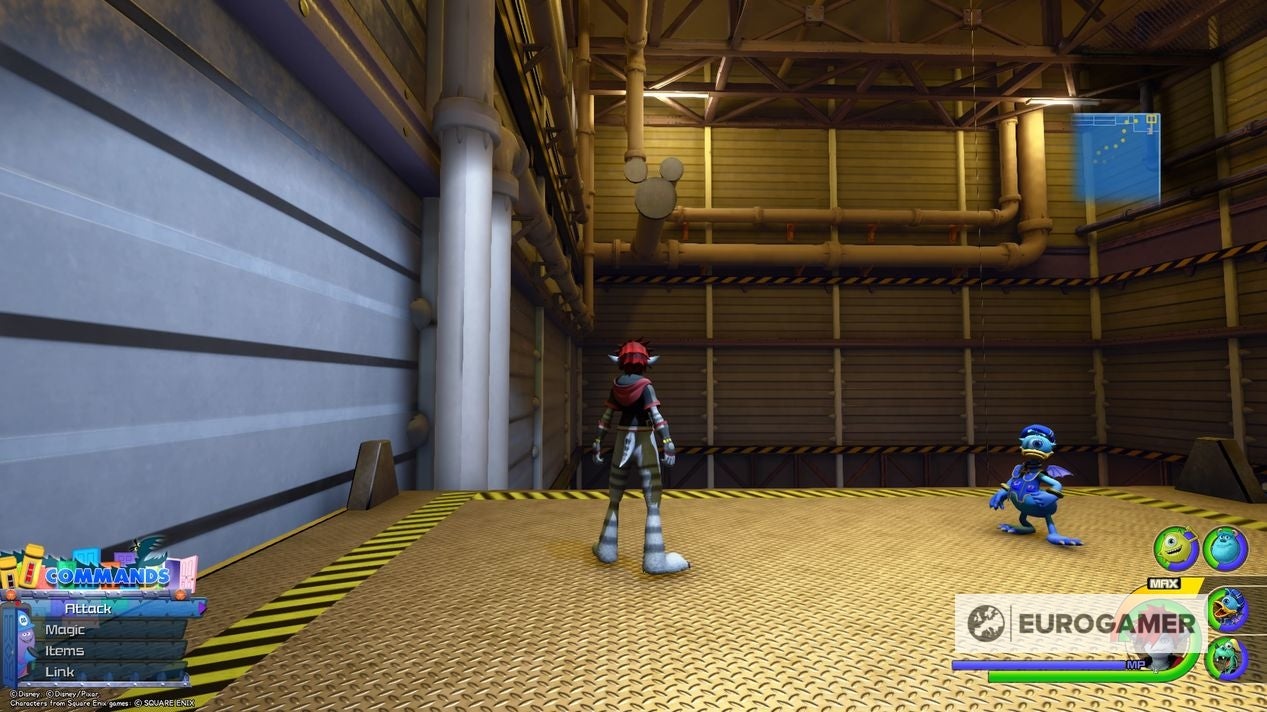
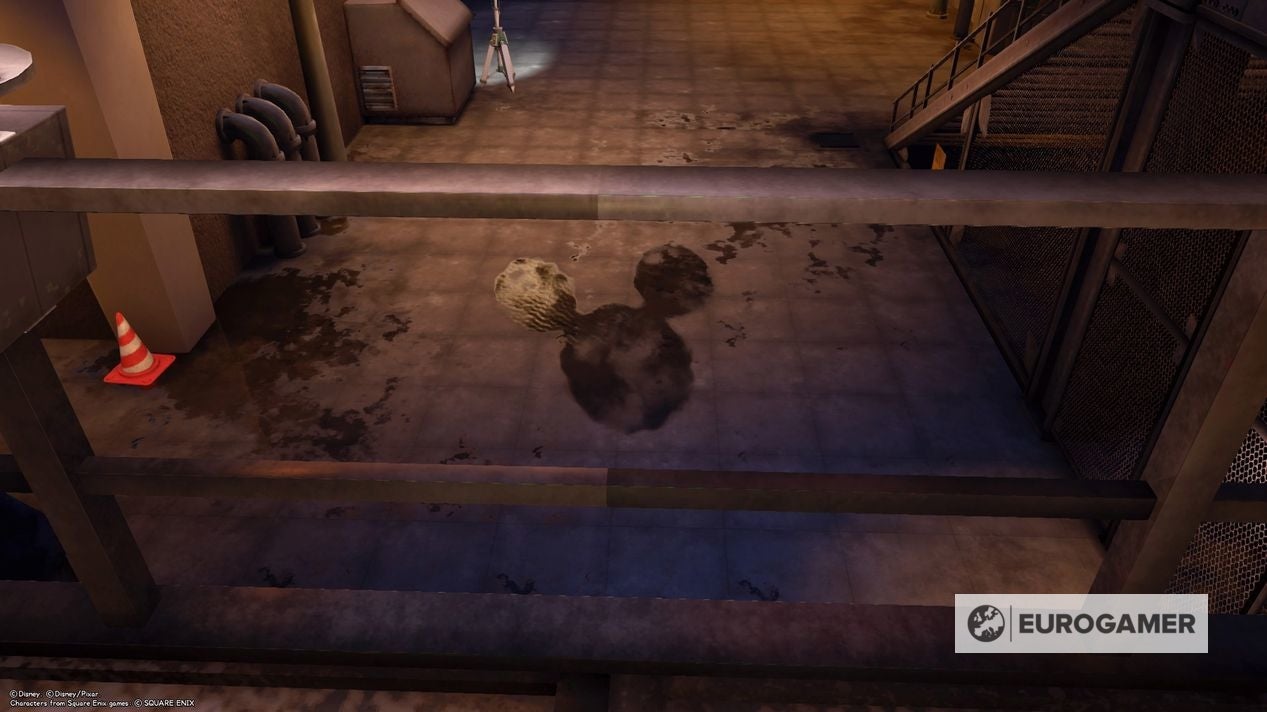
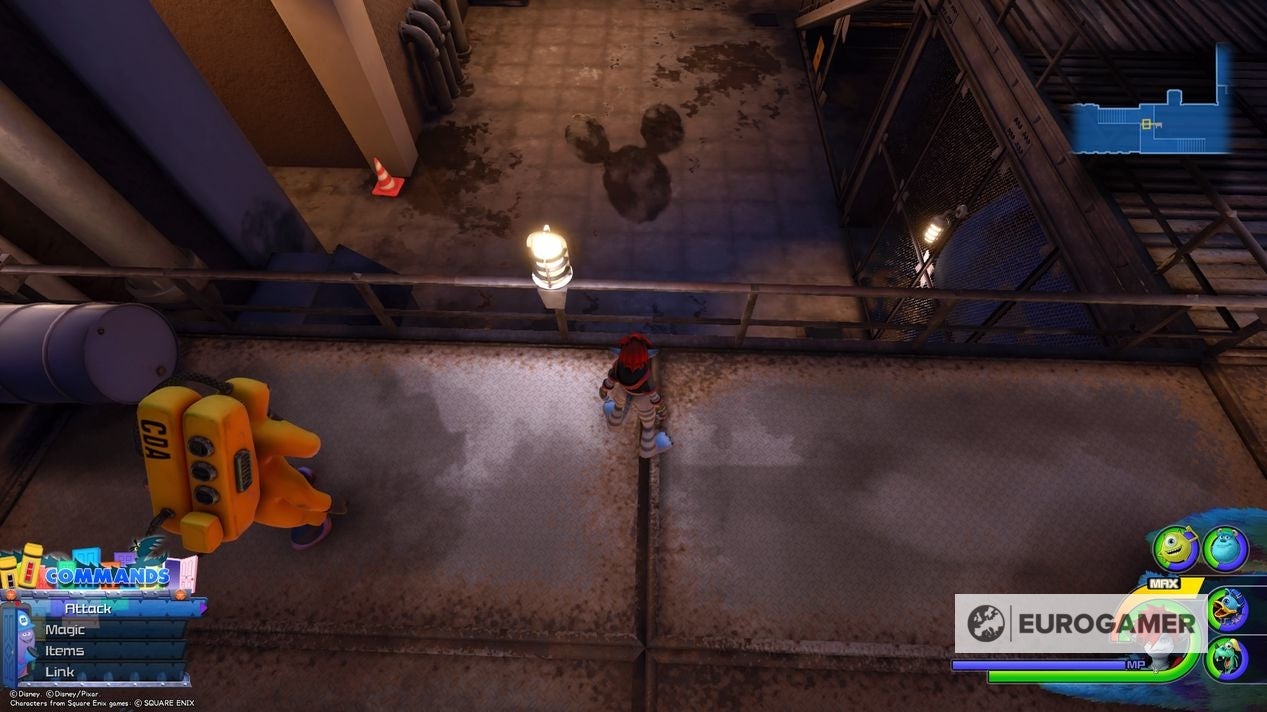
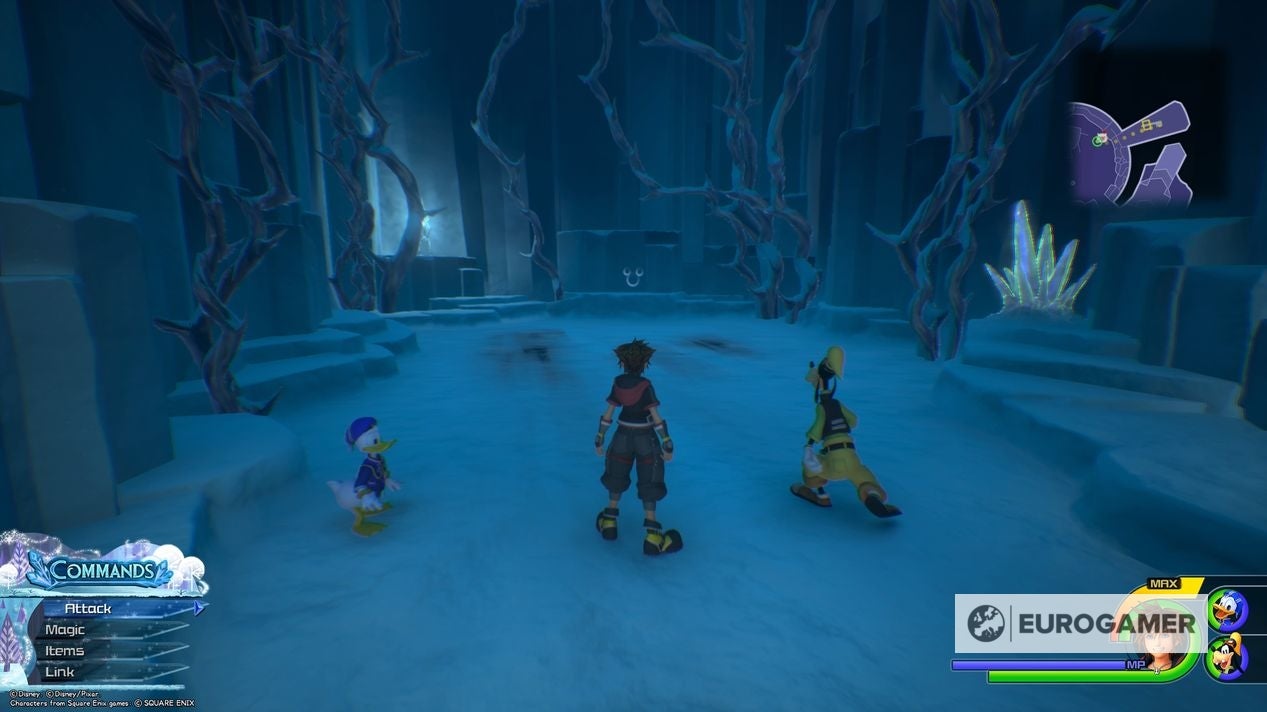
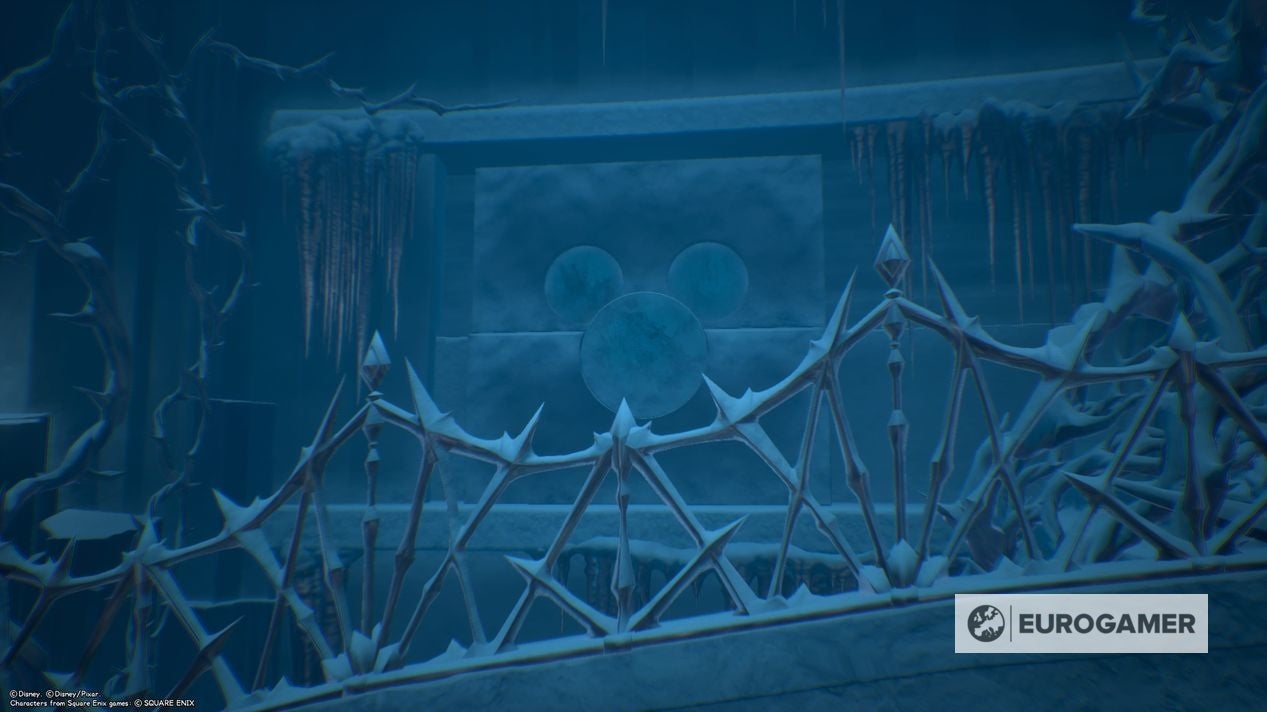
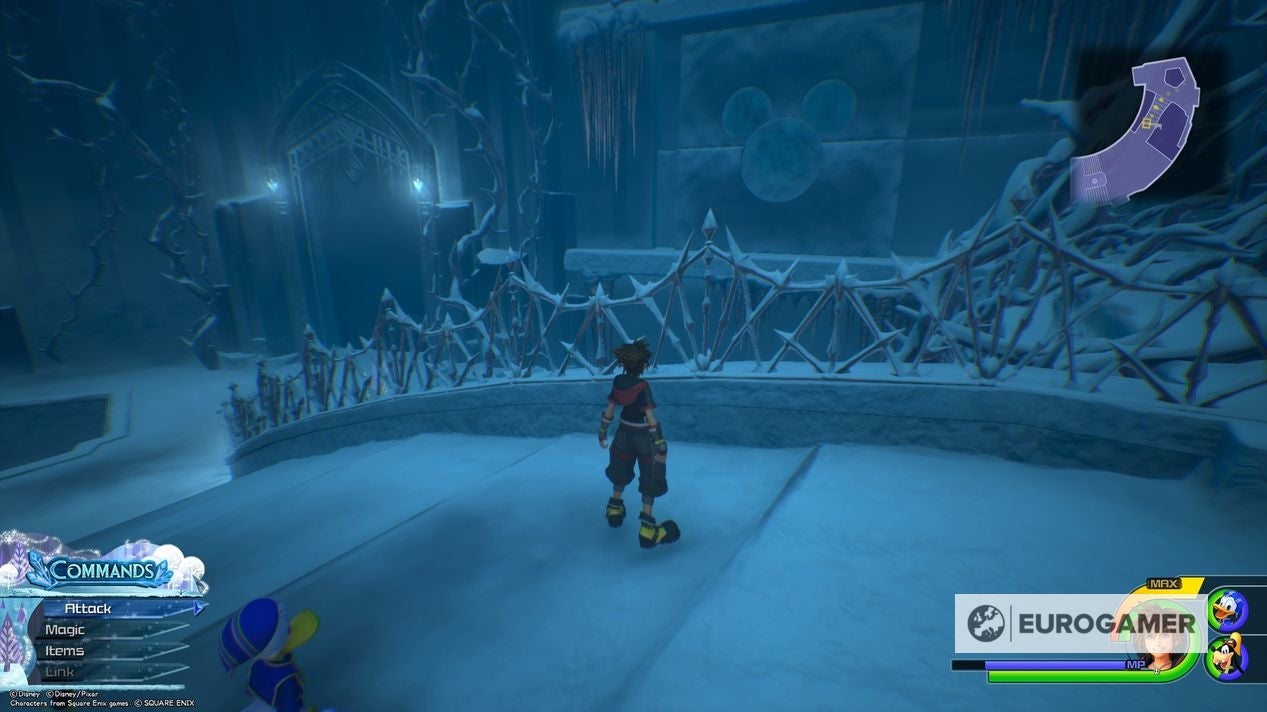
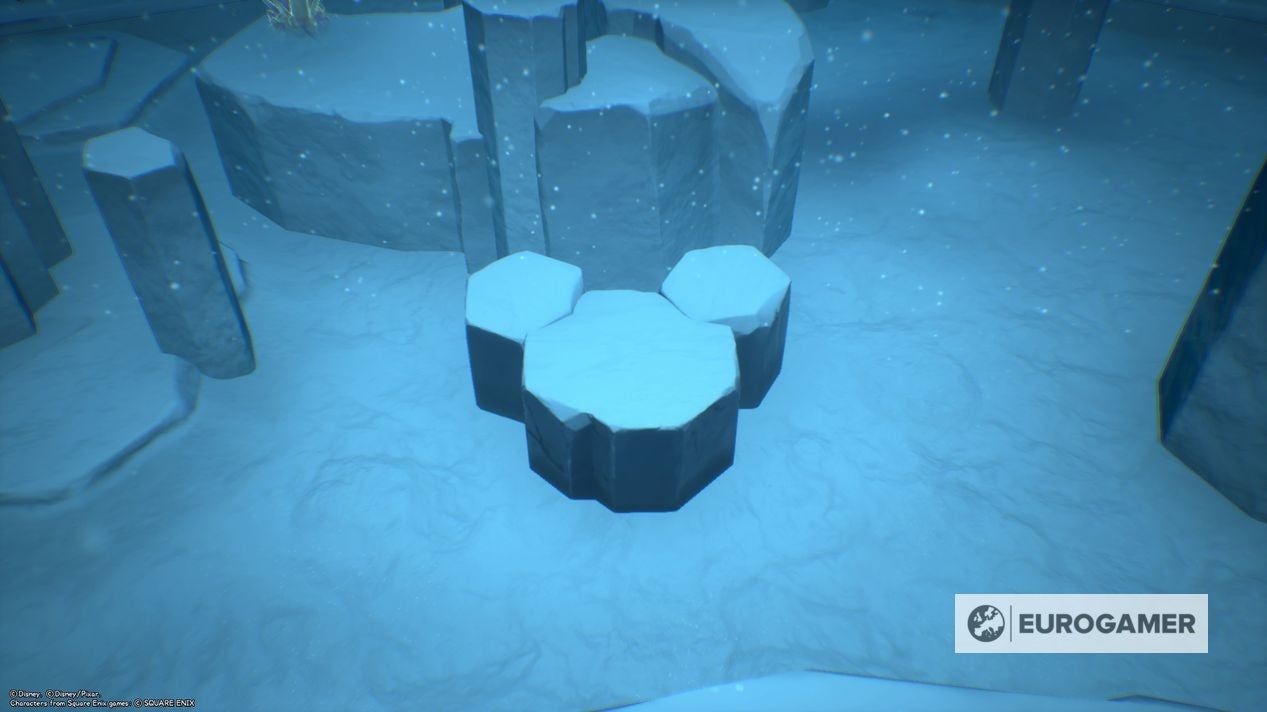
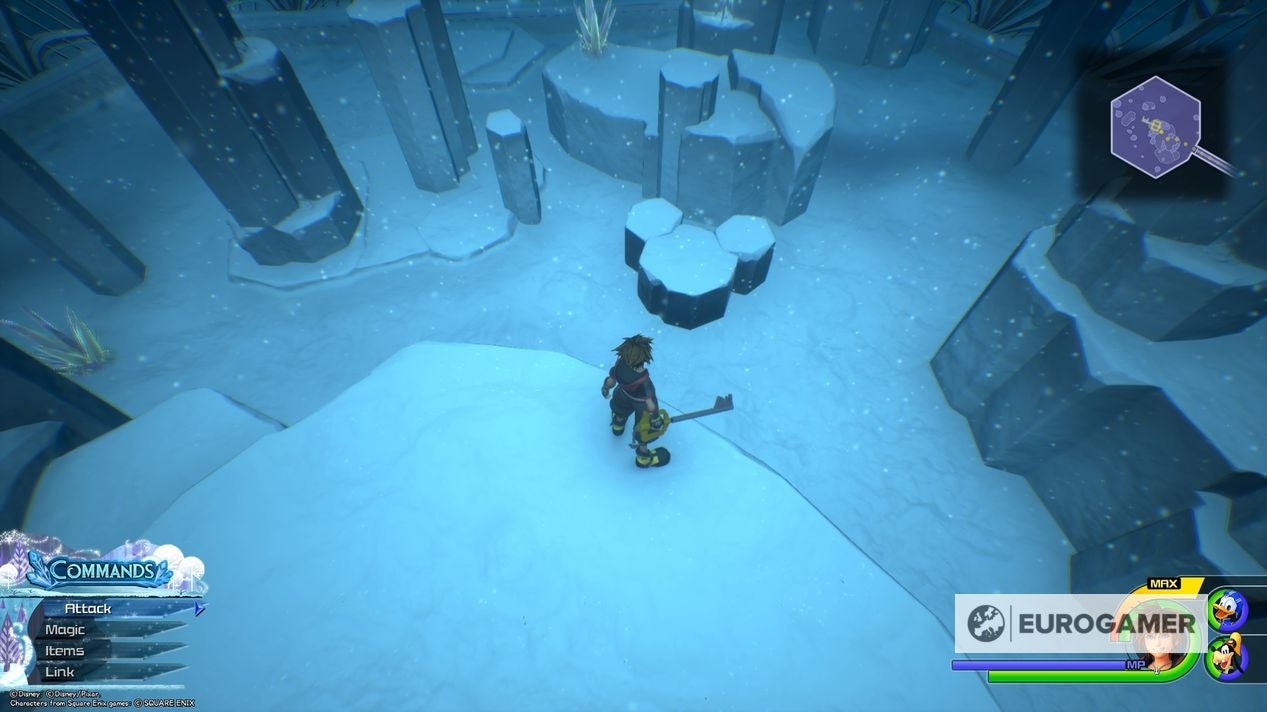
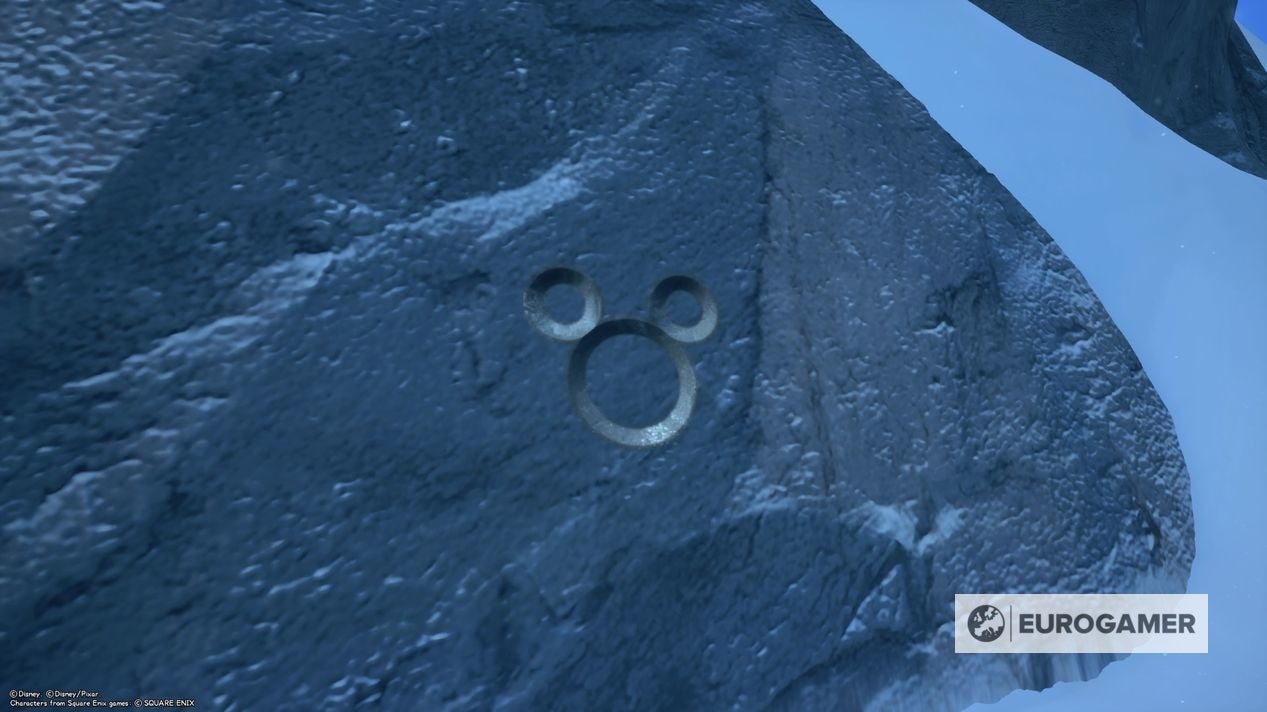
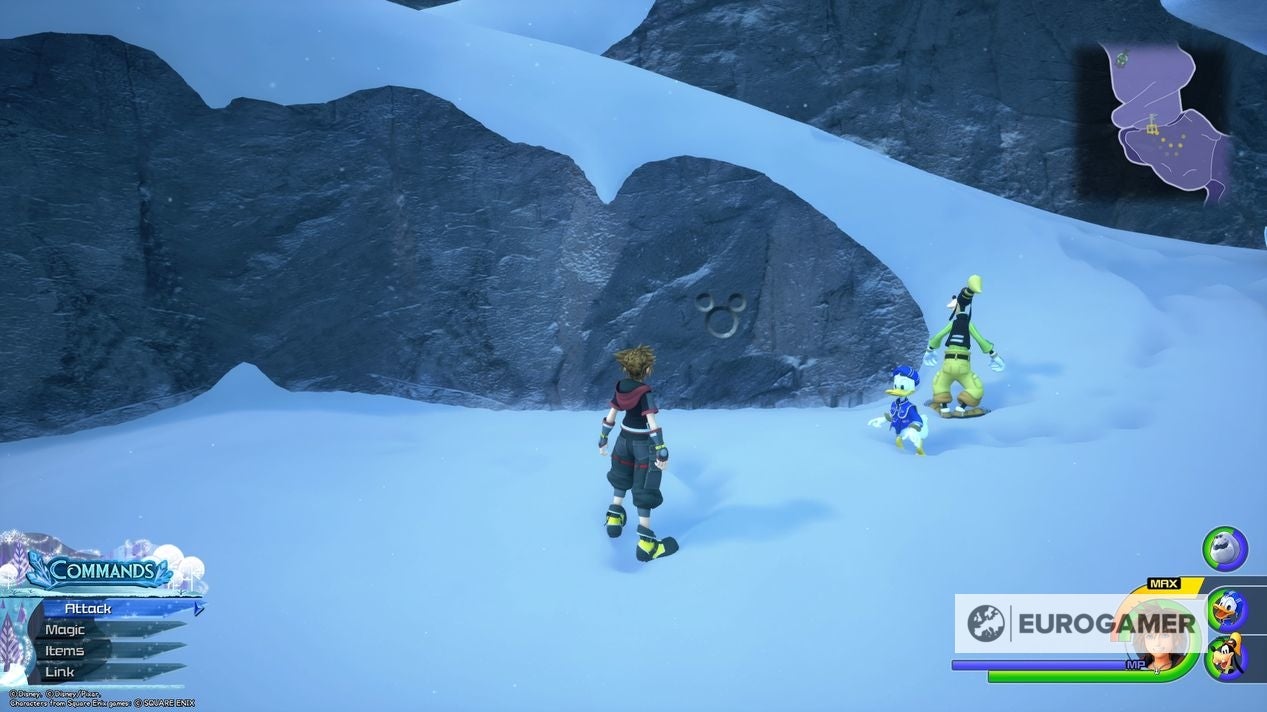
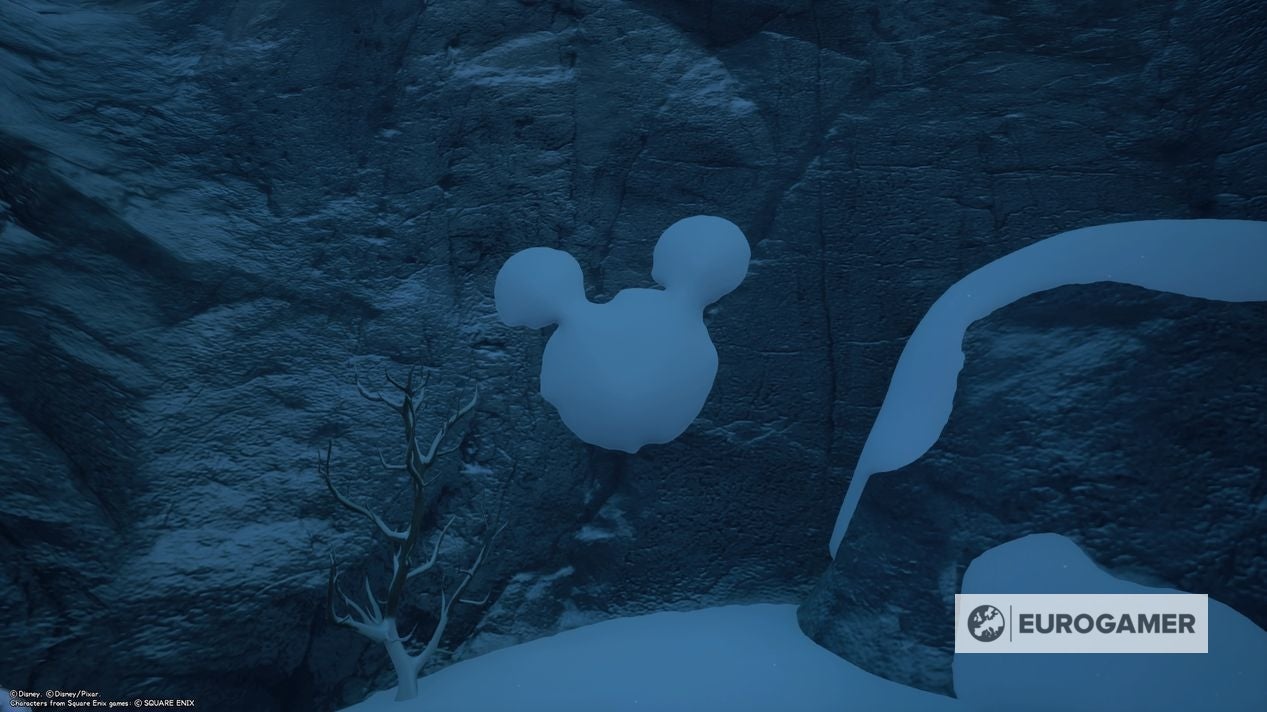
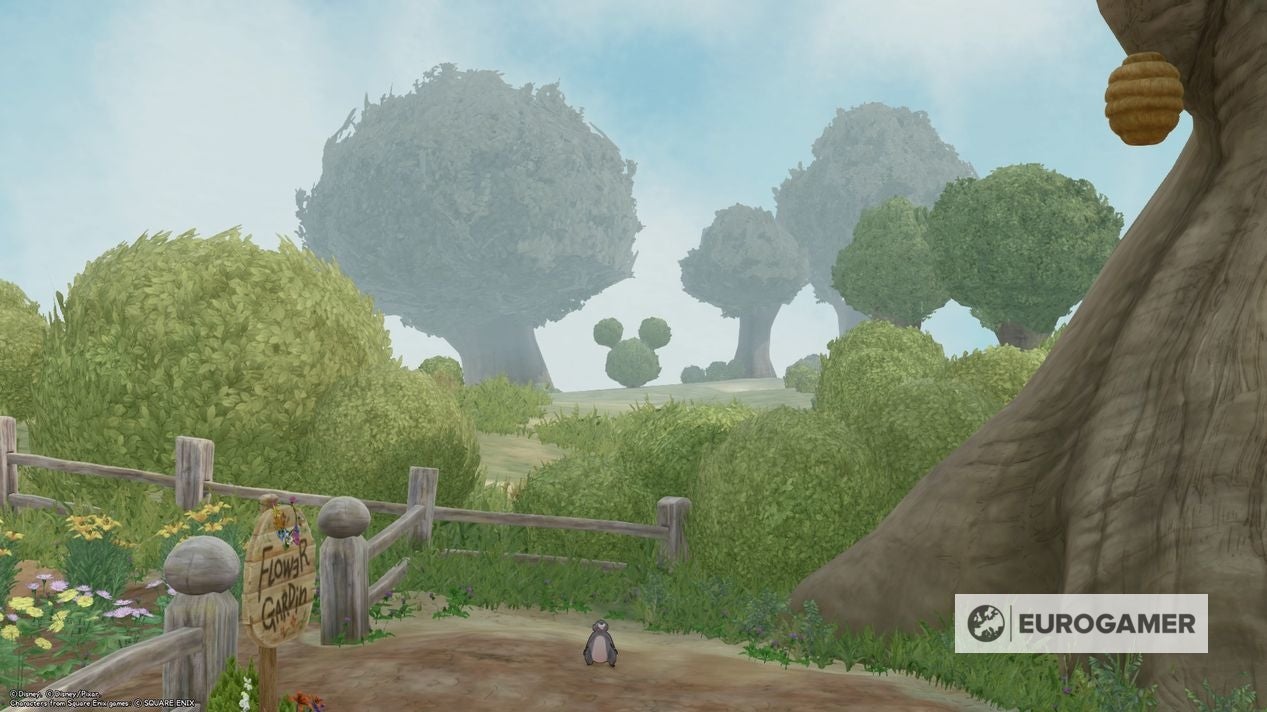
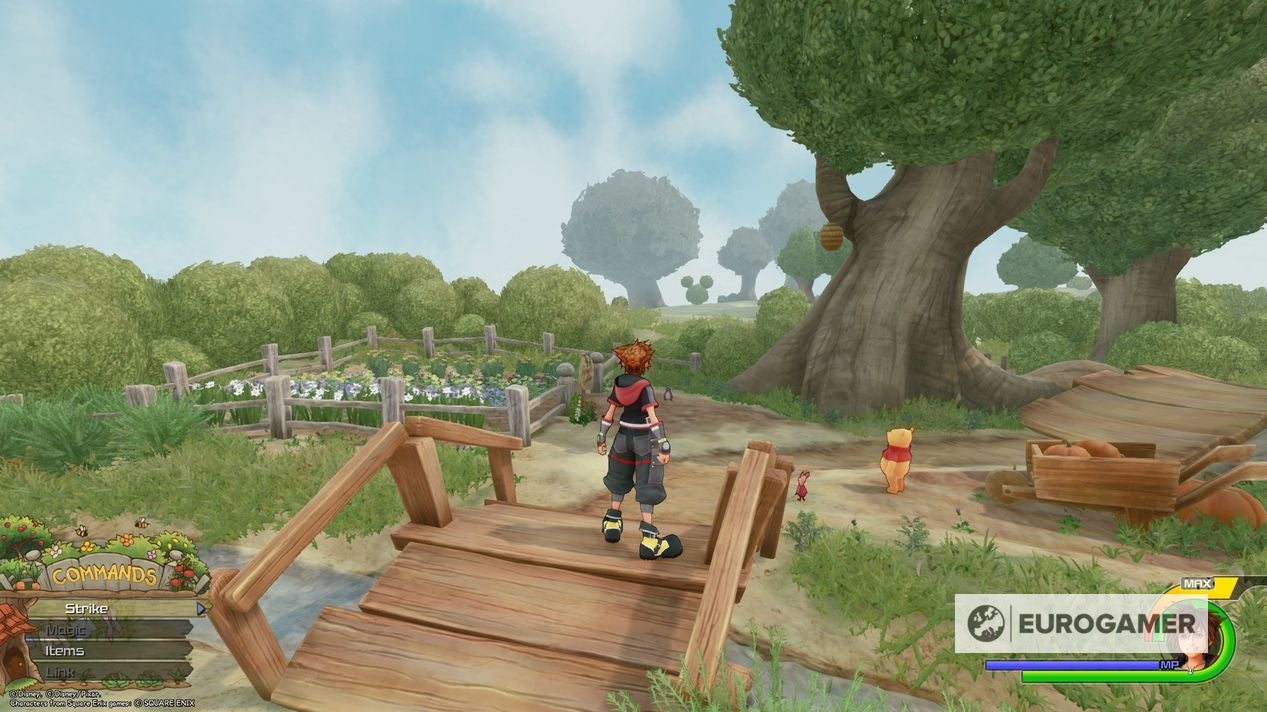
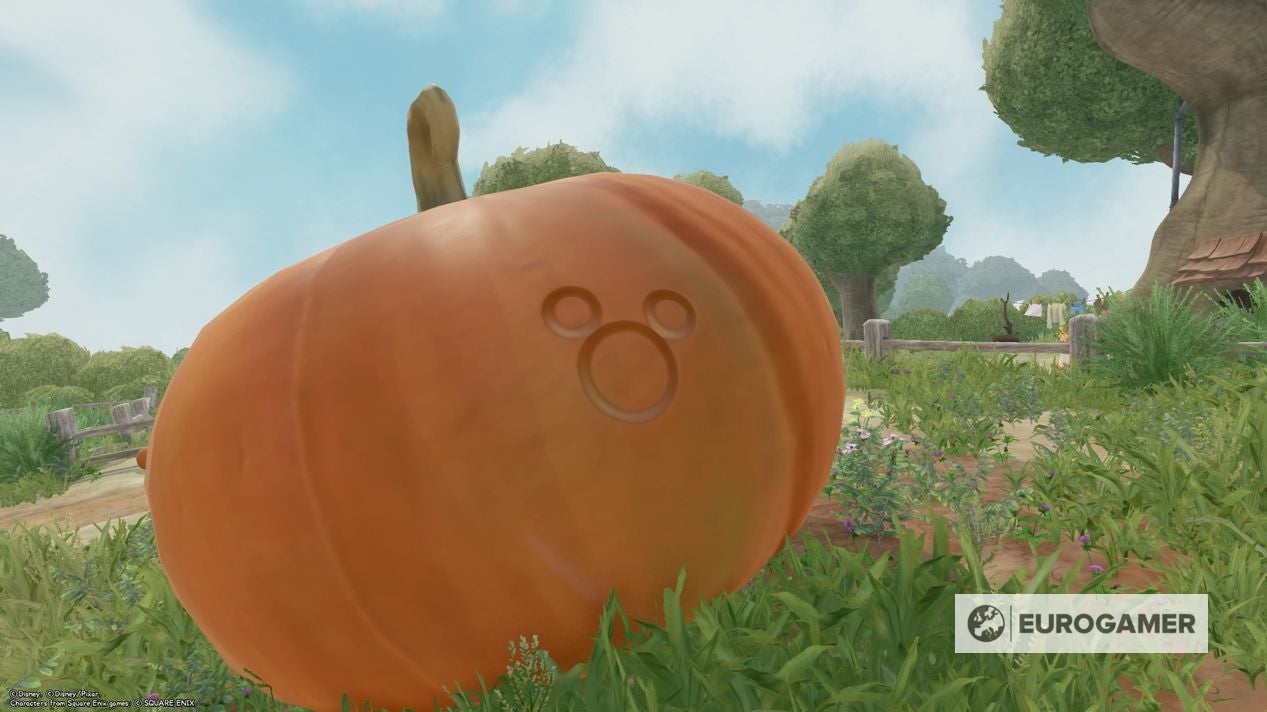
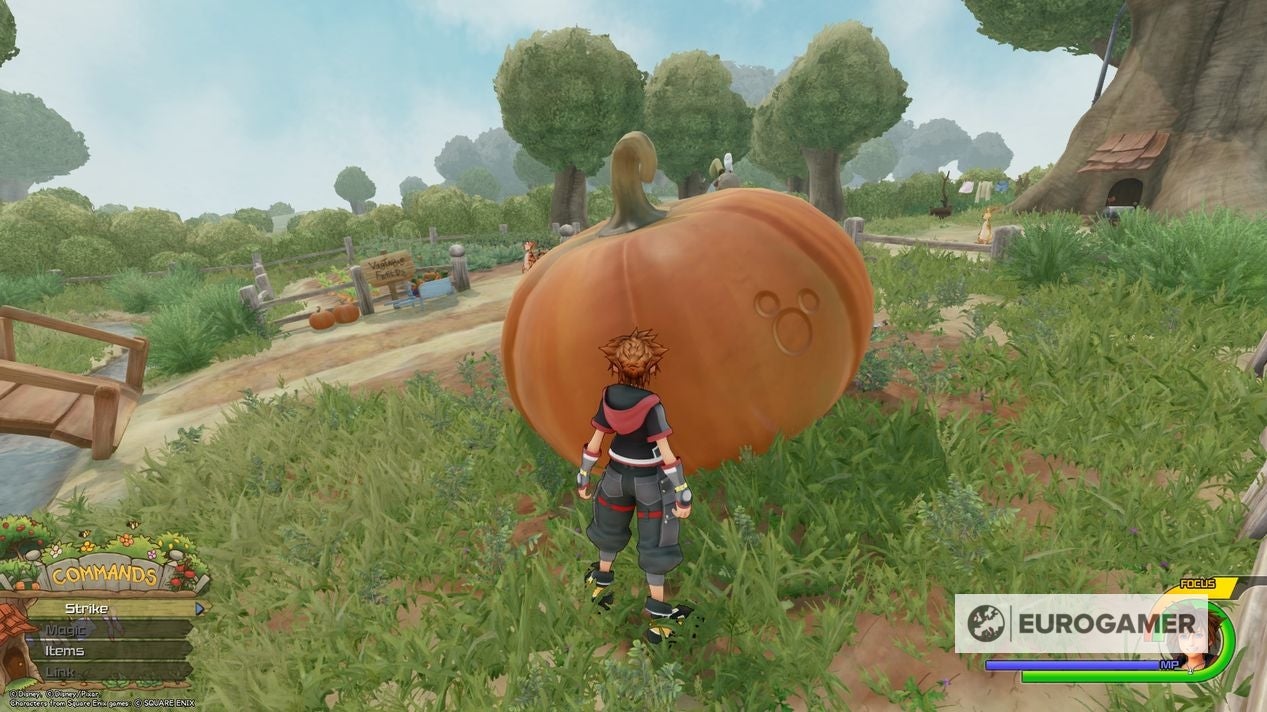
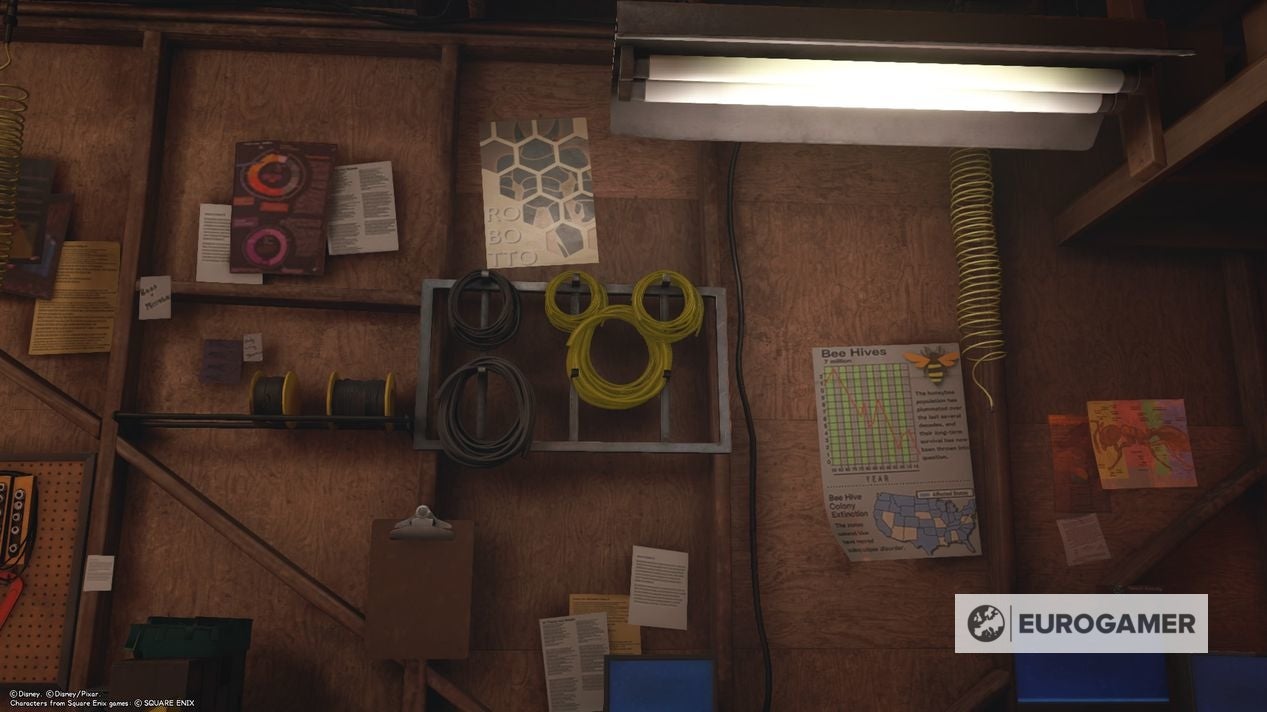
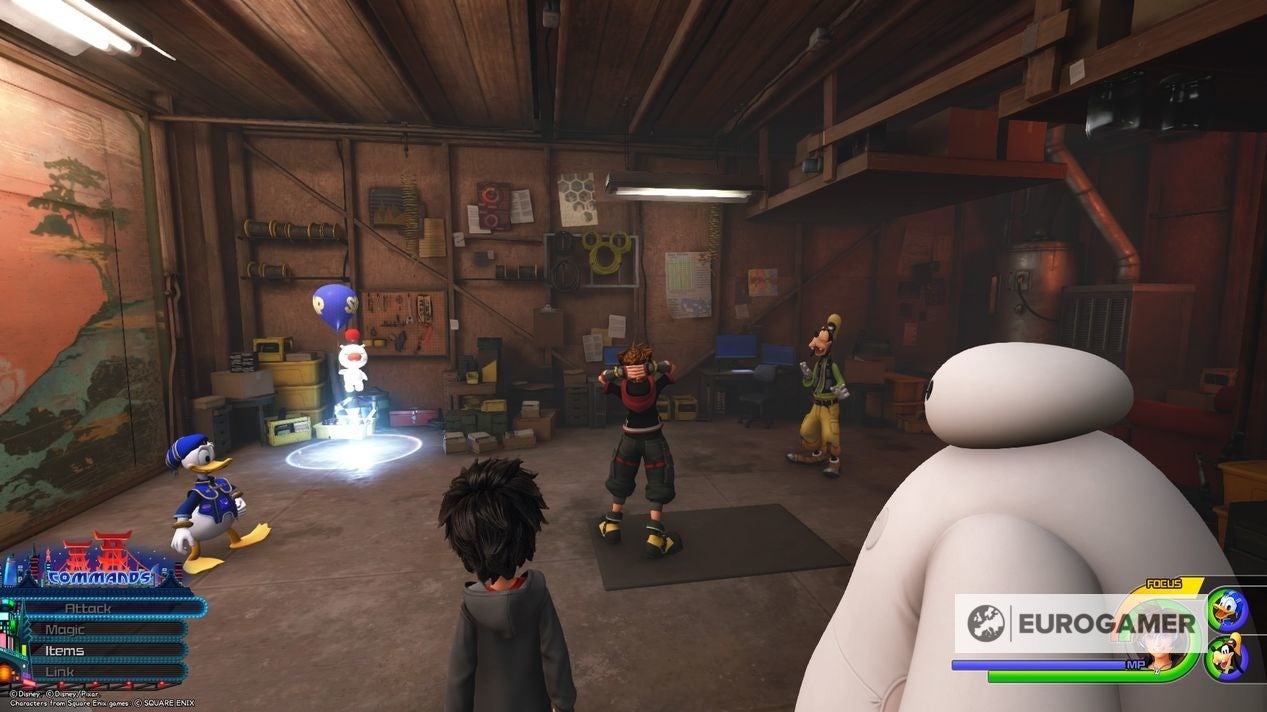
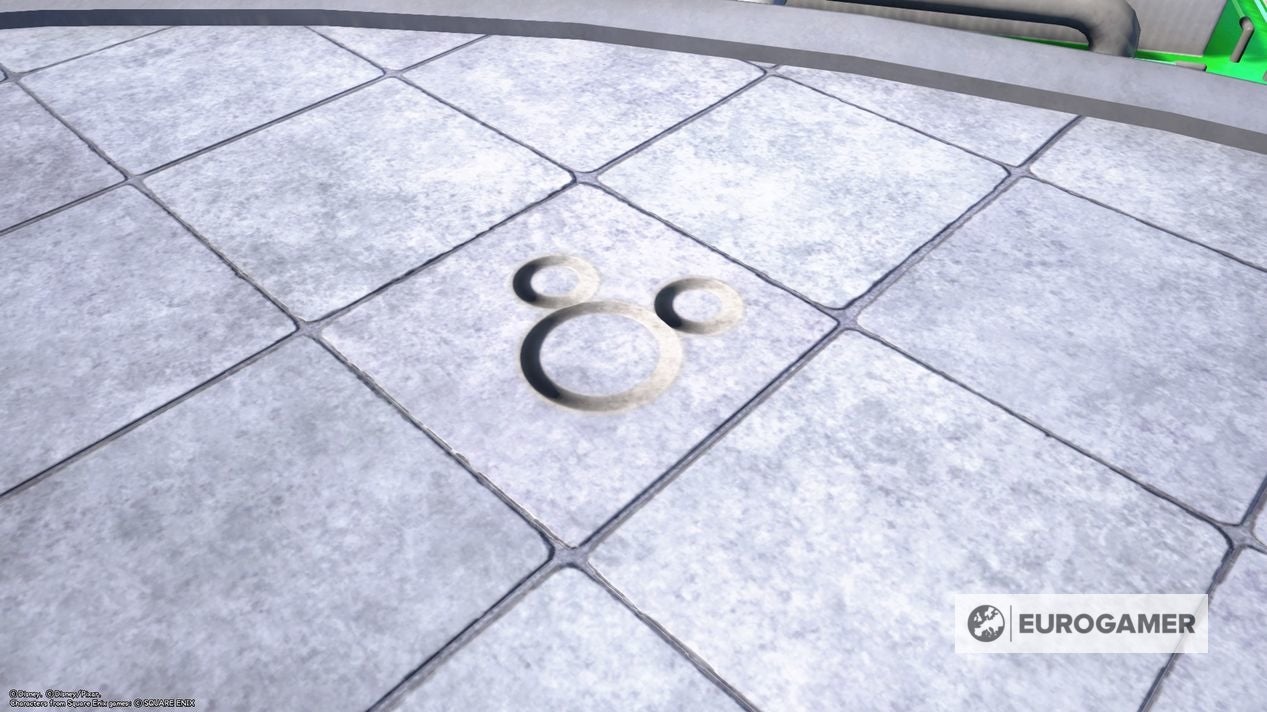
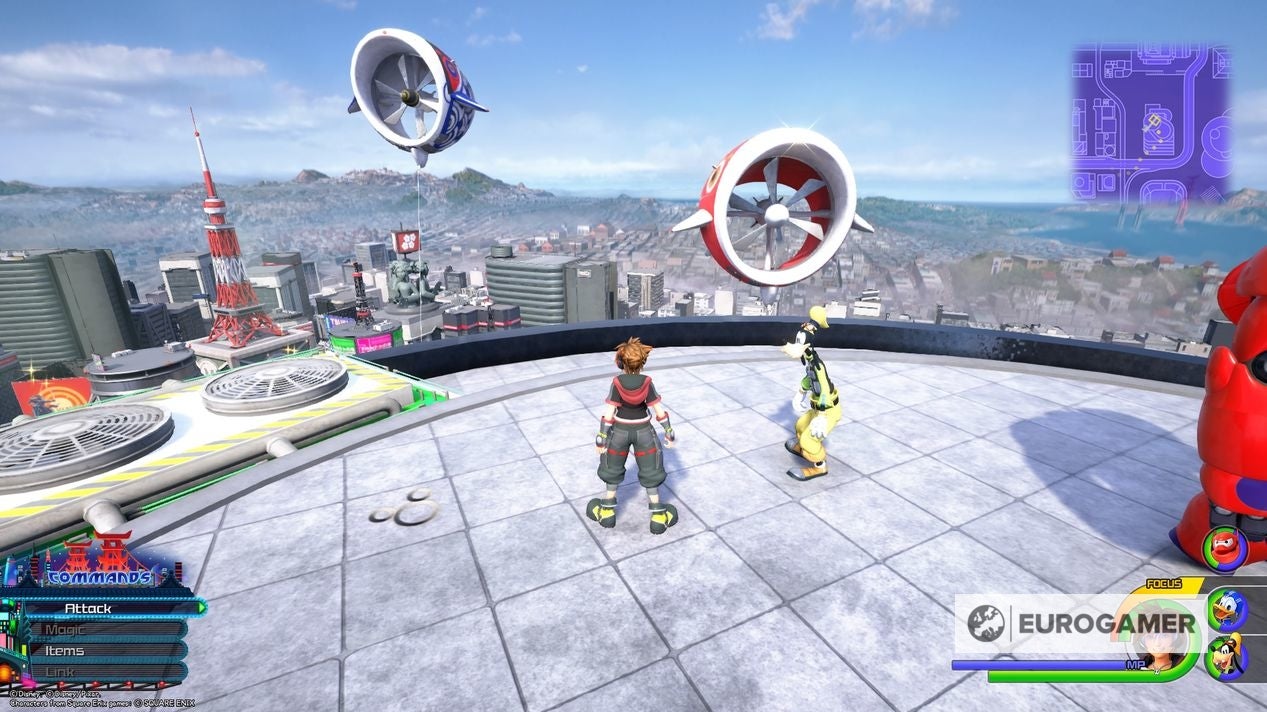
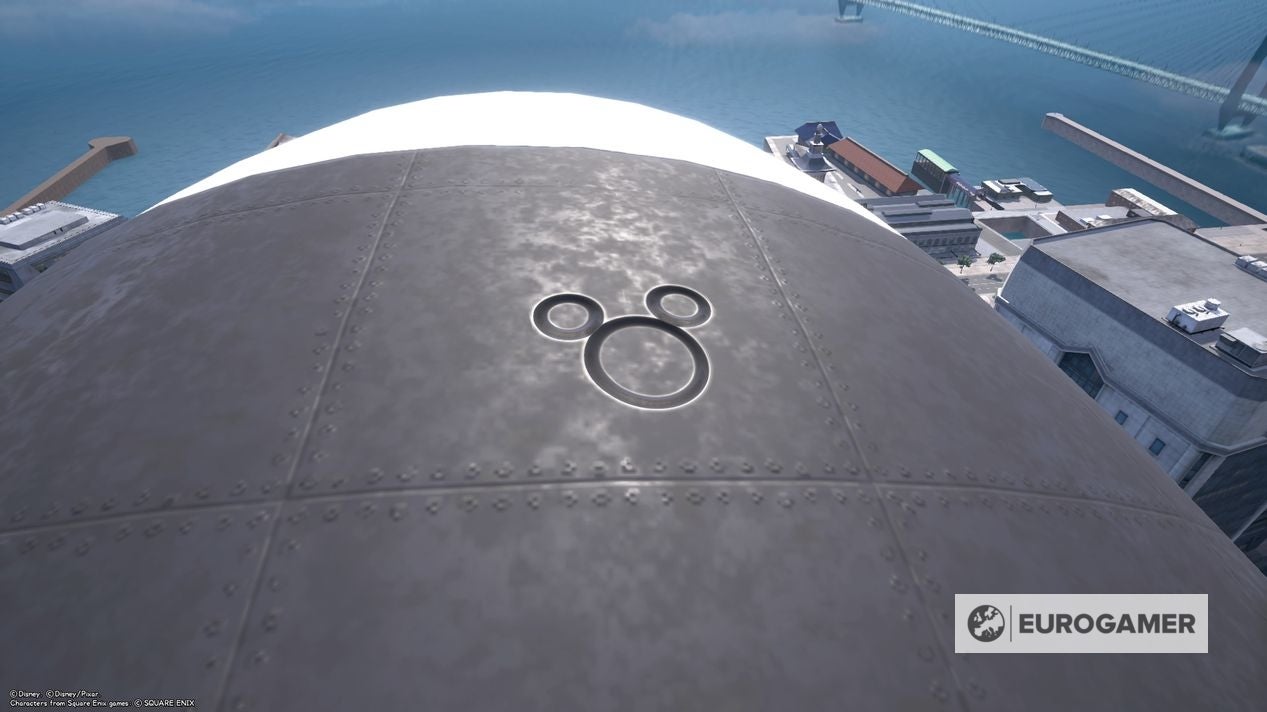
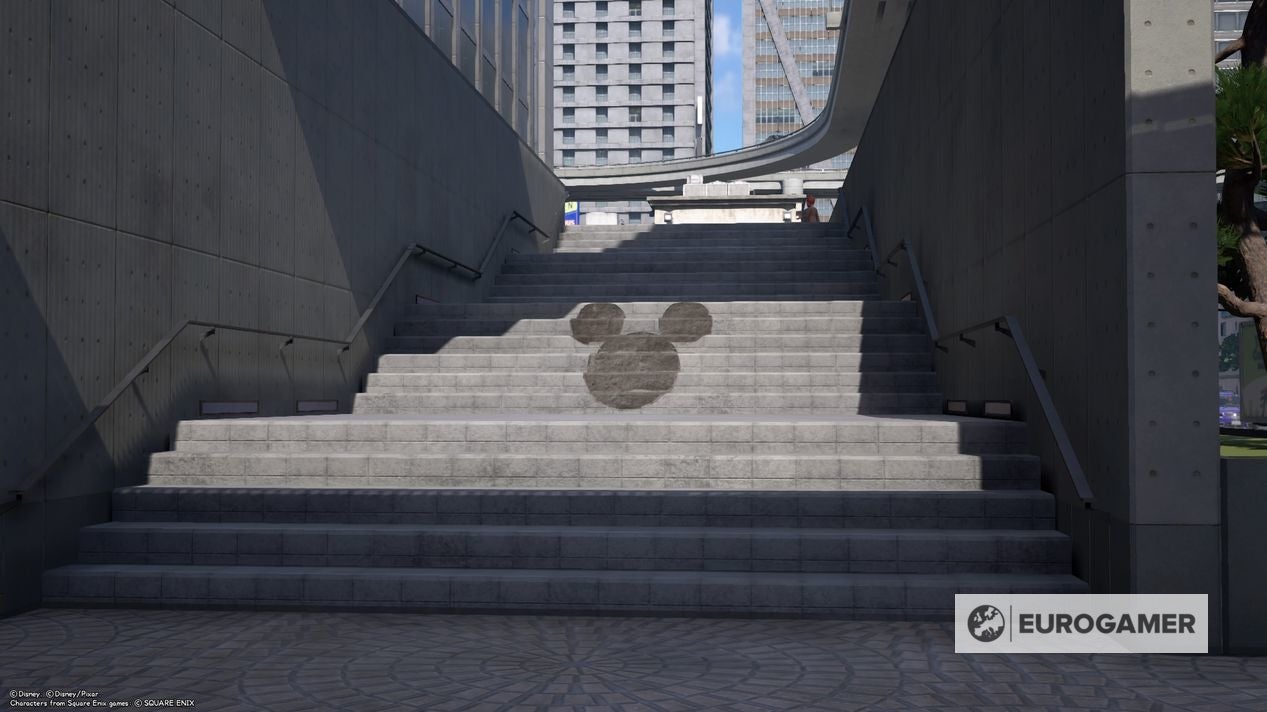
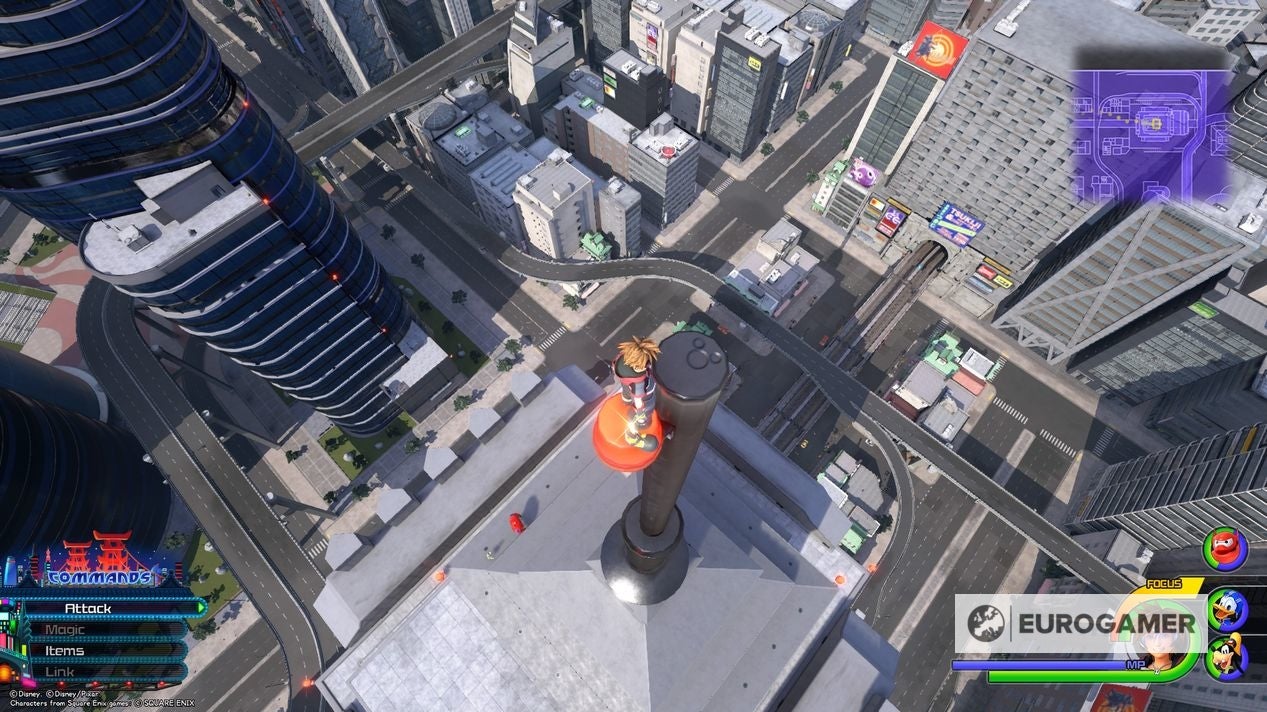
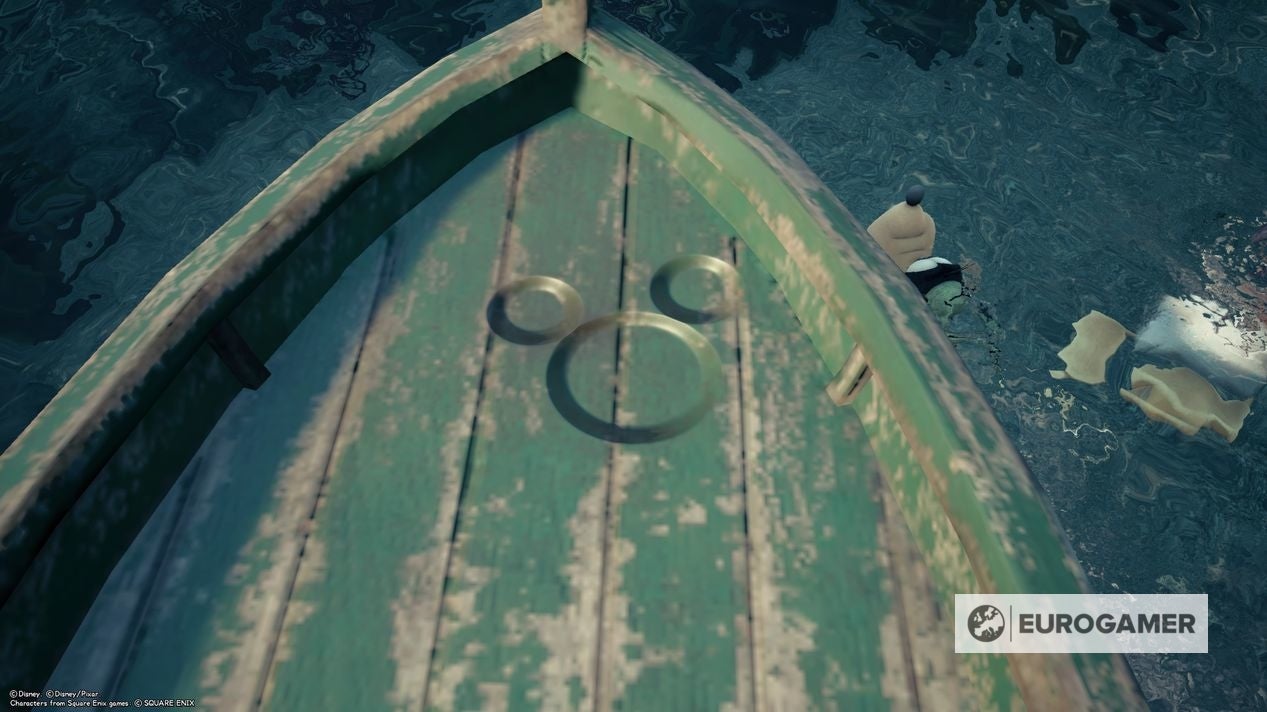
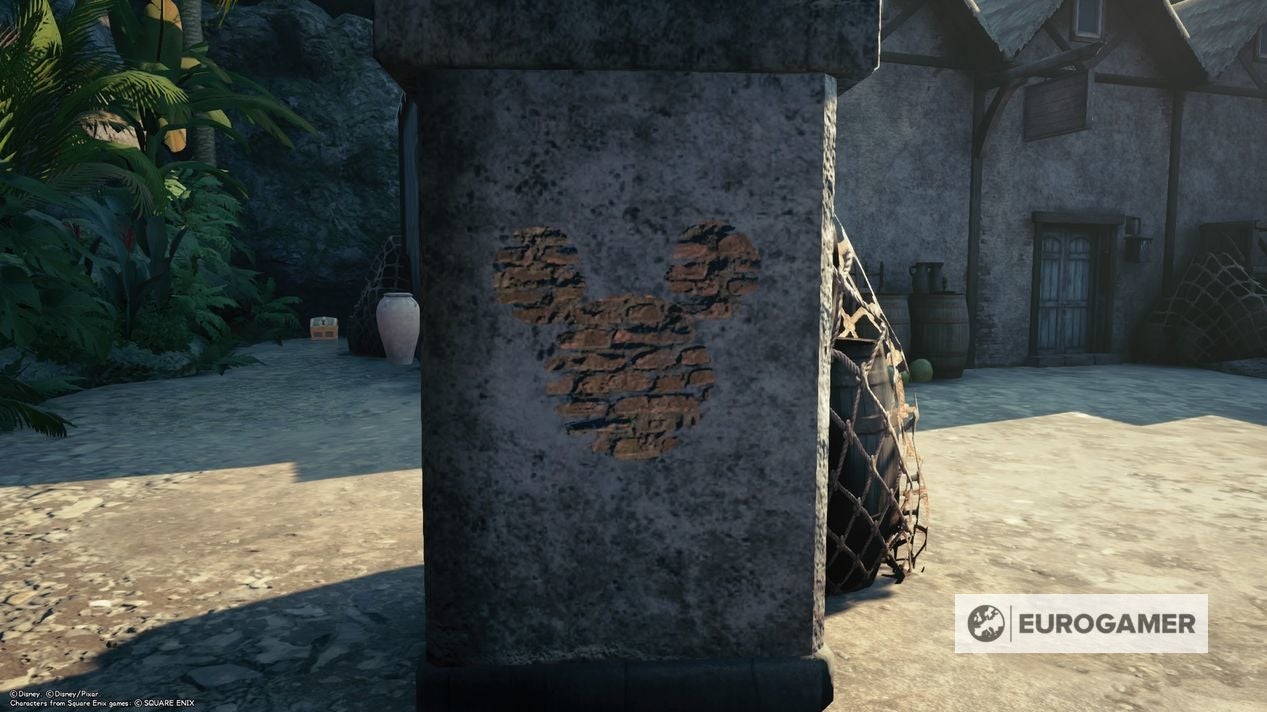
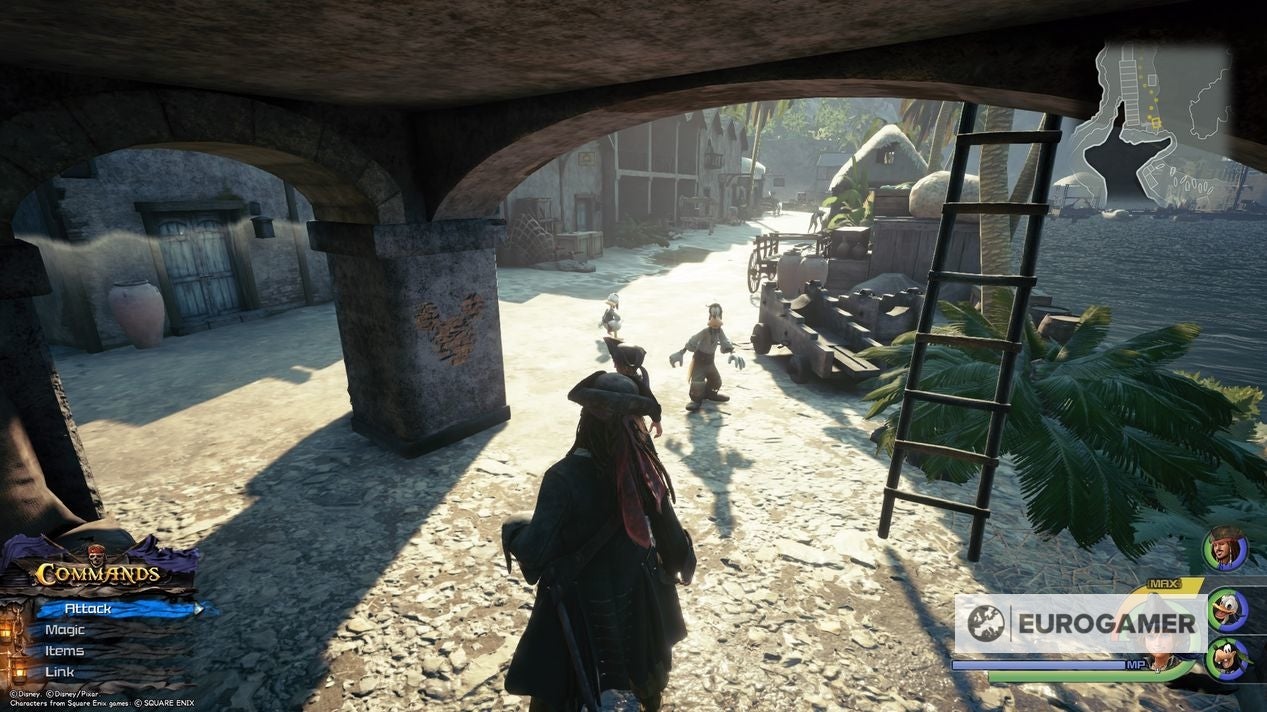
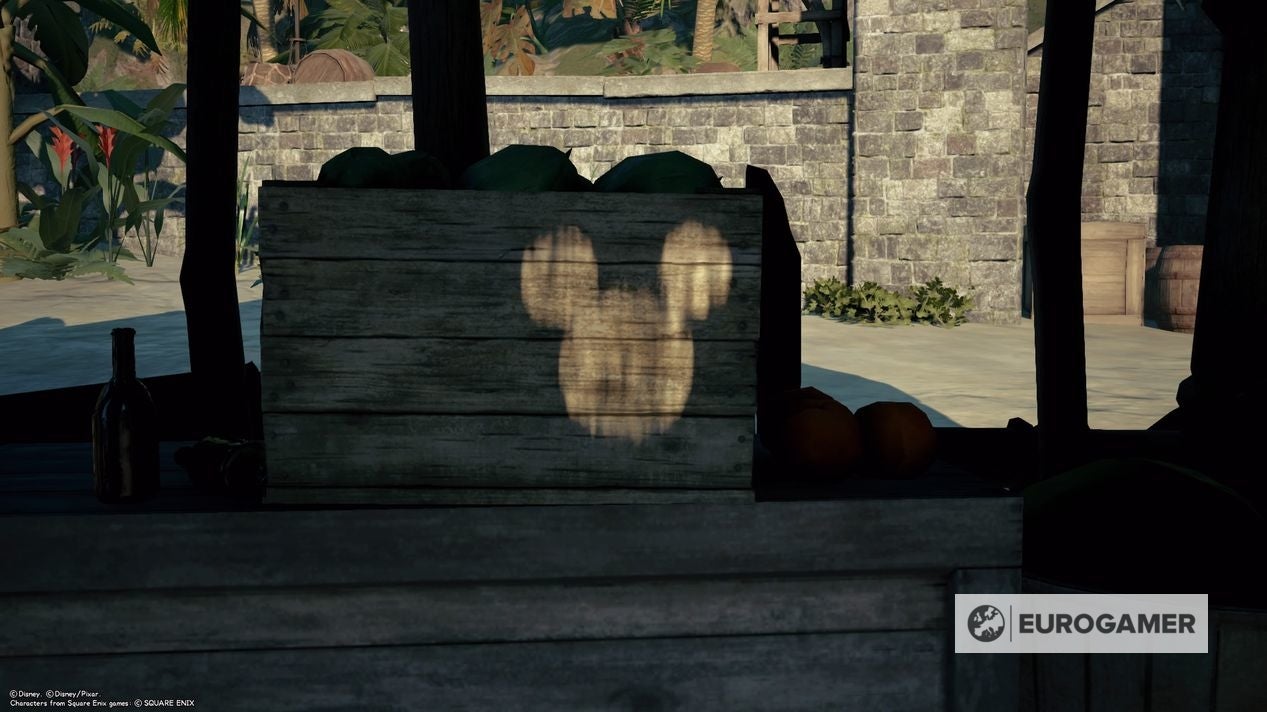
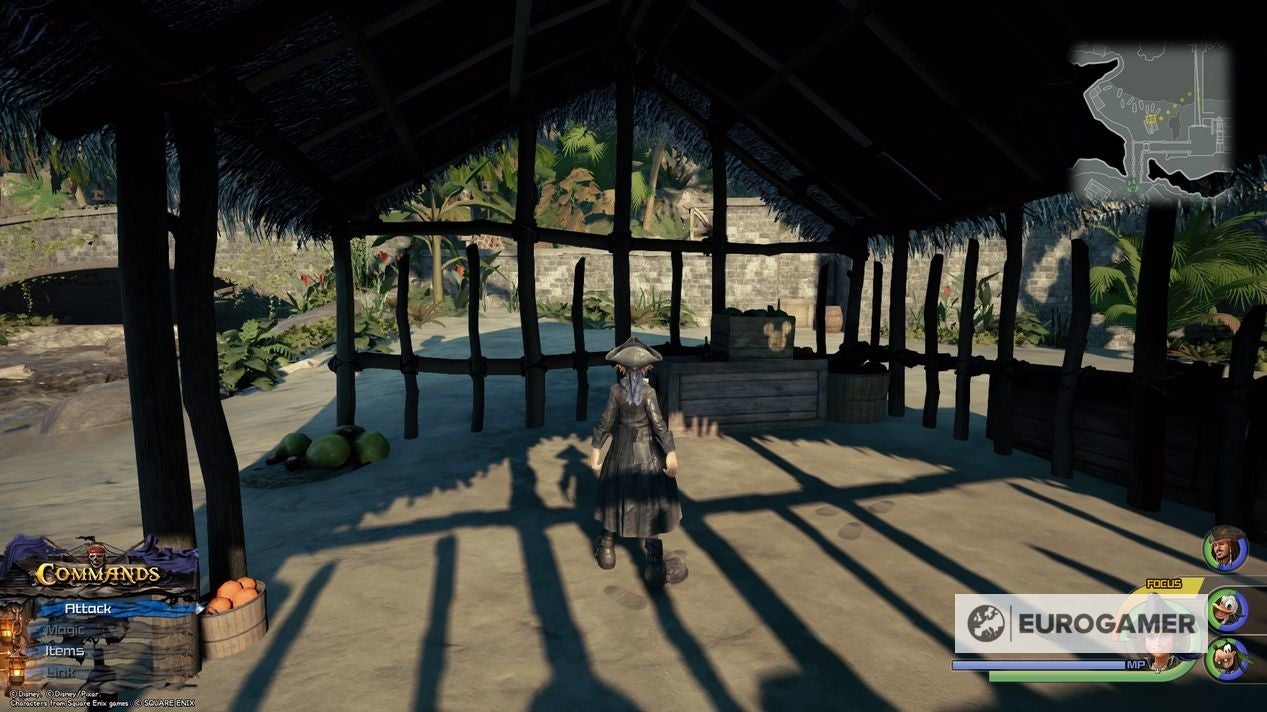
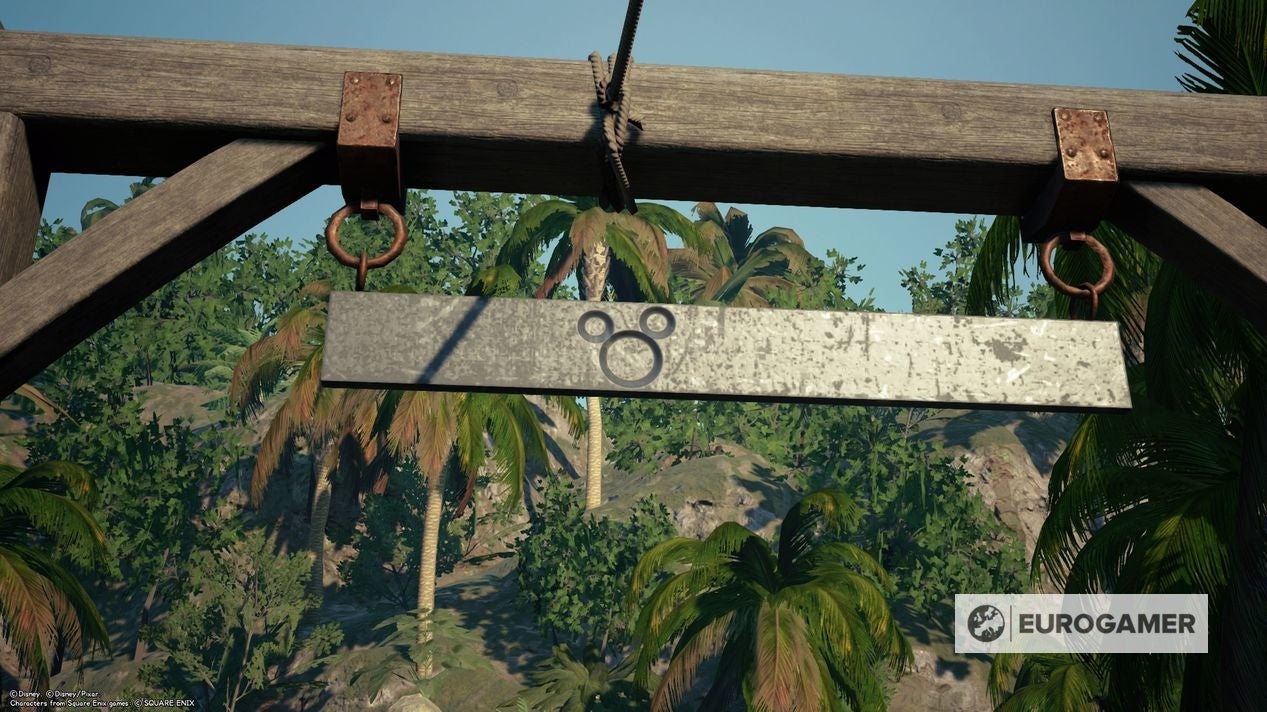
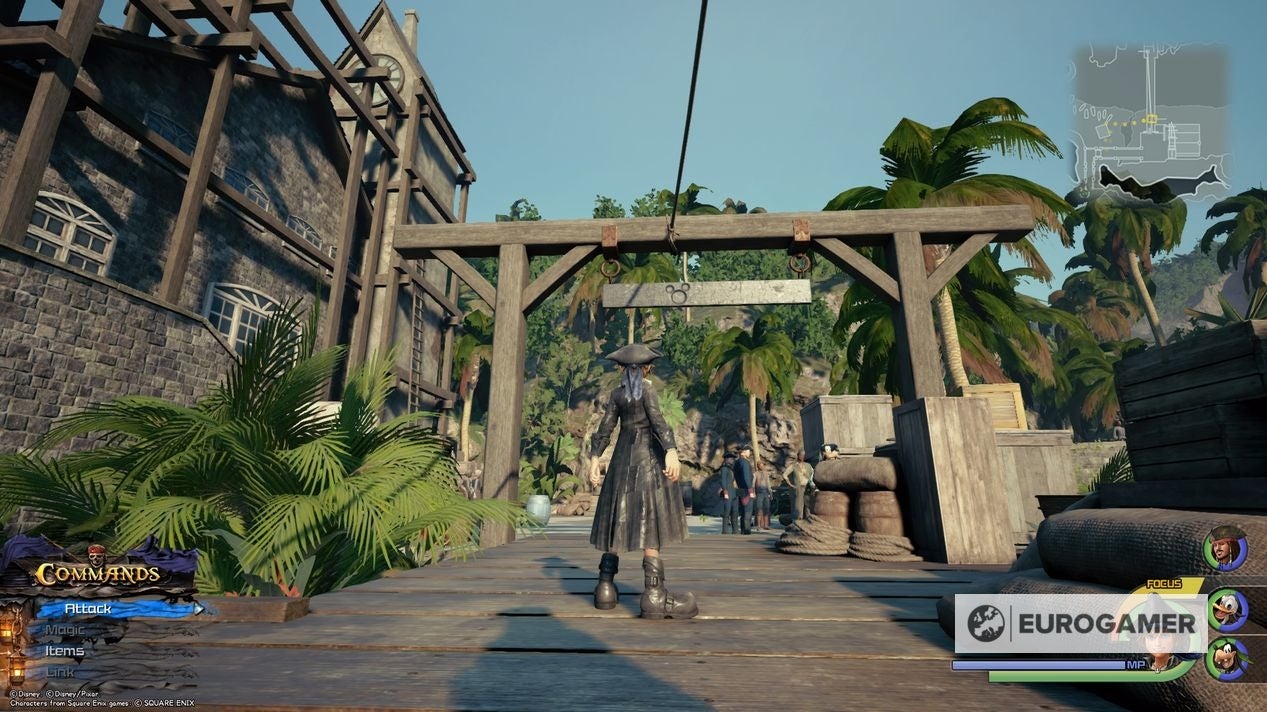
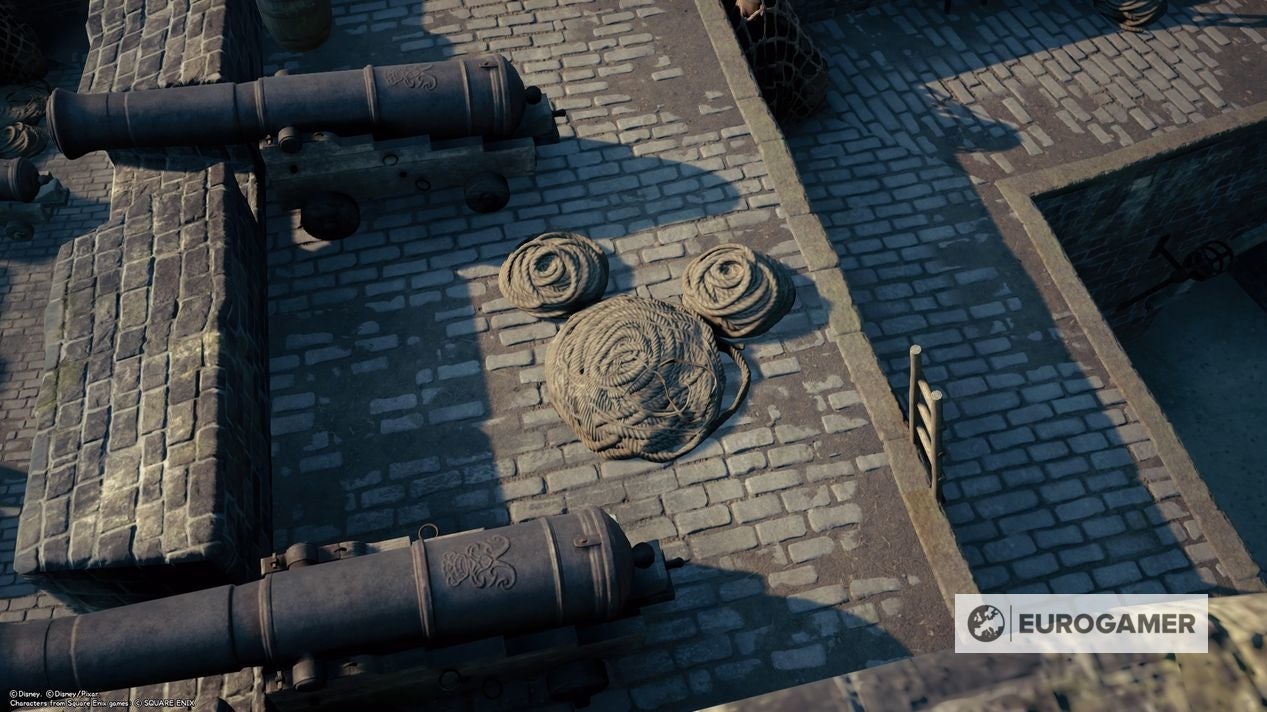
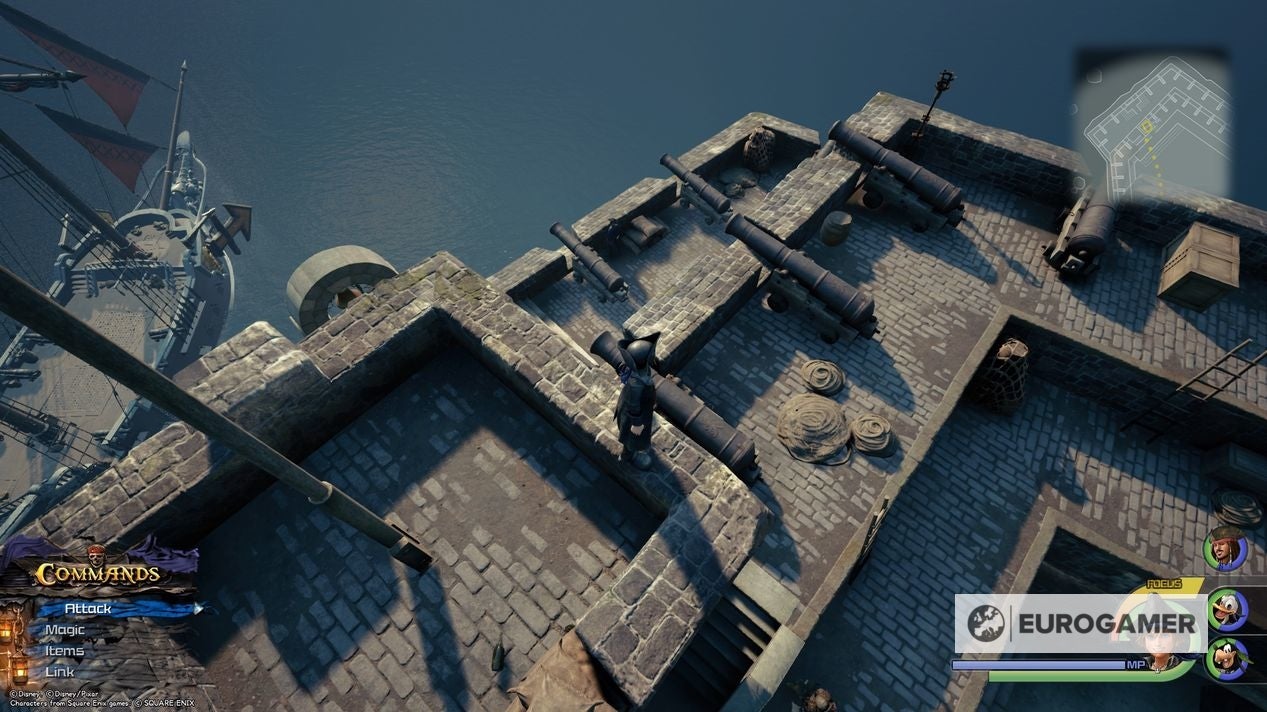
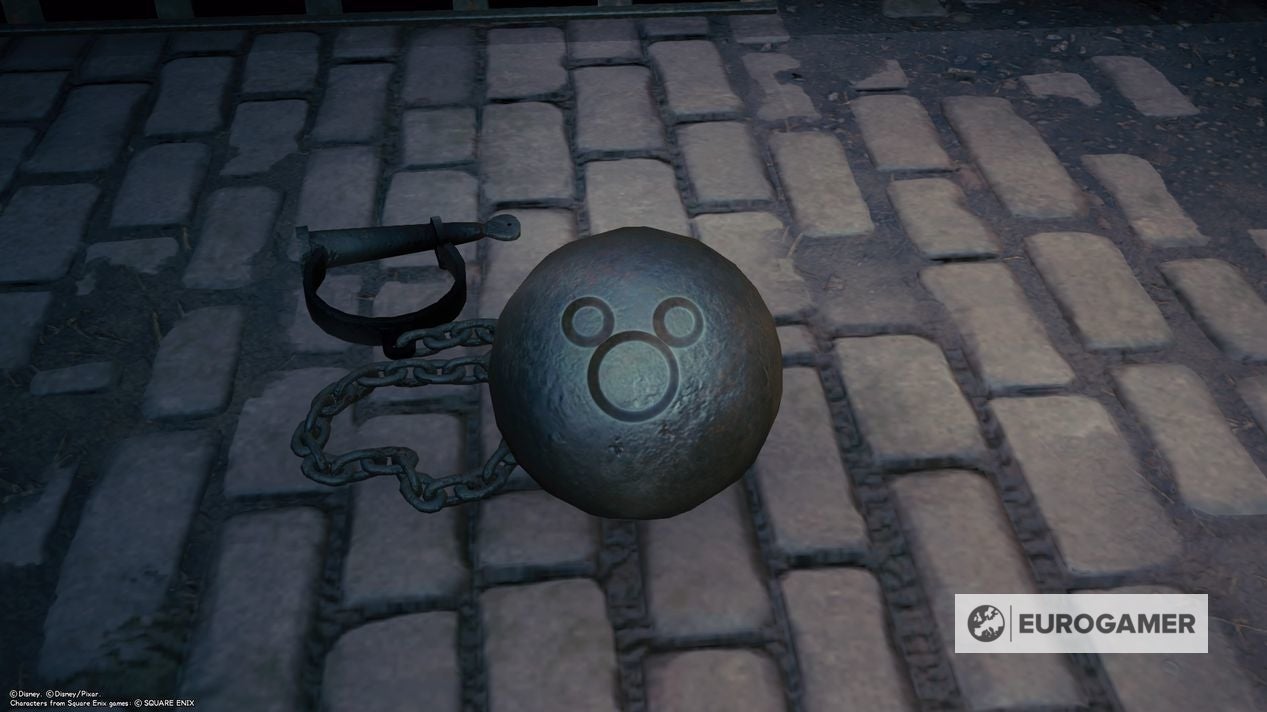
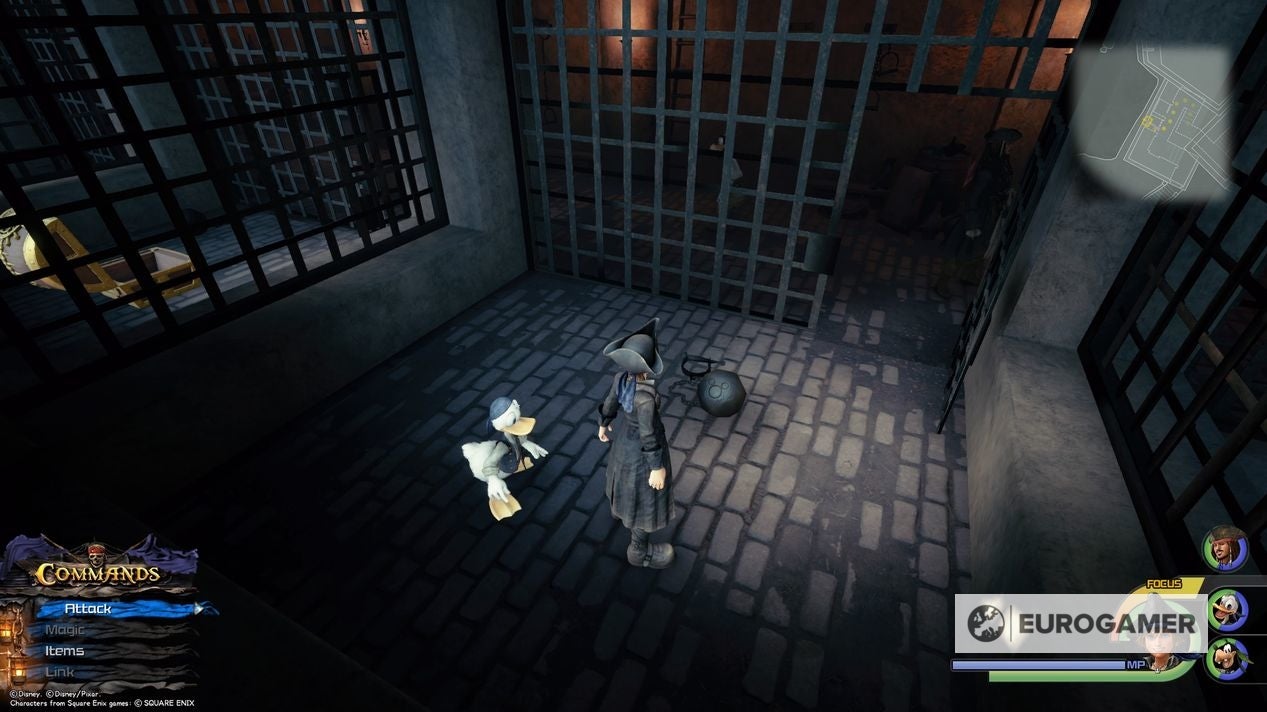
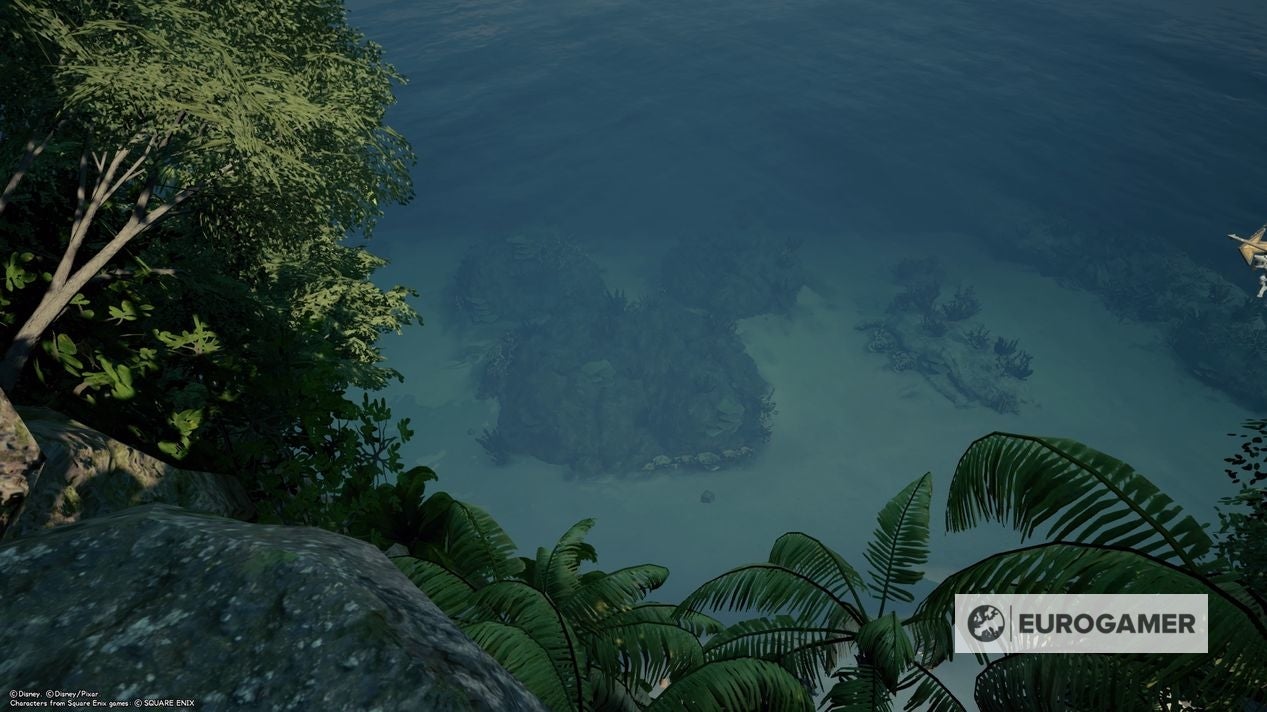
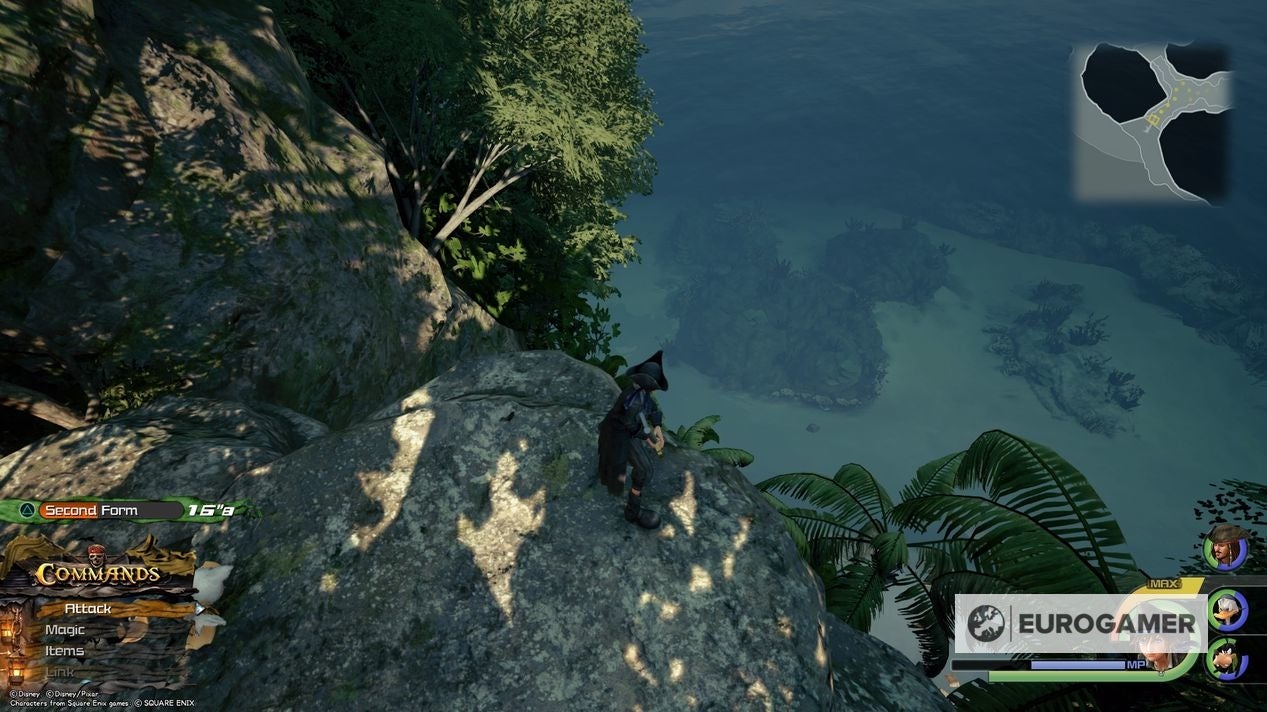
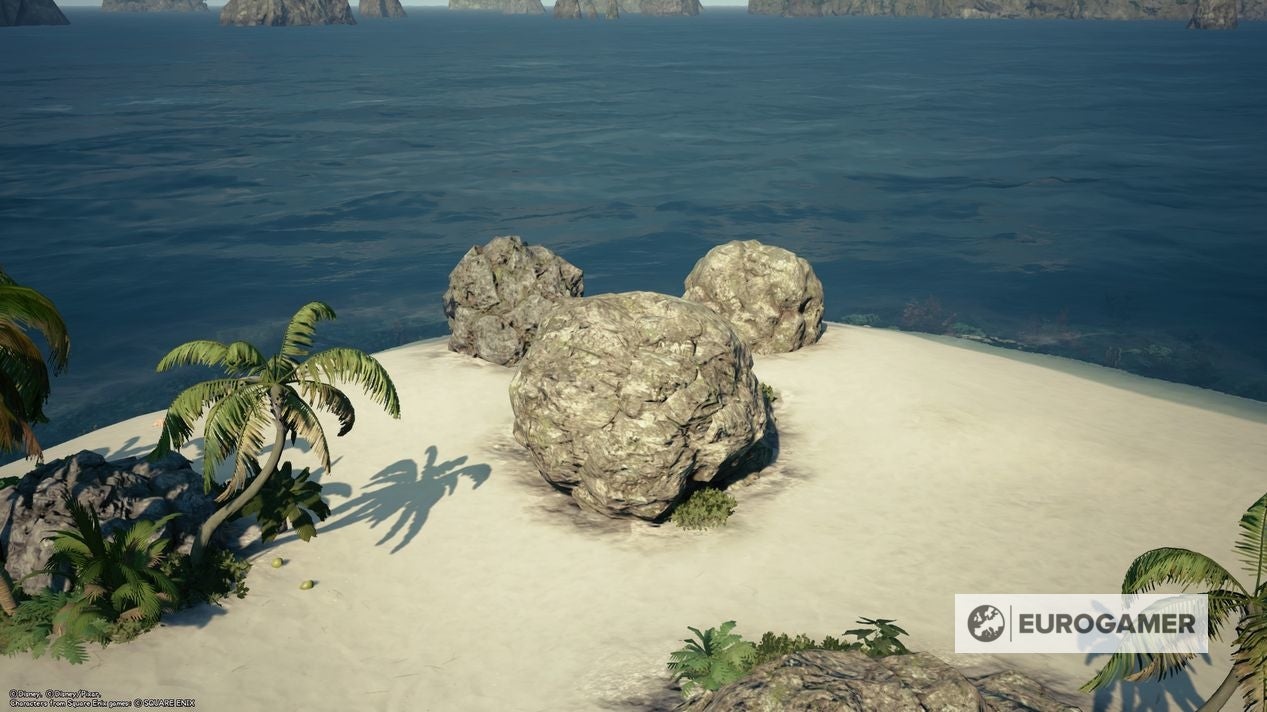
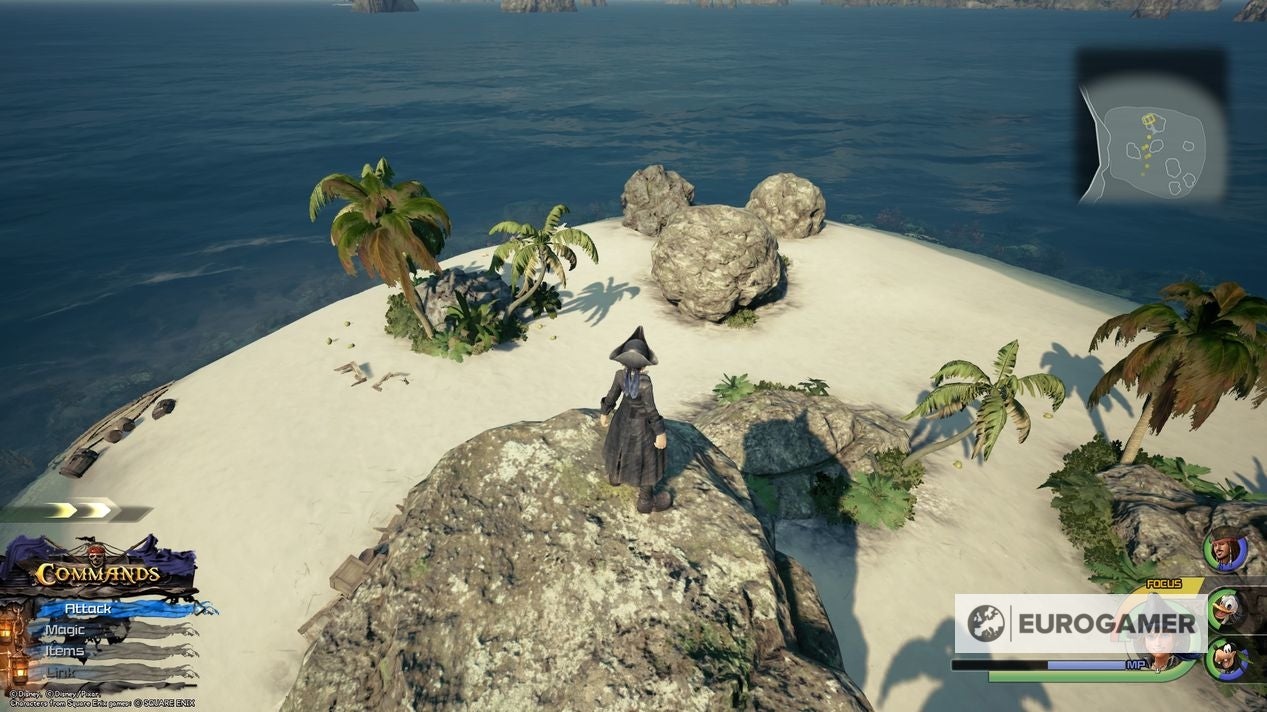
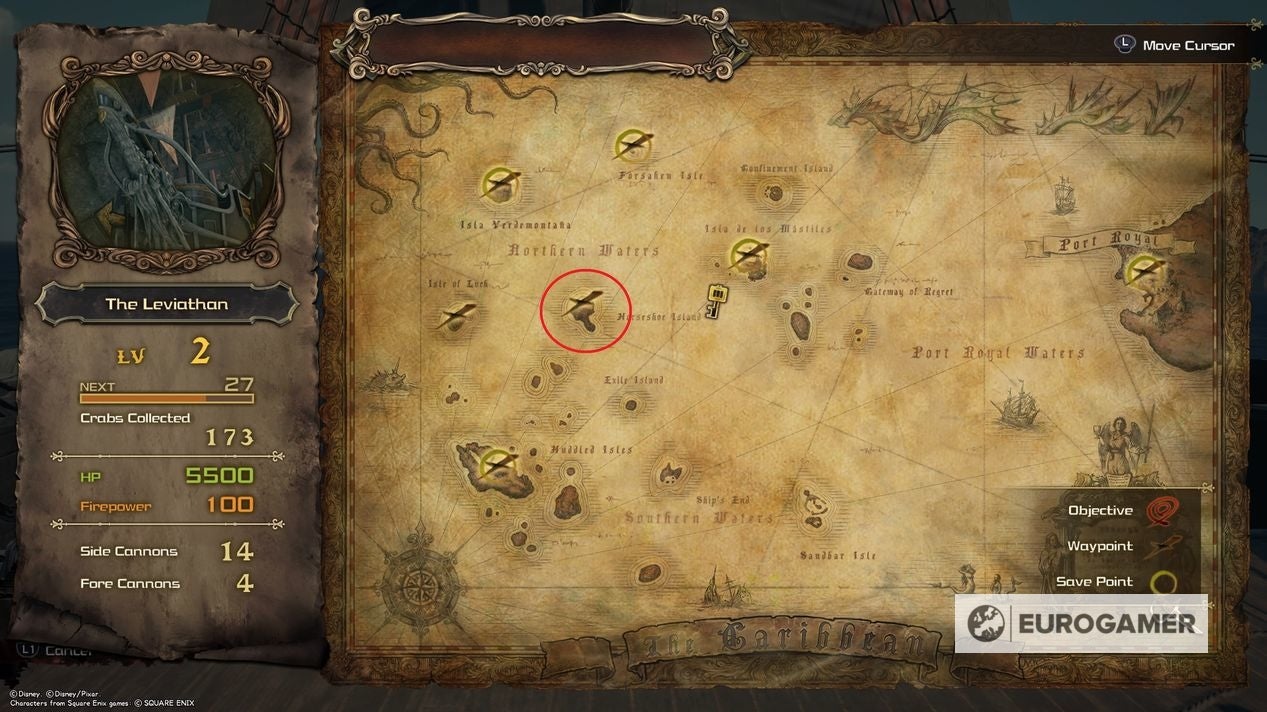
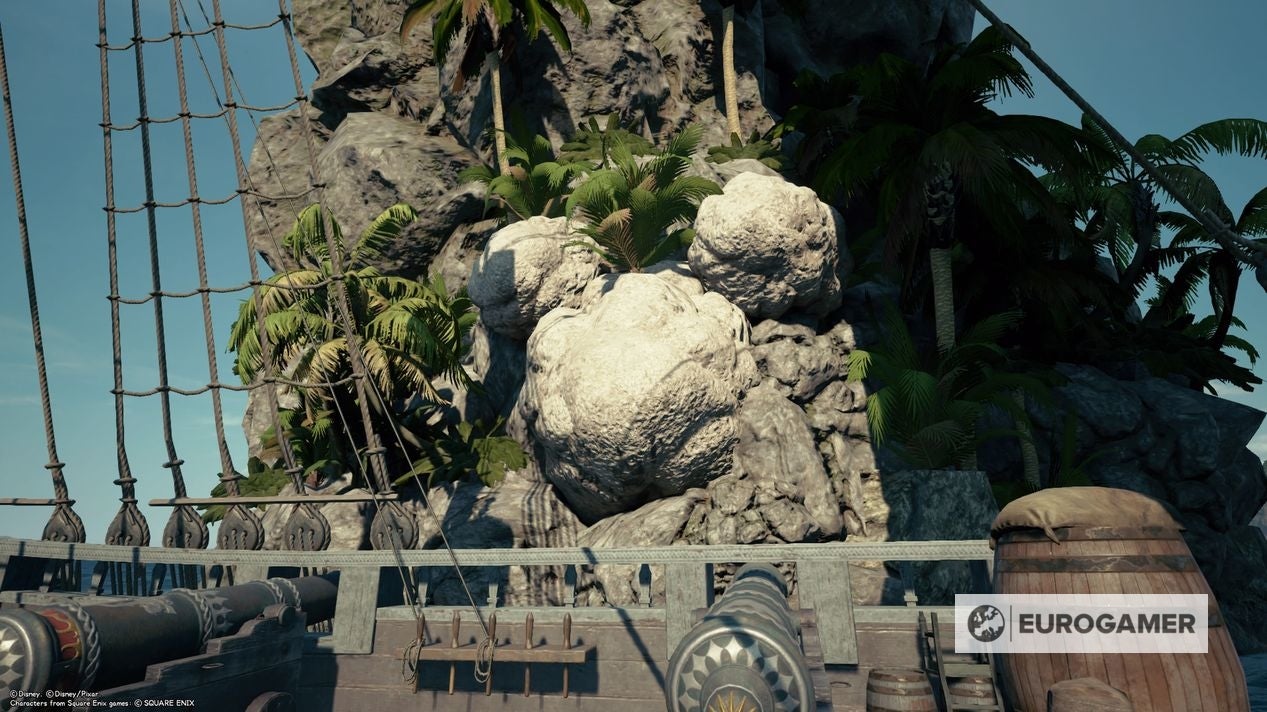
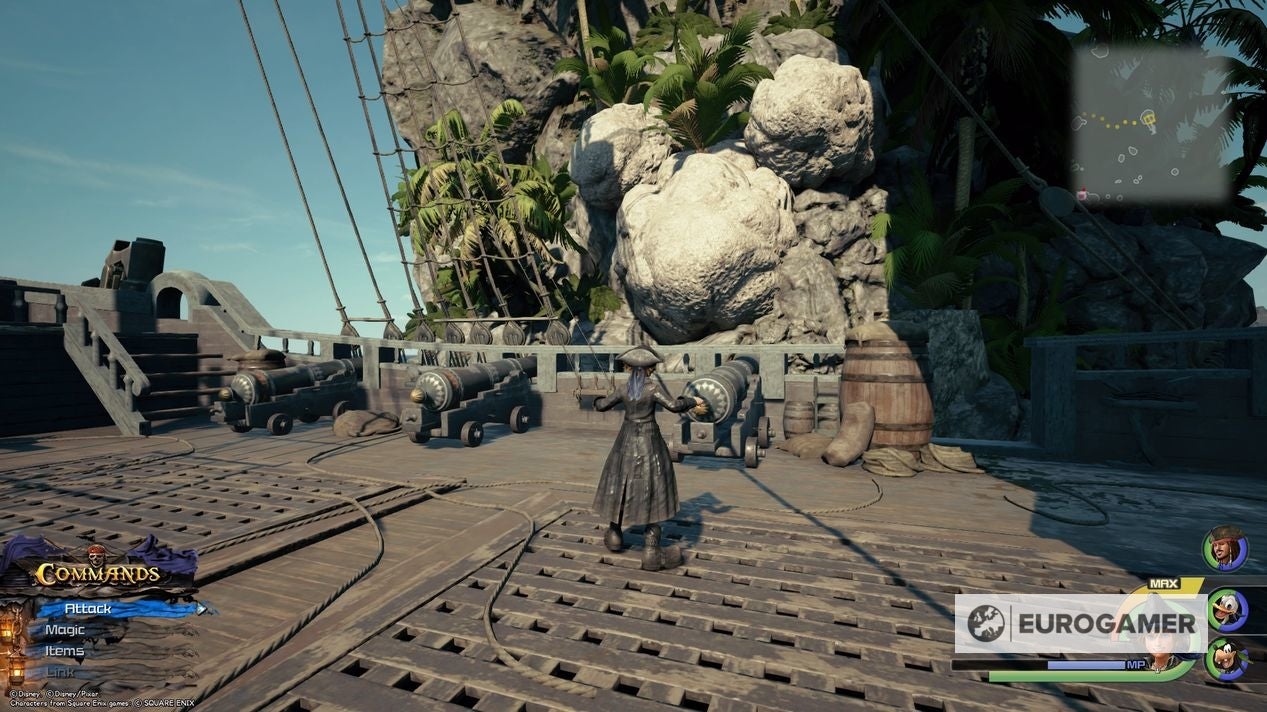
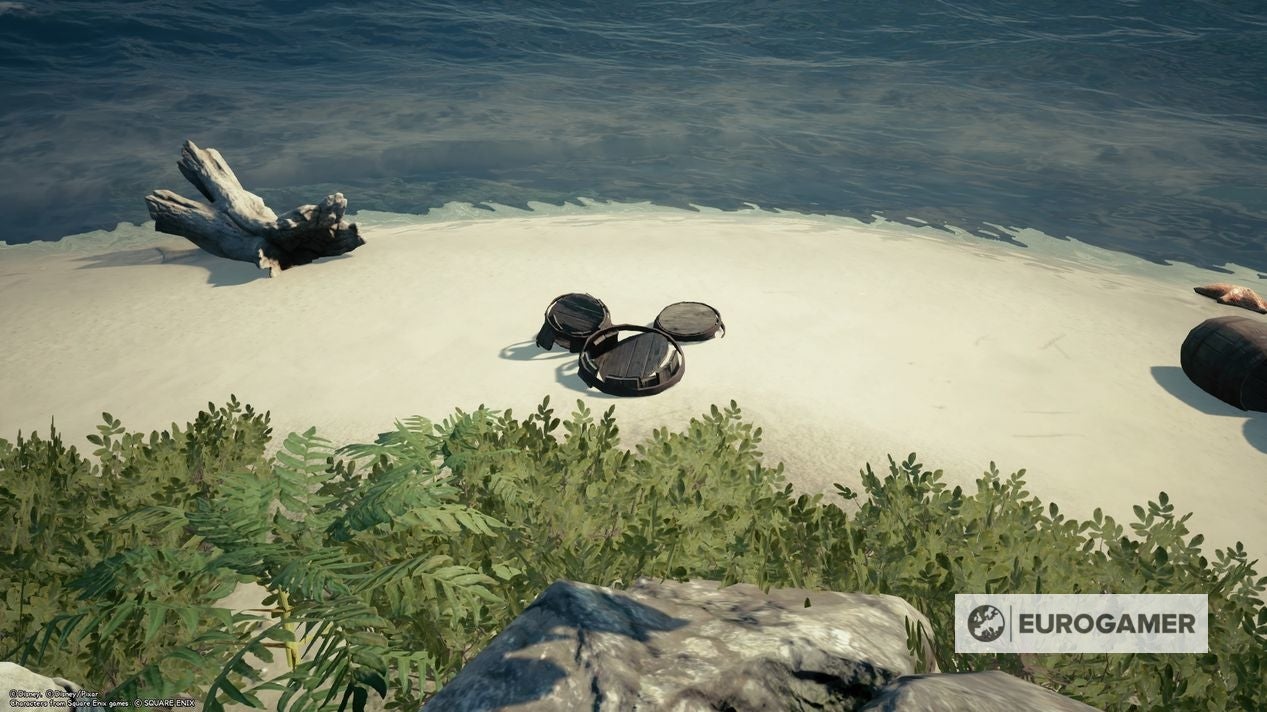
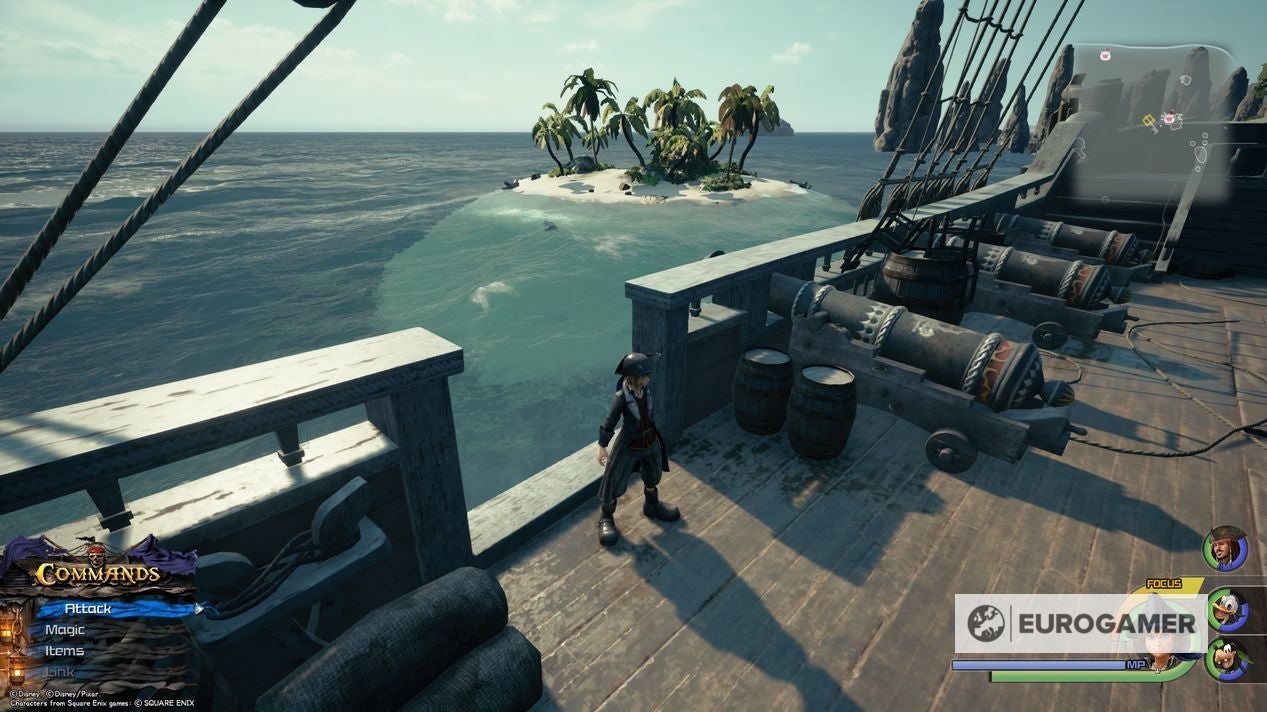
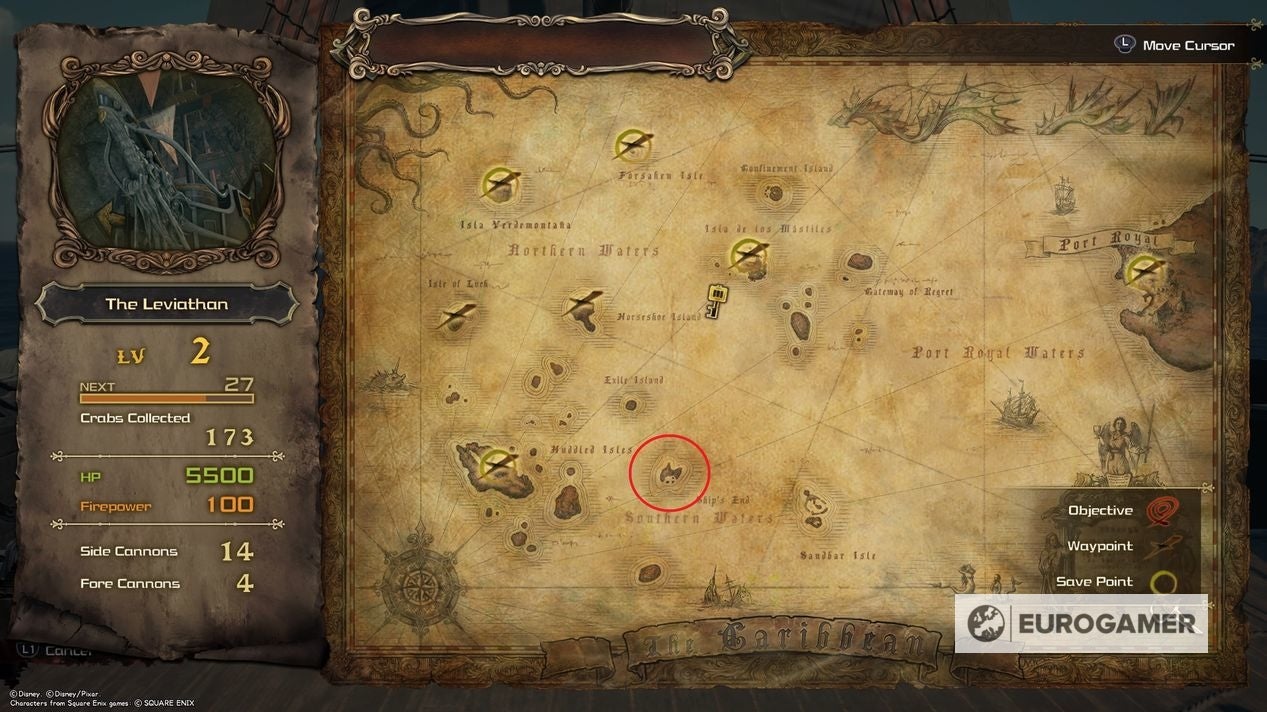
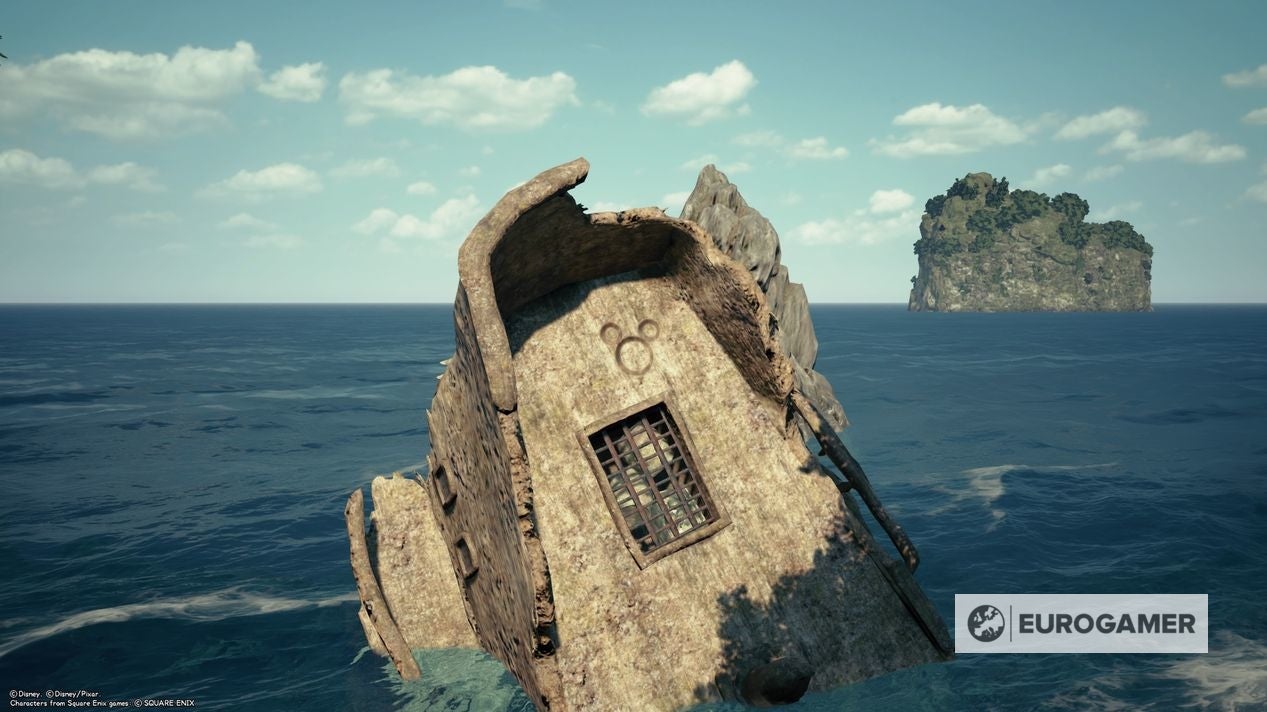
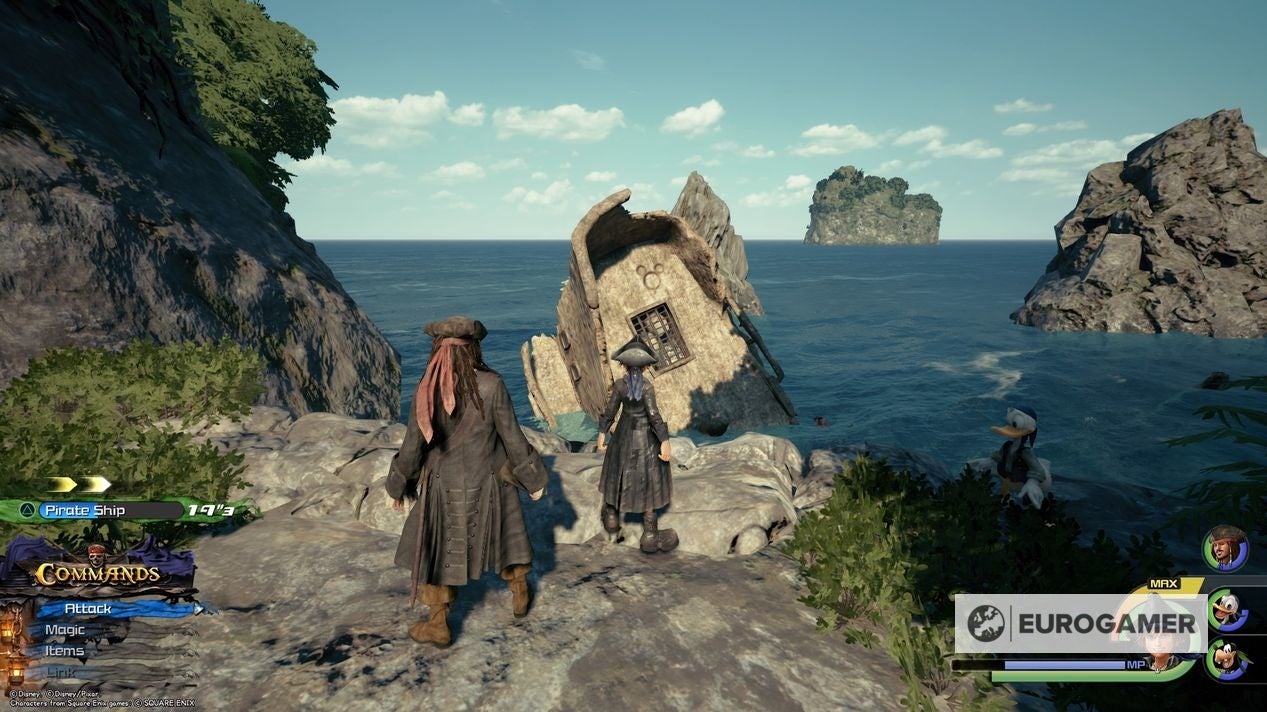
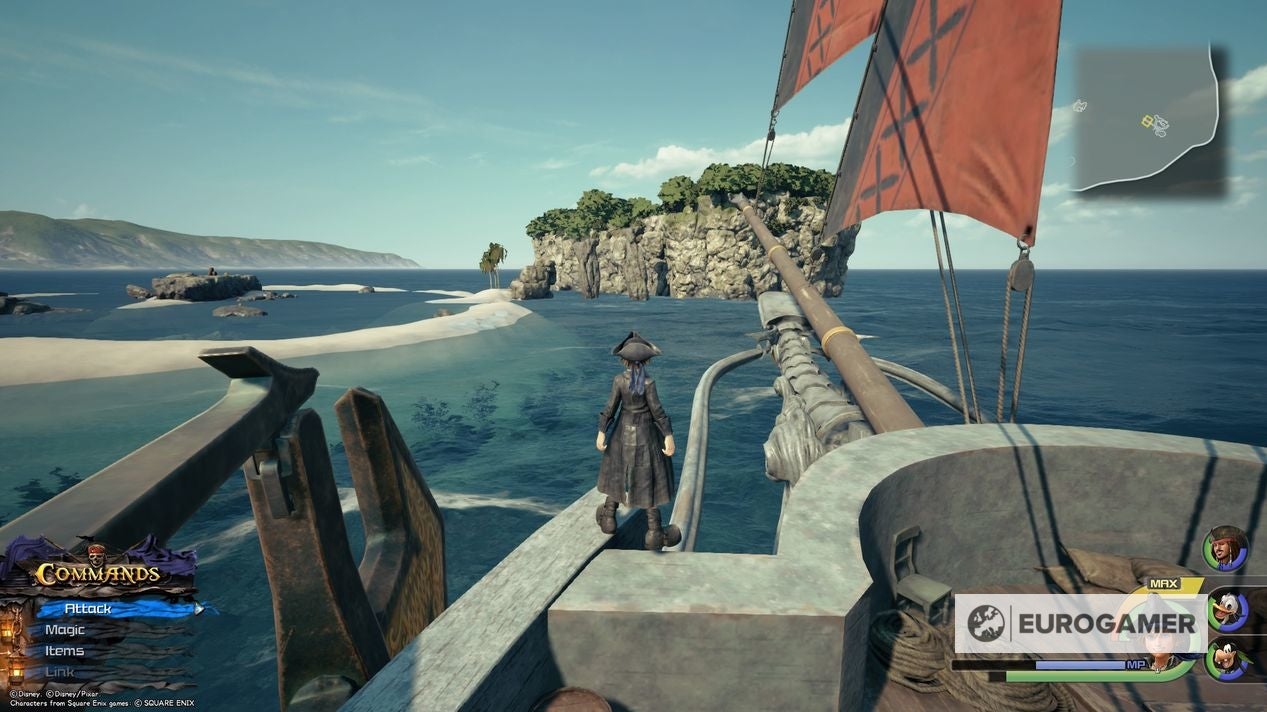
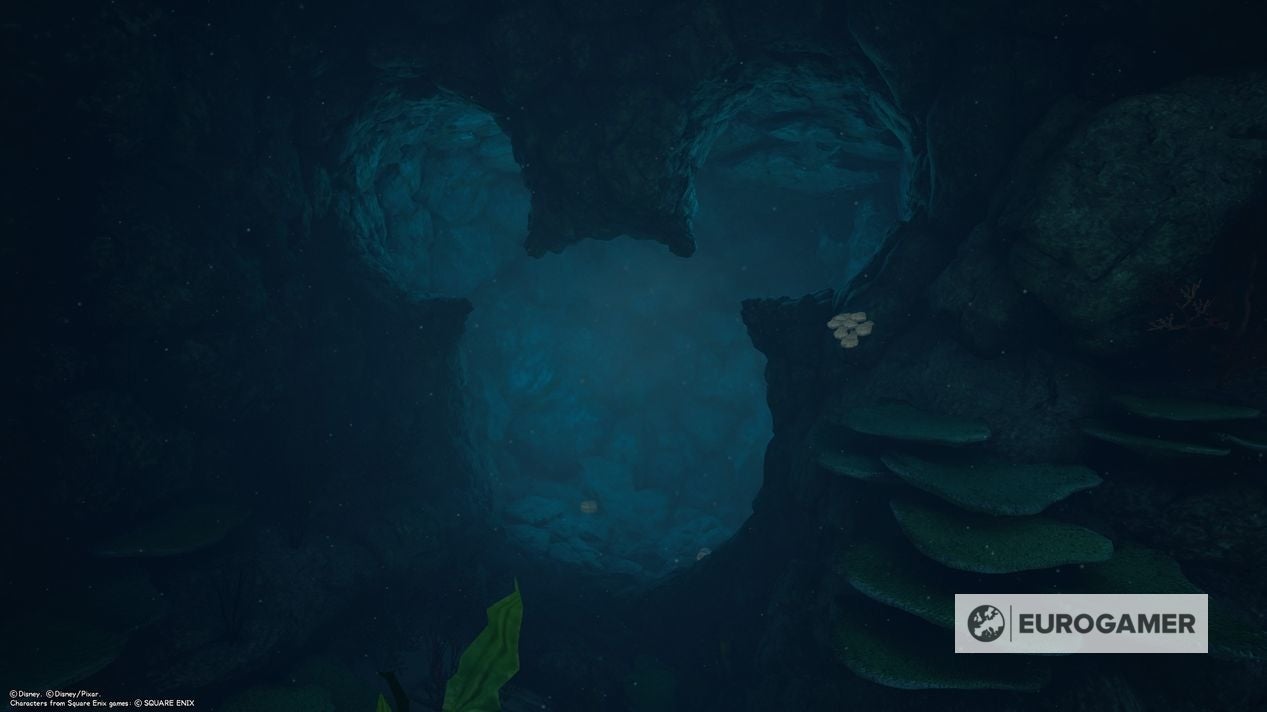
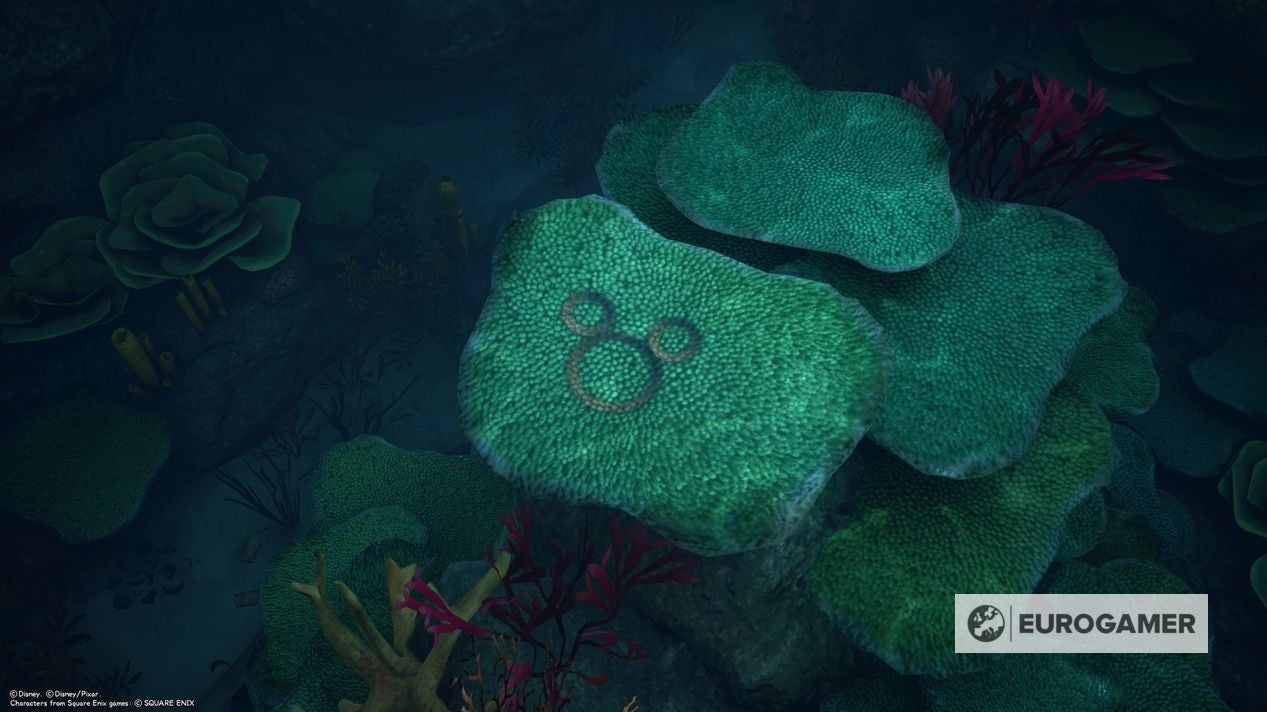
Let’s get started! In Thebes Overlook next to the couple you save who are under attack from the Heartless. If travelling from the save point, head all the way past the rooftops you need to walk across and jump down to the area below with three pillars. It looks like a chunk has been taken out of the wall to make the Emblem shape. Lucky Emblem 2 location From the Thebes Agora save point head left at the statue of Hercules and up the stairs flanked by scaffolding. Take a right up some more stairs once you reach The Big Olive and proceed into the ruins directly ahead that were previously covered in lava. The Lucky Emblem is on some crumbled stone down the middle path. Lucky Emblem 3 location From the same save point as the previous Lucky Emblem, move into the square and look over to the steps on the right-hand side of the Hercules statue. You’ll spot the Emblem over there. Lucky Emblem 4 location Head up the steps from the Thebes Overlook save point and you’ll easily spot the Lucky Emblem on the wall between a few potted plants. Lucky Emblem 5 location If you leave Thebes and take the left route on your way up Mount Olympus towards the ruins you’ll spot this Lucky Emblem on the back of one of the columns. Lucky Emblem 6 location On the climb up Mount Olympus you’ll eventually reach thin waterfall right next to a very large tree and a small pool of water. The Emblem is etched into the rock right behind it. Lucky Emblem 7 location Even further up your climb of Mount Olympus you’ll reach an open area with a mosaic floor and statue of Zeus. Head up a little more and you’ll reach a vast cliff edge. Peek over and you’ll see the Emblem on a plateau below you. Lucky Emblem 8 location In the darker section of the climb up Mount Olympus where you first fought the Titan there will be an open area where a few enemies will spawn. Dispatch them and look towards the tree near the edge. A few vines will form the shape of a Lucky Emblem between the branches. Lucky Emblem 9 location From the Corridors save point in the Realm of the Gods, head up the stairs towards the water streams you can grind along. The Lucky Emblem can be spotted on the side of the next set of stairs up. Lucky Emblem 10 location If you jump on the water stream the goes diagonally upwards next to the previous Lucky Emblem you’ll see this one on a wall in the room ahead. Lucky Emblem 11 location On the other hand, if you jump on the water stream that veers off to the right from the Corridors save point you’ll end up at the Secluded Forge. The Lucky Emblem is easy to spot on the anvil. Lucky Emblem 12 location From the Realm of the Gods - Corridors waypoint, follow the path that curves up to the left and jump on the rail. When you reach the other side, head under the archway and look out towards the clouds in the distance from the slightly raised platform. You’ll see the Lucky Emblem made out of clouds in the far distance. The game essentially gives you this one for free to introduce the concept of finding Lucky Emblems. It’s on the brick wall opposite the Moogle Shop in the Tram Common. Lucky Emblem 2 location Grab a free ride by jumping on or landing on top of the tram that makes its way around the town and you’ll spot the Lucky Emblem on the roof. Lucky Emblem 3 location This one is atop the Moogle Shop on one of the chimneys. It requires a bit of finicky platforming to reach it but you can run up the side of the building to get up there. Lucky Emblem 4 location Head to the movie theatre in the back corner of Tram Common. Bring some popcorn with you as you’ll have to wait for the short film to finish playing and then you’ll be able to photograph the Emblem on the projector screen. Lucky Emblem 5 location Sneakily, this one is made up with dinner plates sitting on a table. If you walk out from the cinema you should jump onto the top of the building directly in front of you and look down from the roof where you’ll see a woman on her own standing next to the table. Lucky Emblem 6 location After you pass through the sewers and exit into the forest immediately turn around and check the open hatch door on the right. It’s rather small, but the Lucky Emblem is on there. Lucky Emblem 7 location Move into the forest a little from the hatch and turn around. Look up at the huge wall in front of you and you’ll spot the Emblem about midway up directly above one of the supporting columns. Run up the column to snap the photo. Lucky Emblem 8 location As you leave the underground pathway to enter the forest, stick to the right side of the area as far as you can go and you’ll spot the Emblem on the side of a mound of dirt. Lucky Emblem 9 location This one’s easy to spot. It’s to the left of the gate between the ivy on the outer surrounding wall of the Old Mansion. In Andy’s Room, jump up onto the shelves to the left of the door with the soldiers and board game on top. The Emblem is on the side of a blue box up there. Lucky Emblem 2 location In the corner on the roof of Andy’s garage. Conveniently, if you jump on the trampoline in front of the garage door it’ll drop you right next to it. Lucky Emblem 3 location Stand on the step at the front door to Andy’s House and look down at the path below. The shape of a Lucky Emblem has been made by some fallen leaves on the ground. What a coincidence! Lucky Emblem 4 location Head across the road from Andy’s House and you’ll spot a green (or silver?) car parked by the curb. The Lucky Emblem is scratched into the back on the car to the right of the number plate. Lucky Emblem 5 location From the entrance to Galaxy Toys move into the main central room and look to the checkout counters on the right. If you jump up onto them and face the wall you’ll see a gift wrapping section where a few rolls of sellotape have been purposefully hung on hooks to make a Lucky Emblem. Lucky Emblem 6 location This Emblem is on the ground floor of Galaxy Toys right at the back of the store and hidden below a display. Climb aboard a Gigas and get smashing the circular stand. Once it topples you’ll find the Lucky Emblem on the base. Lucky Emblem 7 location Go through the Action Figures department on the second floor and into the vent at the back of the room. Very quickly you’ll reach a vertical section that blows you upwards with a gust of wind. Dash out at the first opening and immediately turn around where you’ll spot the Emblem. Lucky Emblem 8 location Look over the railing immediately in front of you as you leave through the window to Babies & Toddlers: Dolls. There’s a red and white UFO directly below. The Lucky Emblem can be found on the entrance hatch. Lucky Emblem 9 location This one can be tricky to spot as you need to get the right angle to see it properly. When you emerge from the vents into Babies & Toddlers: Dolls, you’ll see three glitterballs hanging from the ceiling. If you stand on the display immediately in front of you they’ll line up to look like a Lucky Emblem. Sneaky! Lucky Emblem 10 location From the save point on the third floor of Galaxy Toys, walk away from Play Place and towards the strange robot on a plinth. The Lucky Emblem is etched into the base. Lucky Emblem 11 location They’re starting to get a bit cheeky with these now. This Lucky Emblem is right outside the front of the Galaxy Toys store. Look at the boxes piled up to the left of the entrance and you’ll spot they’ve created an Emblem using a logo and two stickers. Climb to the top of Rapunzel’s Tower and look down towards the pool of water behind it. You’ll see the Lucky Emblem made out of rocks nearby. Have fun trying to balance atop the tower to get the picture, though! Lucky Emblem 2 location This one can be a pain to find. The easiest way to get to it is to take the save point at the Marsh, then move deeper into the Marsh while hugging the right edge. After you fight some bats and the umbrella-wielding Heartless, there’s a small circular area poking out to the right where you’ll find the Lucky Emblem on the rock face. Lucky Emblem 3 location You’ll find this one during the section where you use Rapunzel’s hair to cross a number of large gaps. It’s on a barrel in a small cave during your climb out of the canyon. Lucky Emblem 4 location An easy one to spot. Quite simply to the side of the bridge that leads into the Kingdom. You can start at the Thoroughfare save point and simply walk back out to find it. Lucky Emblem 5 location When you’re in the Kingdom proper, you can snap this Lucky Emblem on the left side of the archway into the main square. Lucky Emblem 6 location To the left of the dancing area during the Festival you can spot a large wooden gate. The Lucky Emblem is carved into the front of that for all to see. Lucky Emblem 7 location From the Kingdom - Thoroughfare save point, head left down the stairs and towards the wharf. Take a short walk over to the guard tower by the water’s edge and you’ll see the Emblem by the door. Lucky Emblem 8 location If you head down those same stairs towards the wharf again but immediately turn around once you reach the bottom you’ll see the Lucky Emblem cleverly created by three barrels next to some boxes. Lucky Emblem 9 location The final one in this world is on the wharf again. You’ll need to climb to the top of the lighthouse in town and the Lucky Emblem can be found in the fire pit. It seems someone on the Laugh Floor likes to doodle as the first Lucky Emblem of this world is found drawn on some paperwork pinned above their desk. Lucky Emblem 2 location At the entrance of the Laugh Floor is a large clown toy. Knock it about a bit with your keyblade and it will reveal a Lucky Emblem on the floor beneath it. Serves it right, to be honest, clowns are scary not funny. Lucky Emblem 3 location From the Door Vault - Upper Level save point, head along the first rail slide until you reach its end. There’s a large brown door on this platform with the Lucky Emblem inscribed on it. Lucky Emblem 4 location There’s a fair chunk of back-tracking to do if you missed this on your first run through Monstropolis. Start at the Factory - Basement save point and head through the small white door propped up against the wall. Proceed through the next area until you’re faced with a wall of many small doors and take the brown one second from the left. From the large platform, head through a small corridor and you’ll see the Lucky Emblem made out of yellow doors in the distance. Lucky Emblem 5 location Head to the Factory - Ground Floor save point. Walk past the elevator and into the room marked C1 where you’ll spot the Lucky Emblem below a window. Lucky Emblem 6 location The next Lucky Emblem is right by the Factory - Ground Floor save point. Check by the containers of paint and you’ll spot splotches of paint on the floor with the pink spillage looking suspiciously like a certain cartoon mouse. Lucky Emblem 7 location Take the elevator up next to the Factory - Ground Floor save point and make your way through the corridor until you reach an orange staircase. Walk straight past that and duck into an opening on your left. The Lucky Emblem will be on the wall immediately above you. Lucky Emblem 8 location Warp in on the Power Plant - Accessway save point. In this room is a desk with a blue hard hat on top of it. You’ll easily spot the Lucky Emblem above it carved into the filing cabinet. Lucky Emblem 9 location This Lucky Emblem involves a bit of a walk to reach. Begin at the Power Plant - Tank Yard save point and use the crane to get yourself back outside. From the platform, look up and use Shotlock to reach the top of the structure. Make your way around to the left and follow the path across the grind rail. Continue following the path and go across the open area full of pipes down another small path. The Lucky Emblem will be above the door at the end of this final path. Lucky Emblem 10 location Start at the Power Plant - Tank Yard save point. You’ll see an CDA agent standing in front of some blue crates which you need to climb and then jump onto the platform to the side. Look up towards the pipes above and you’ll notice they form the shape of a Lucky Emblem. Lucky Emblem 11 location From the Door Vault - Service Area save point, head down the dark tunnel towards the Power Plant. Make your way up the set of stairs to where the CDA agent is standing. Look over the railing and you’ll see the Lucky Emblem in a puddle of oil on the ground. Travel to the North Mountain - Gorge save point. From there, head back down down the mountain and very quickly you’ll come to a point where you can drop off to the left. Land on the plateau below (where you’ll see a boulder you can smash or an already opened chest). The Lucky Emblem is on a tree off to the side. Lucky Emblem 2 location Begin at the North Mountain - Gorge save point again. This time, jump into the nearby portal that takes you back into the Labyrinth of Ice and then use your Shotlock to spin down the elevator directly behind you. Proceed through this area until you can take a left into a small room with some enemies and a bridge. You’ll find the Lucky Emblem on the wall at the end of the bridge. Lucky Emblem 3 location Right by the Labyrinth of Ice - Lower Tier save point is a ramp that leads to a small dead end corridor. The Lucky Emblem is right at the end. Lucky Emblem 4 location From the Labyrinth of Ice - Lower Tier save point again, head through the large opening and climb up to the Middle Tier using your Shotlock. When crossing the bridge directly if front of you, look to the left and you’ll see the Lucky Emblem on the wall. Lucky Emblem 5 location On the Upper Tier of the Labyrinth of Ice, hop on the grind rail to a small room in the shape of a heptagon that’s full of pillars. Jump up onto the centre platform and you’ll see the Lucky Emblem on the ground. Lucky Emblem 6 location Travel to the Mountain Ridge save point immediately in front of the Ice Palace. From there, drop down the mountainside a few steps but stop before the huge fall off the cliff edge. Turn around and you’ll see the Emblem on the rocks. If you do drop too far, never fear, you can just run up the cliffside and the Emblem will be right in front of you! Lucky Emblem 7 location Start back at the ice palace again but instead go through the small crack in the rocks to the Frozen Wall area. Proceed all the way along the path until you reach a more open area with a scalable wall. Stick to the right side of the wall and you’ll spot a small slope going down off to the side a short way up. Jump down there and the Lucky Emblem can be seen on the wall. Lucky Emblem 8 location Chances are you spotted this one (or Donald shouted about it to you) on the way to the previous Lucky Emblem. Either way, head through the crack in the rocks to the Frozen Wall from the ice palace and proceed down the path. The Emblem is drawn in the snow at the point where the path turns sharply. Lucky Emblem 9 location Start at the North Mountain - Snowfield and follow the path all the way until you reach an area with a scalable wall on the right. Climb this and immediately turn around. You’ll spot the Lucky Emblem in a small patch of snow on top of a spiked rock. Lucky Emblem 10 location From the North Mountain - Foothills head up the path to a large open area. Continue straight forward and you’ll spot a pile of logs that make the shape of a Lucky Emblem hidden behind a rock. Lucky Emblem 11 location This is in the area where you had to use cover to hide from the snowstorm. Start at the Foothills save point again and transition into the next area. The Lucky Emblem can be seen on the other side of the fourth rock you pass. Stand on the bridge facing away from Rabbit’s Howse and you’ll see in a bush in the far distance that makes the shape of a Lucky Emblem. Lucky Emblem 2 location This Lucky Emblem is hidden around the back of the giant pumpkin next to the scarecrow. Lucky Emblem 3 location There’s a bucket on the ground next to the washing line by Rabbit’s Howse. Look down and you’ll see them emblem at the bottom. In Hiro’s Garage there’s a Lucky Emblem made out of coils of wire on the wall. Why does everyone is this game love hanging stuff this way? Lucky Emblem 2 location Travel to the South District and climb atop the giant sushi chef statue near the save point. Look down towards the grass below and you’ll spot a Lucky Emblem made out of red bushes. Lucky Emblem 3 location You’ll need to be in night time to see this one so start at the South District - Night save point. Climb on top the the building immediately in front of the save point and look towards the skyscraper with a giant ‘M’ on the top. The Lucky Emblem is being projected onto a Tsukiji Delicatessen sign below it. Lucky Emblem 4 location Climb the skyscraper with the giant ‘M’ on it that you were looking at for the previous Emblem. If you look towards the edge of the map you’ll see three statues holding fans and the Lucky Emblem is scratched into one of those fans. Lucky Emblem 5 location Head into the Central District and look for the building with a metal dome on the roof next to the freeway. The Lucky Emblem is on the side of the dome. Lucky Emblem 6 location There’s a very tall building in the Central District surrounded by a number of large suspended fans. Climb to the top of it and the Lucky Emblem can be found on the roof. Lucky Emblem 7 location From the rooftop where you found Lucky Emblem number six you’ll be surrounded by a number of fans suspended in the air. Jump or Shotlock your way to a patterned one towards the water and you’ll find the Emblem etched into the top of it. Lucky Emblem 8 location From the North District save point head through the car park and the park full of pink and green trees. There are some steps to the side of the road where you’ll find the Lucky Emblem on the ground. Lucky Emblem 9 location Directly above the North District save point are the monorail tracks. Jump up onto them and head towards the tunnel near to where Lucky Emblem eight can be found. Position yourself correctly at the back of the tunnel and you’ll see the next Lucky Emblem on the wall. Lucky Emblem 10 location Hop down from the monorail tracks where you found the previous Lucky Emblem and into the alleyways below. There’s a yellow car with the next Lucky Emblem scratched into the side of the door. Lucky Emblem 11 location For the last Lucky Emblem you’ll want to climb to the top of the tallest building in San Fransokyo. It’s the one with a pointed spire. To make things easier, it’s the same building that the monorail tunnel passes through. Use Shotlock to reach the top and snap the Emblem. Right by your ship in the Port Royal docks is a small green rowboat. The Lucky Emblem can be found on the front of the boat. Lucky Emblem 2 location Turn left when walking off the pier in Port Royal and jog all the way down to the building at the end of the docks. Smash the yellow crate underneath it and you’ll spot the Lucky Emblem on the wall. Lucky Emblem 3 location From the Port Royal - Settlement save point follow the steps down towards the beach. There’s a small incomplete hut there with the Lucky Emblem inside. Lucky Emblem 4 location This Lucky Emblem is on the back of a hanging sign above the pier and directly next to the hut where you found the previous one. Lucky Emblem 5 location Head outside from the Port Royal - Fort save point and jump up onto the battlements where the British flag is planted. Look down to the side and you’ll see the Lucky Emblem made out of coils of rope. Lucky Emblem 6 location Go down into the jail in the Fort and you’ll find this Lucky Emblem in one of the open cells scratched into a ball and chain. Lucky Emblem 7 location Prepare to set sail to find the next lot of Lucky Emblems. For the first one you’ll want to set a course for Isla Verdemontaña in the top-left of the map. Once you’ve docked, make your way through the jungle to the top of the island. You’ll reach a cliff edge where you can look out to sea and if you look down the Lucky Emblem can be seen below the water’s surface. Lucky Emblem 8 location Next, you’ll want to make your way to the Isle of Luck at the far west of the map. There’s a small patch of land and a few rocks which form the shape of a Lucky Emblem. Lucky Emblem 9 location Just to the east of the Isle of Luck is Horseshoe Island. Sail towards it and drop anchor in the archway where you can find the Lucky Emblem made up of rocks in the cliffside. Lucky Emblem 10 location Set a course for the Isla de los Mastilles for the next Lucky Emblem. Instead of docking on the island, though, jump off at the tiny circular spot of land to the west of it. A trio of barrels in the sand are what you’re looking for as they make up this Lucky Emblem. Lucky Emblem 11 location You’ll want to go to Ship’s End next at the south of the map. Head onto the island and through the small alcove where you’ll spot a shipwreck sticking out of the water. The Lucky Emblem can be found on it. Lucky Emblem 12 location Your final destination is Sandbar Isle at the south of the map. Jump up towards the main bulk of the island and you’ll find a spot where you can drop into a lagoon. The first of the final two Lucky Emblems is the large the cave entrance inside. Lucky Emblem 13 location The final Lucky Emblem is in exactly the same area as the previous one and you probably spotted it when jumping in to the lagoon too. It’s on top of the pile of rocks surrounded by coral in the center of the lagoon. Congrats! The hunt is over! All done? It’s time to get everything else you need for Ultima Weapon. And if you’re done that, then it’s time to check out some Battlegate locations if you haven’t already.